https://youtu.be/PsU5Gow-9r4?si=UzROHfssN3Lf6d31
Fault Phenomenon:
Abnormal movement or noise occurs during Y-axis operation, and an error indicating Y-axis homing failure is reported.
Error codes: 0xFD010D0002, 0xFD010D0004
Cause Analysis:
- Insufficient space in front of or behind the printer causes the standard flatbed to collide with walls or objects during homing, resulting in failure.
-
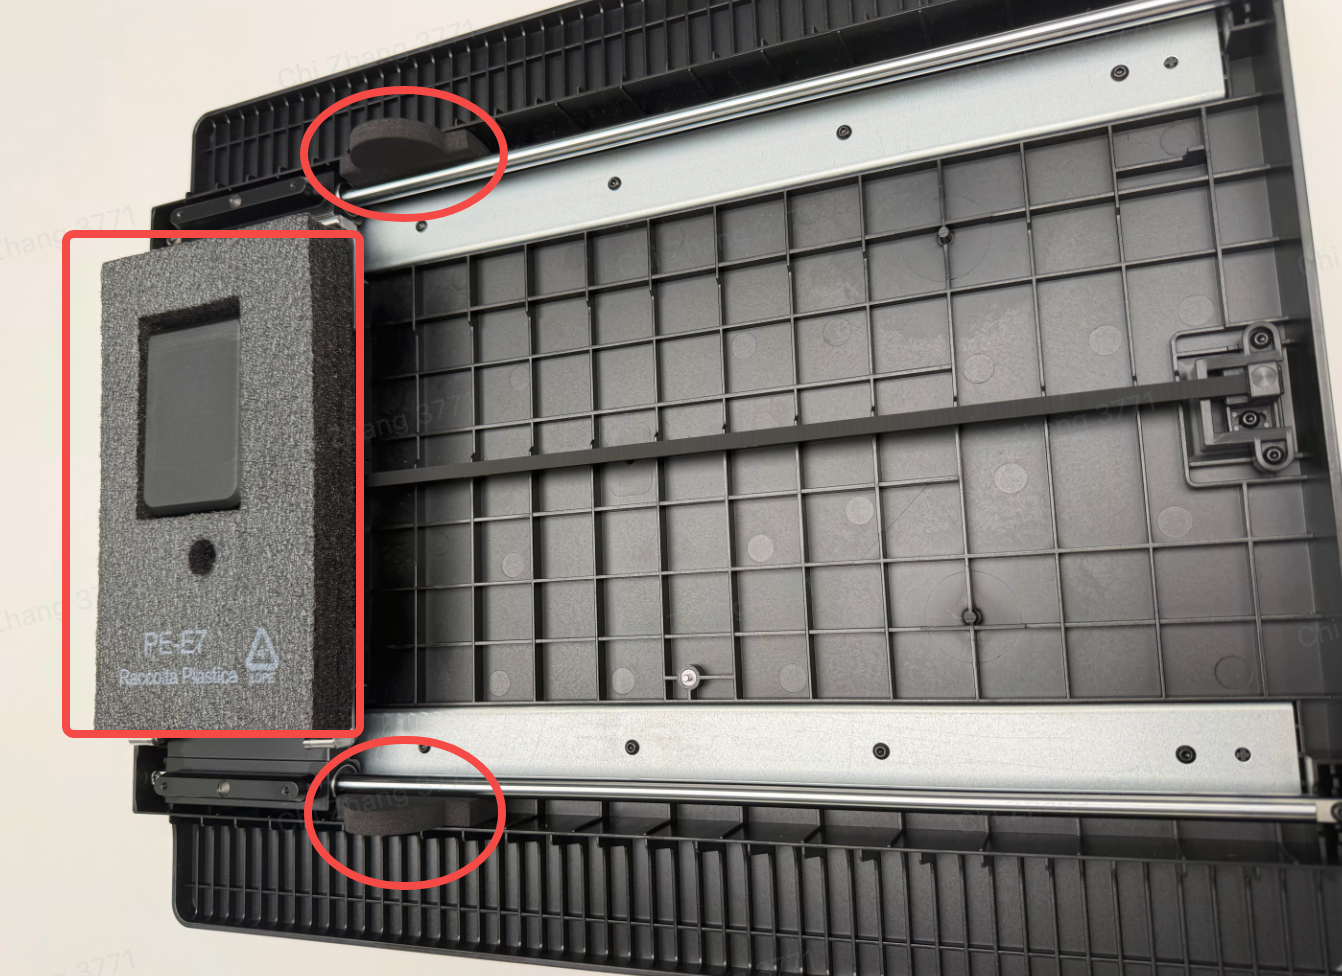
The foam on the back of the standard flatbed has not been fully removed, causing unstable or restricted Y-axis movement.
-
Foreign objects are obstructing the bottom of the standard flatbed.
-
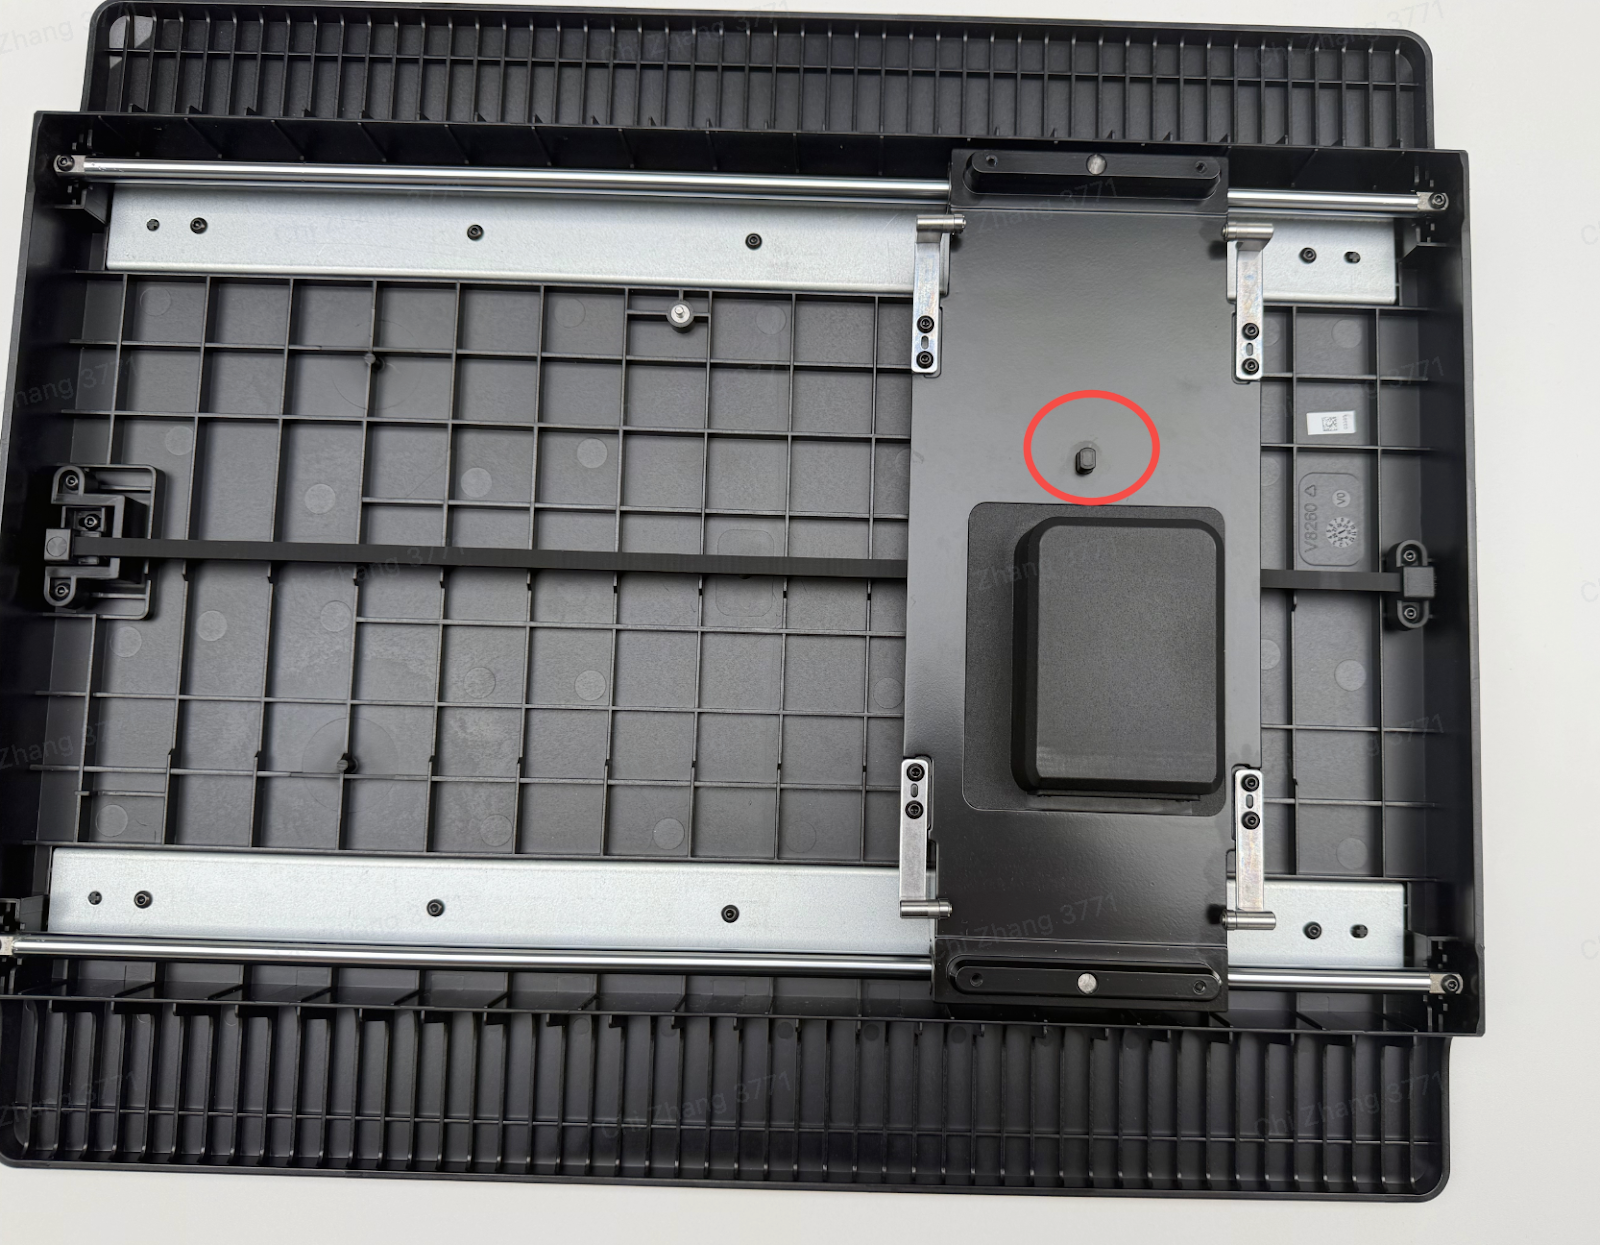
Damage to the limit trigger tab on the standard flatbed prevents proper limit detection.
-
Foreign objects are obstructing the Y-axis movement module, or internal cables are not securely connected.
Troubleshooting Steps:
Check whether there is sufficient space in front of and behind the printer:
- UV Printer E1 Placement Requirements
-
Check whether the foam on the back of the standard flatbed has been completely removed.
3. Remove the standard flatbed. Hold down the sliding button (as shown in Figure 1), then slide the bottom movement module left and right to check whether it moves smoothly.
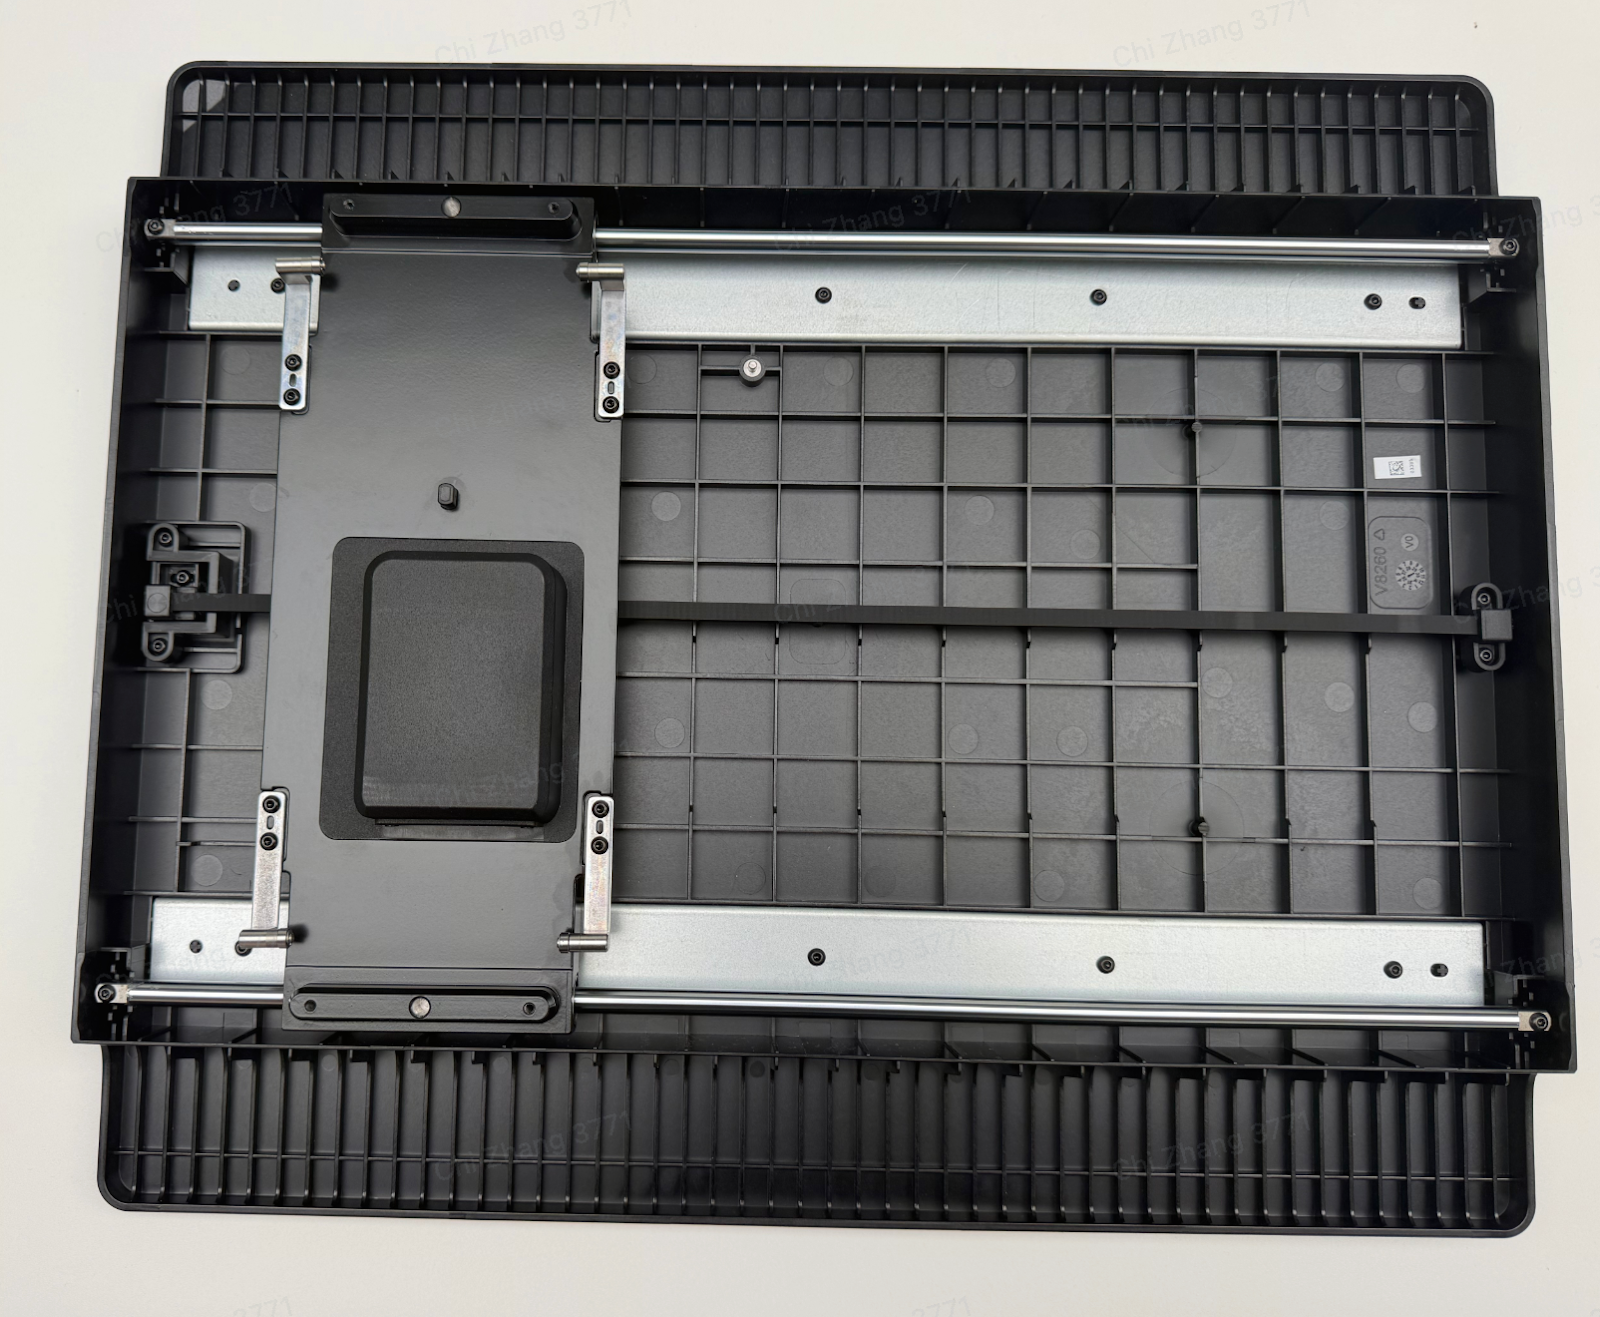
Check for any foreign objects at the bottom of the standard flatbed.
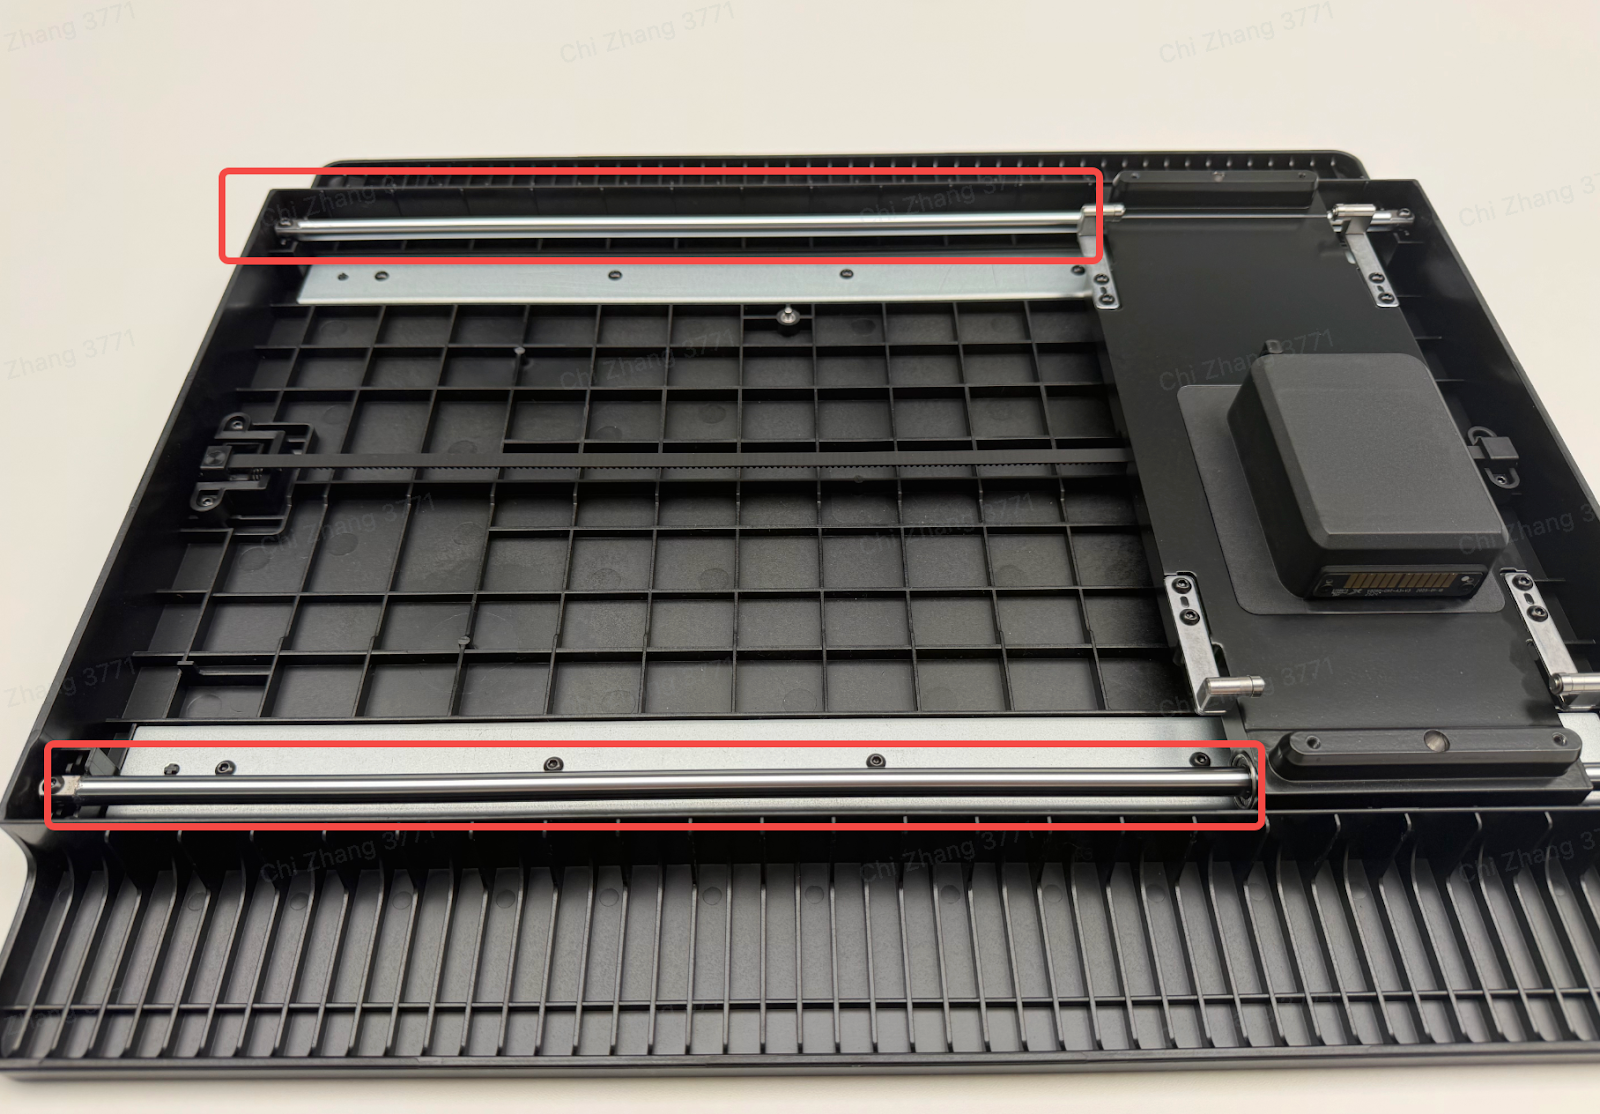
Also check whether the optical rods on both sides are heavily dusted.
If dust accumulation is present, refer to the maintenance guide:
4. Deep Manually Cleaning for UV Printer E1
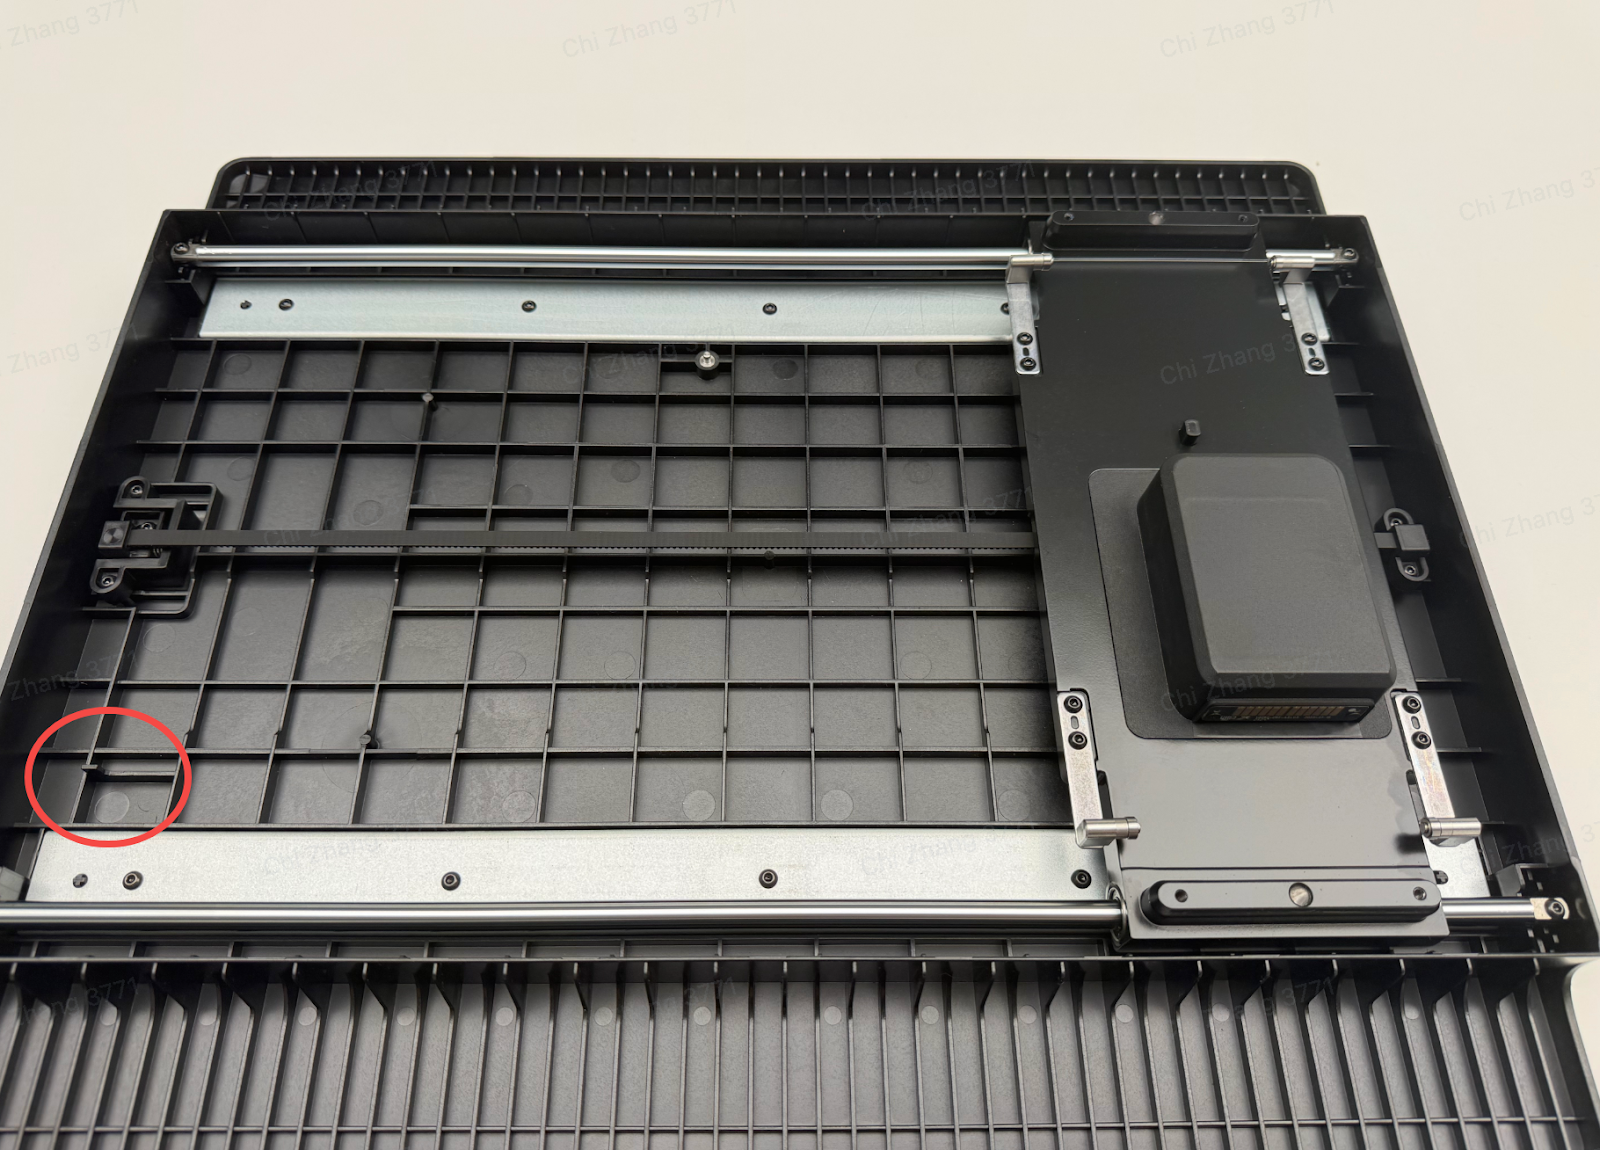
5. Check whether the limit trigger tab on the standard flatbed is damaged.
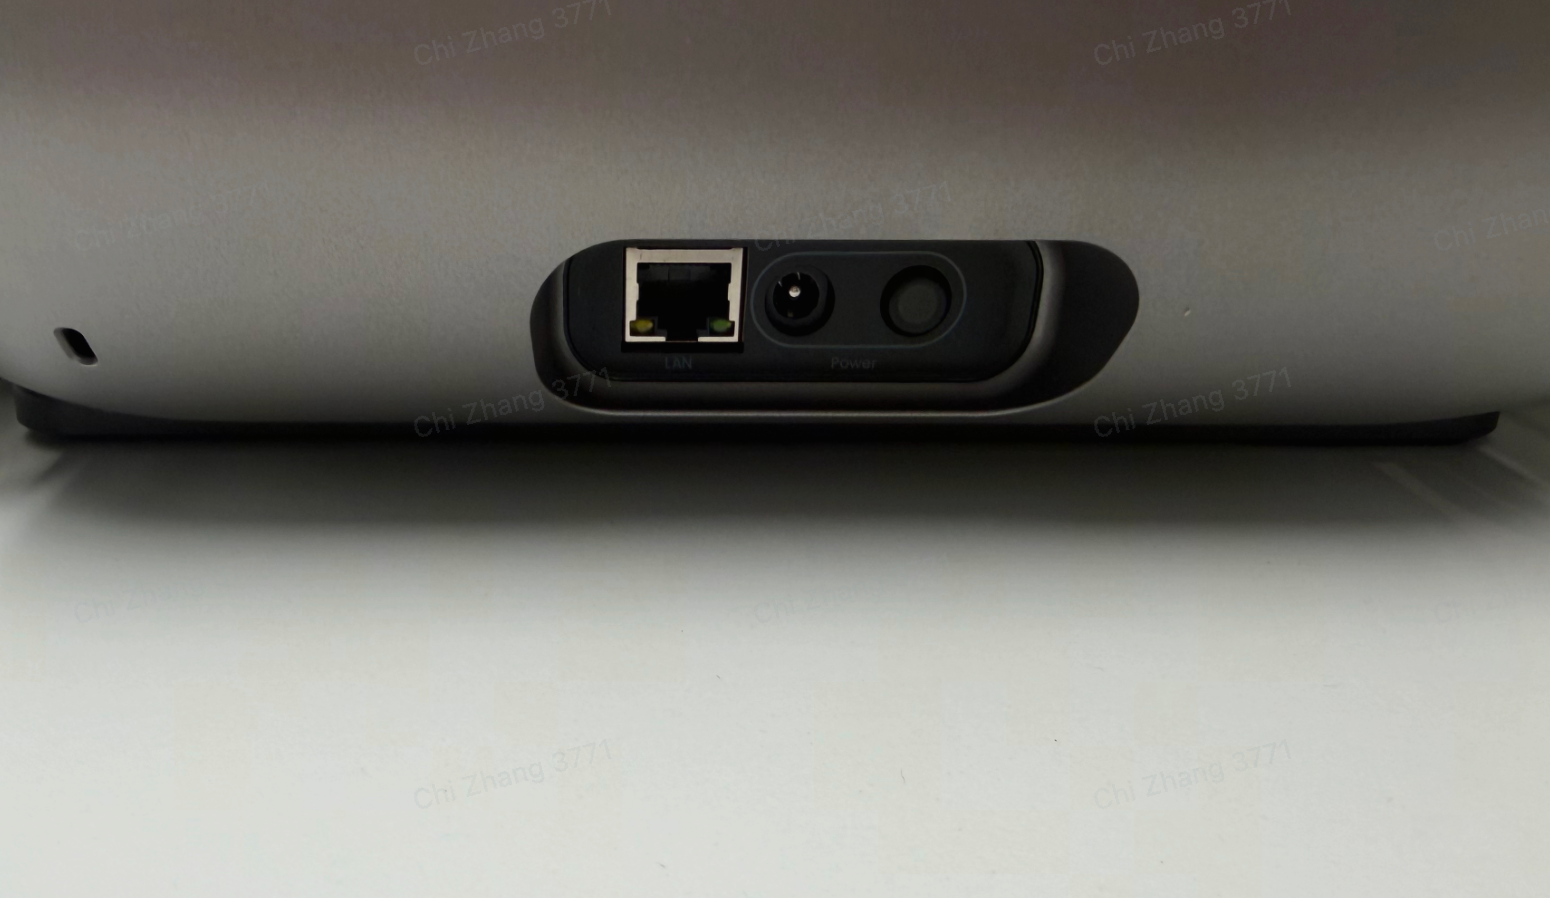
6. Unplug the printer's Power cable.
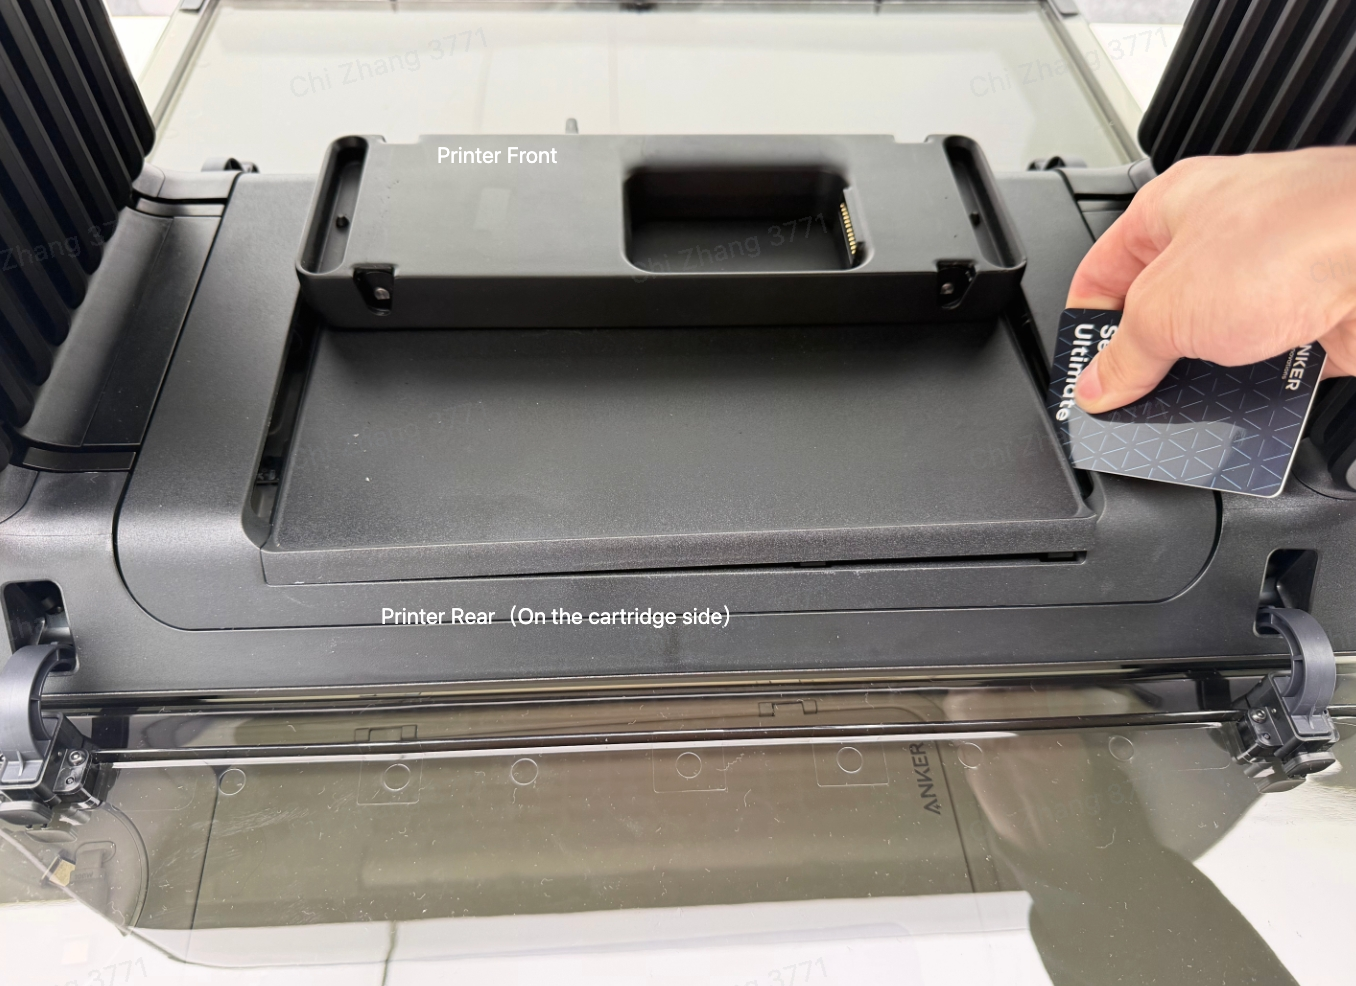
7. Manually push the Y-axis movement module to the front of the printer.
Use a disassembly tool, pry tool, or hard card to remove the upper cover of the Y-axis module from the position shown in the image.
Move the Y-axis module forward and backward manually.
Check for foreign objects underneath and clean if necessary.
8. Observe whether the movement is smooth and free from jamming or obstruction.
Note: Some resistance is normal when moving the module by hand, but there should be no significant jamming.
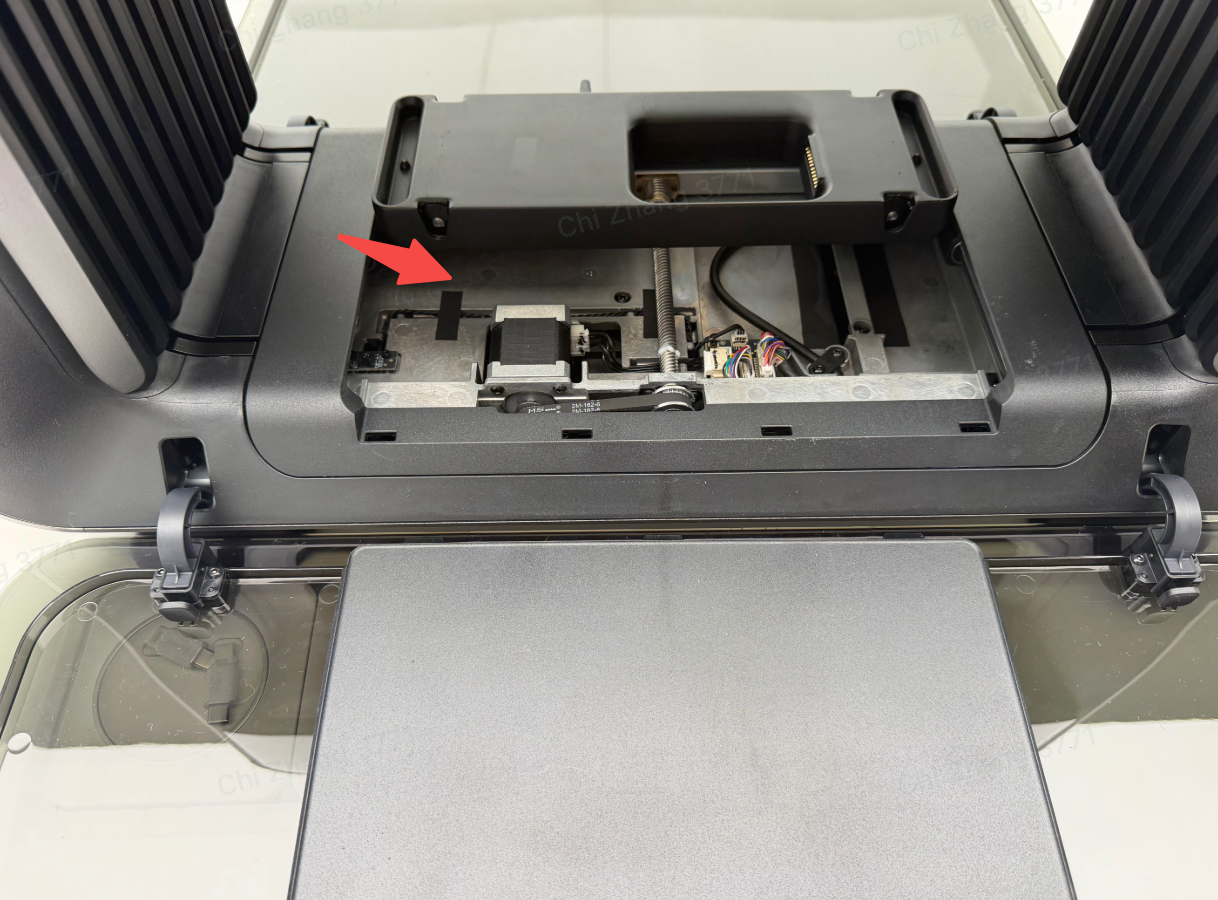
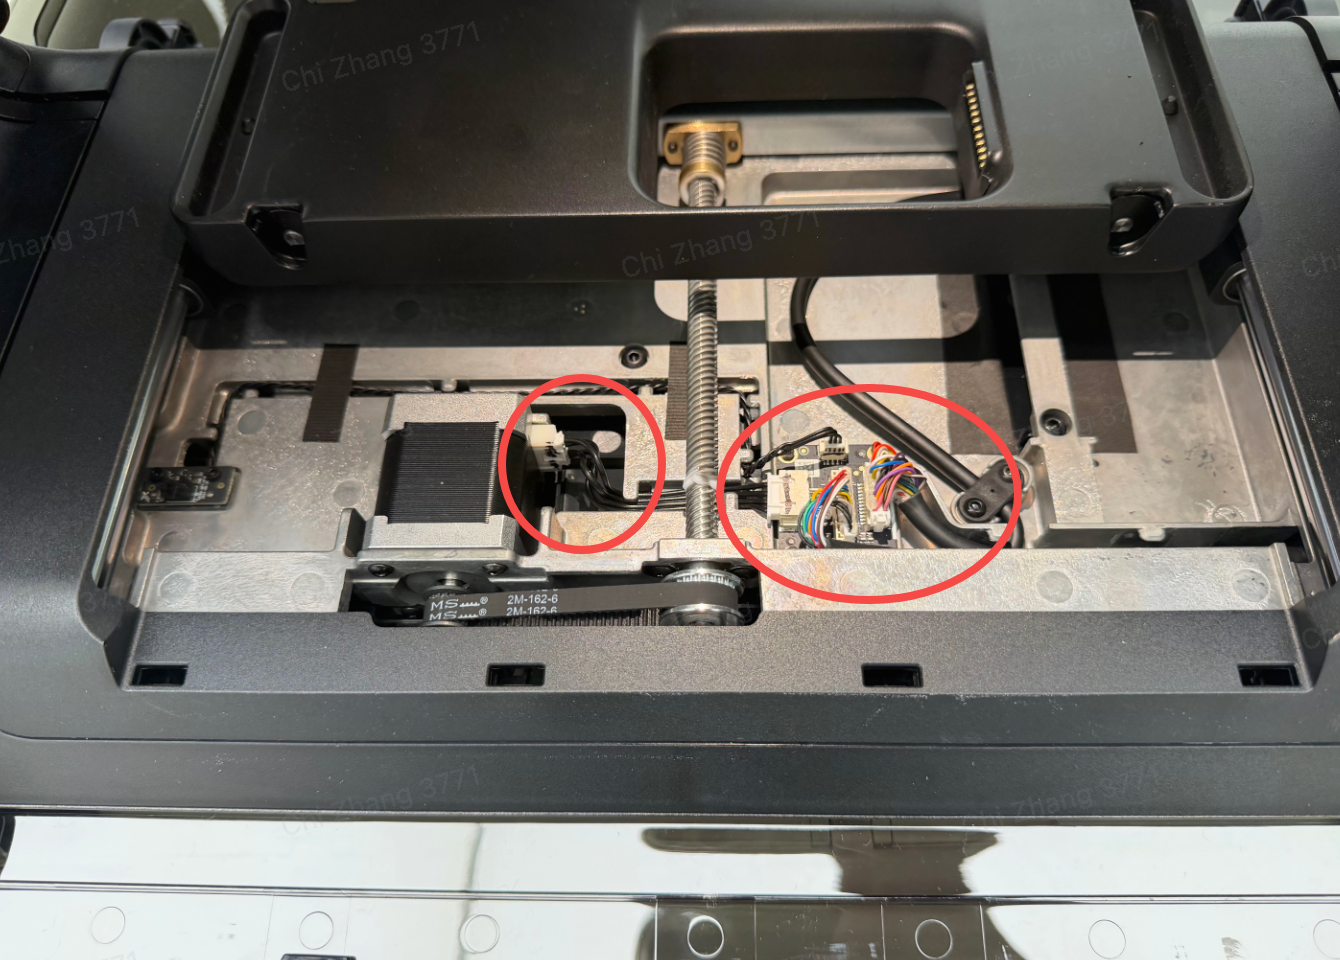
9. Check the wiring at the bottom of the Y-axis module for any loose connections.
If any issues are found, reconnect the cables securely.
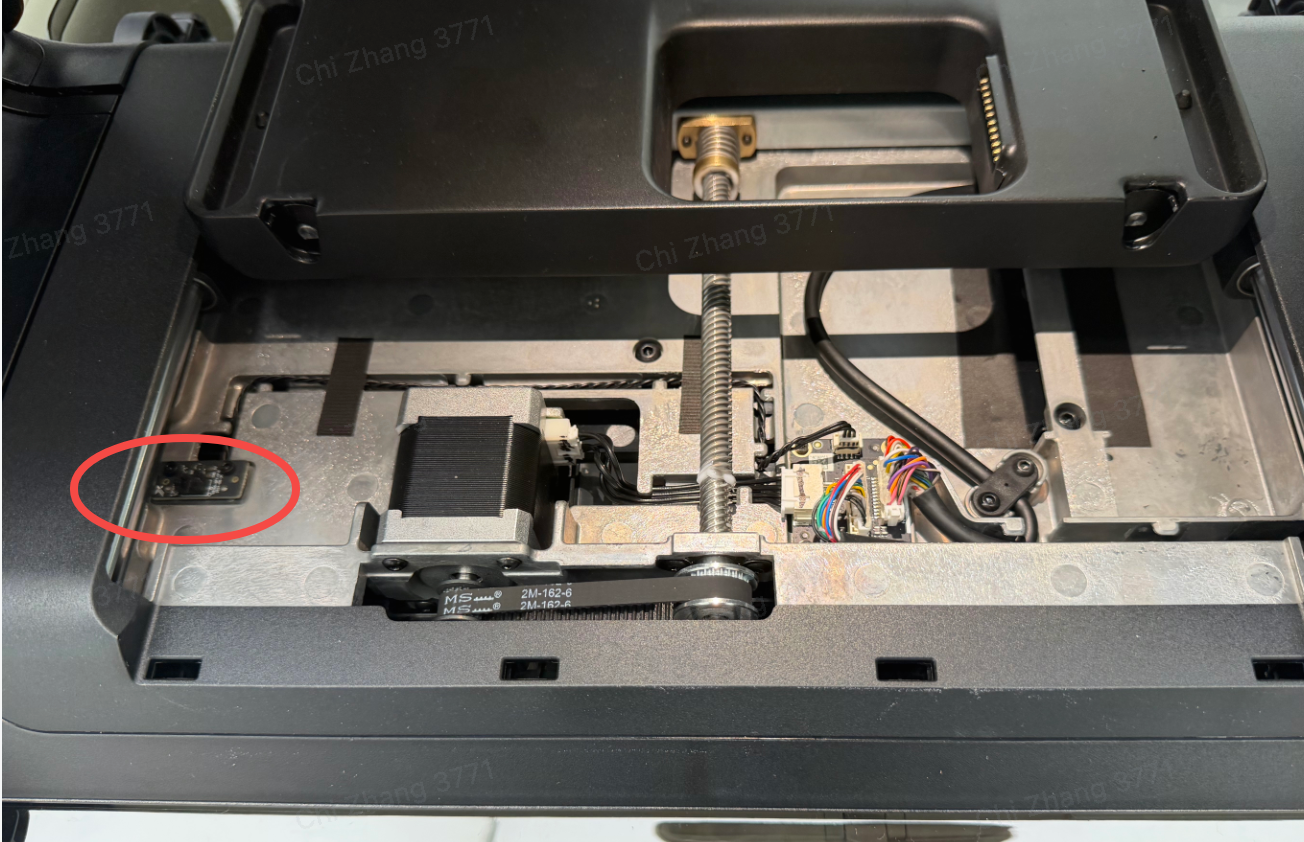
10. Check whether the Y-axis photoelectric switch is properly positioned.
Gently press it by hand to confirm it is not loose.
Support Contact
If the issue persists after completing the above steps, please contact eufyMake Customer Support at support@eufymake.com with the following information:
-
Your Order Information
-
Printer SN. Please refer to: How to Check the Device Serial Number (SN)
-
Printer and App Logs. Please refer to Log / Feedback Upload Process (App & PC) – Overview
-
Relevant photos and videos.