Deep Cleaning (Once every 3 months)
UV printers can accumulate ink and dust during use, so regular maintenance is essential to ensure stable performance and print quality.
Maintenance is divided into two manual cycles:
1. Routine Cleaning (Once a month)
2. Deep Manually Cleaning (Once every 3 months)
⚠️ Safety Precautions: Always wear protective gloves and goggles throughout all cleaning operations to prevent UV ink from contacting your skin or eyes. And avoid letting the cleaning solution drip onto the machine’s exterior, as it can be corrosive.
Deep Cleaning (Once every 3 months)
Every three months, thorough maintenance of both internal and external components is required. Wear gloves at all times and work carefully.
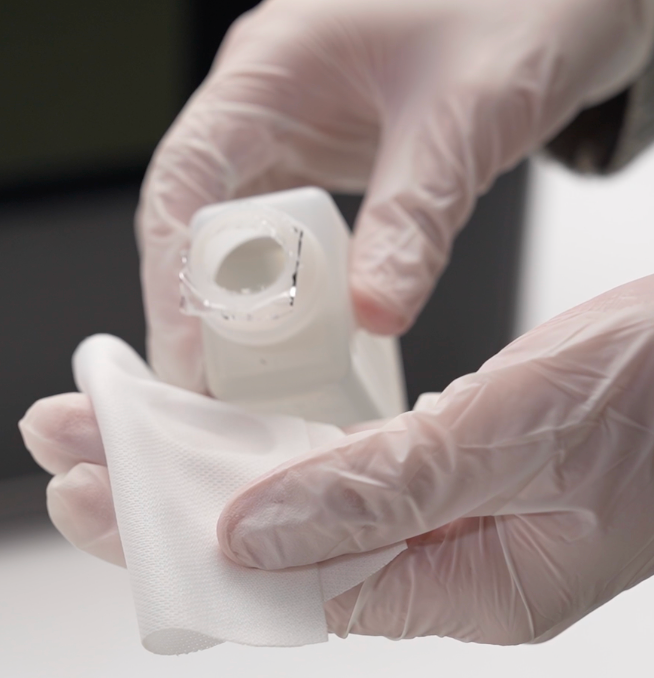
Materials Needed:
-
Lint-free cloths
-
Lint-free cotton swabs
-
Ink cleaning solution
-
Disposable nitrile gloves
-
Silicone ink scrape
-
Anti-rust lubricating oil
Procedure:
General Precaution
Since UV ink and cleaning solution are mildly corrosive, always wear gloves when cleaning and proceed carefully to avoid splashes.
-
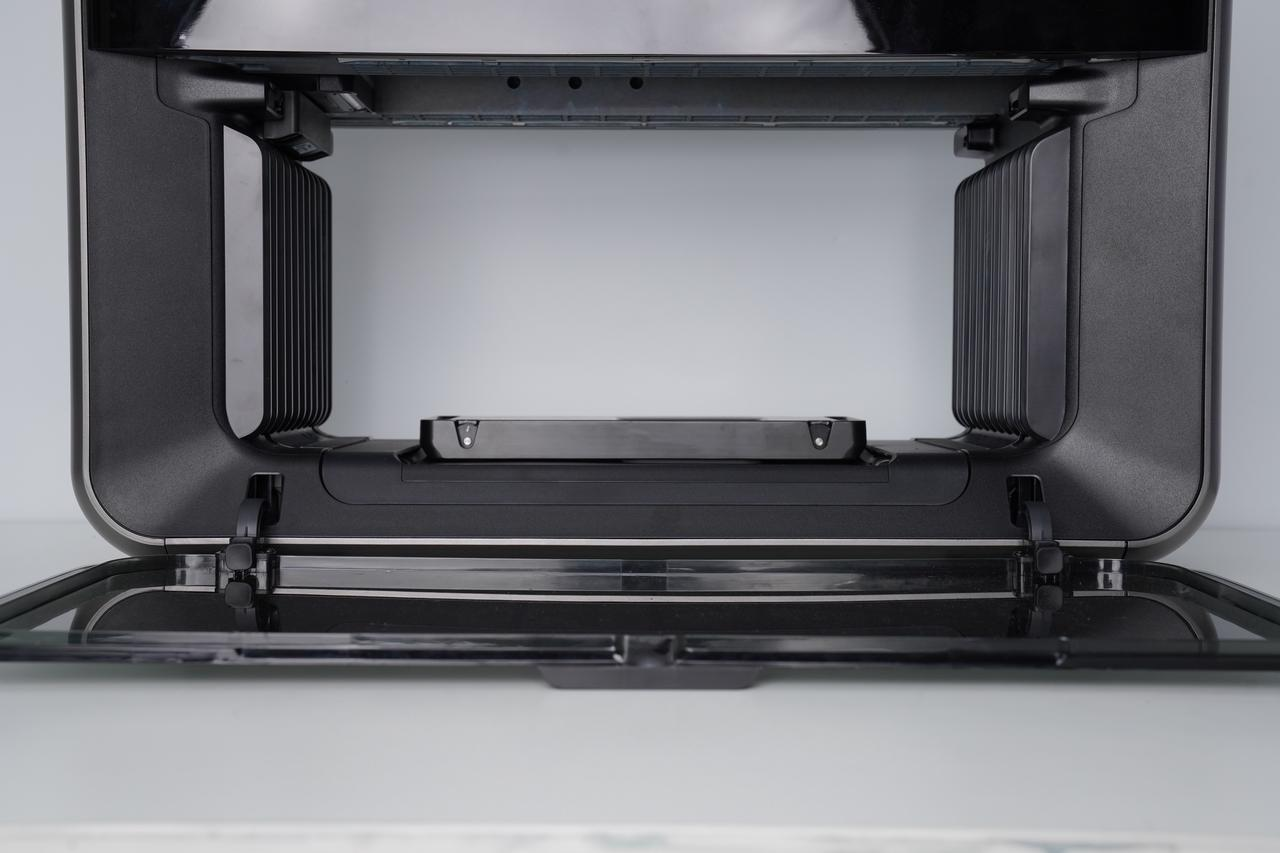
Pre-cleaning operations
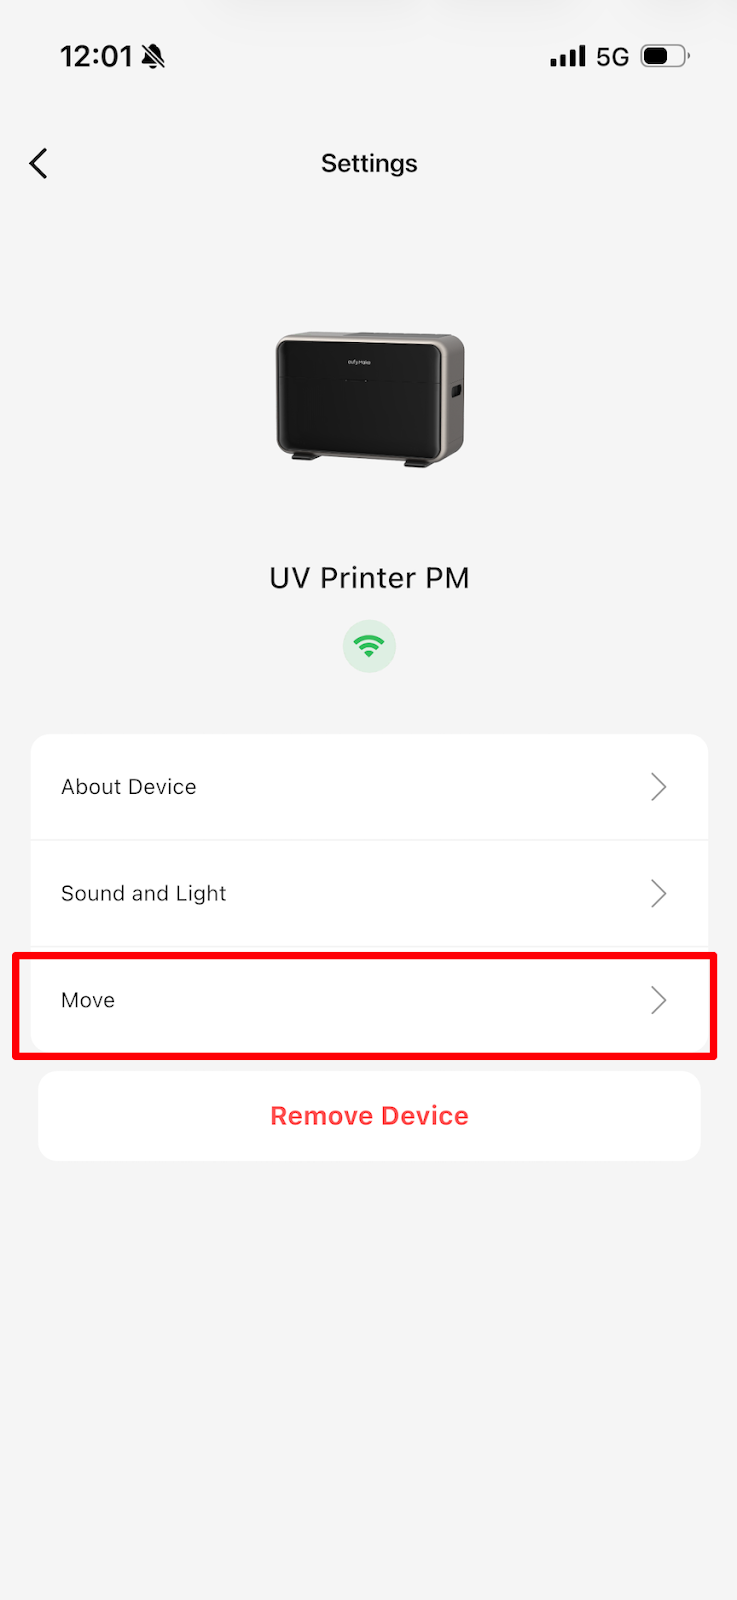
⚠️Warning: Make sure the device is idle
Move the nozzle outward along the X-axis to near the Camera through APP operation, and move the Y-axis base forward through the software until it cannot move forward, leaving enough space for subsequent operations.

-
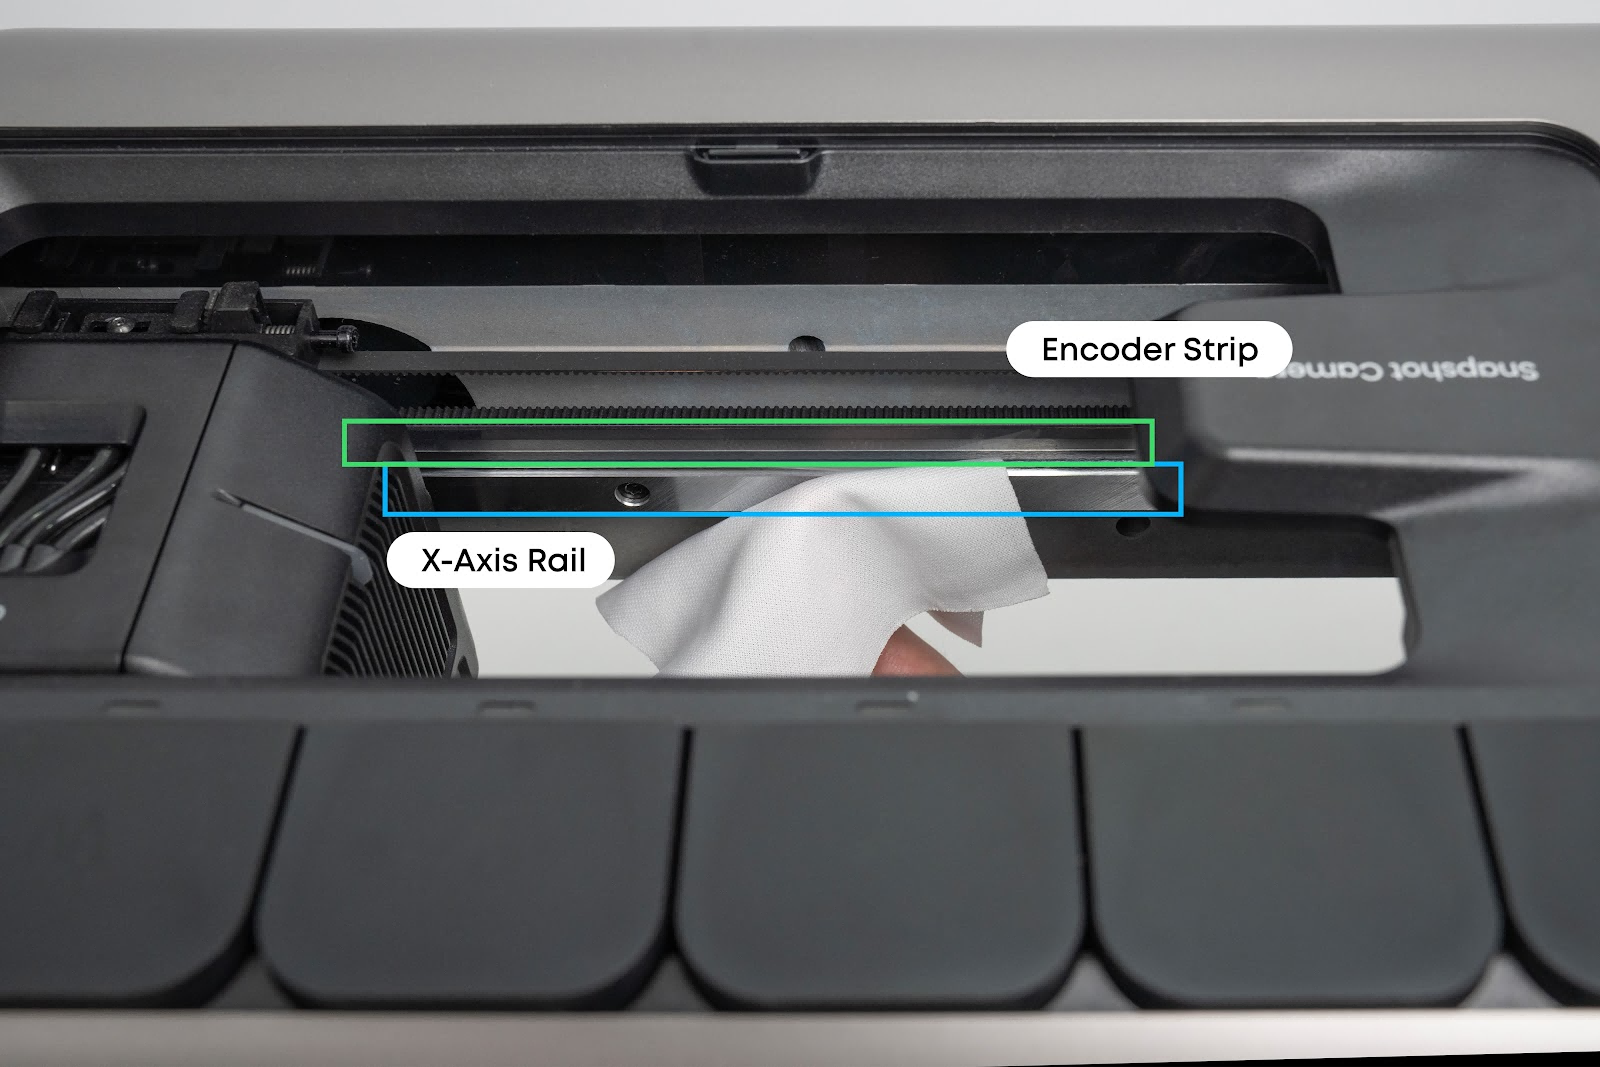
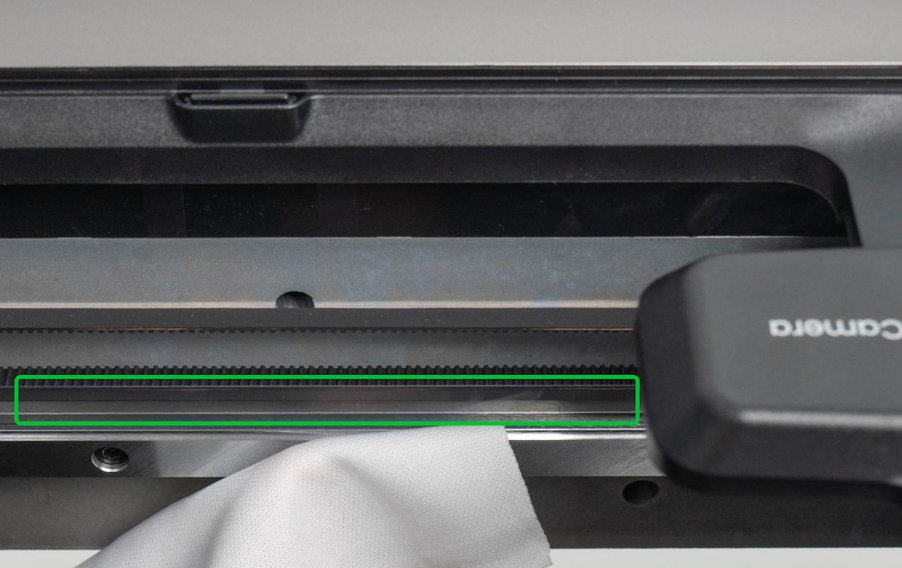
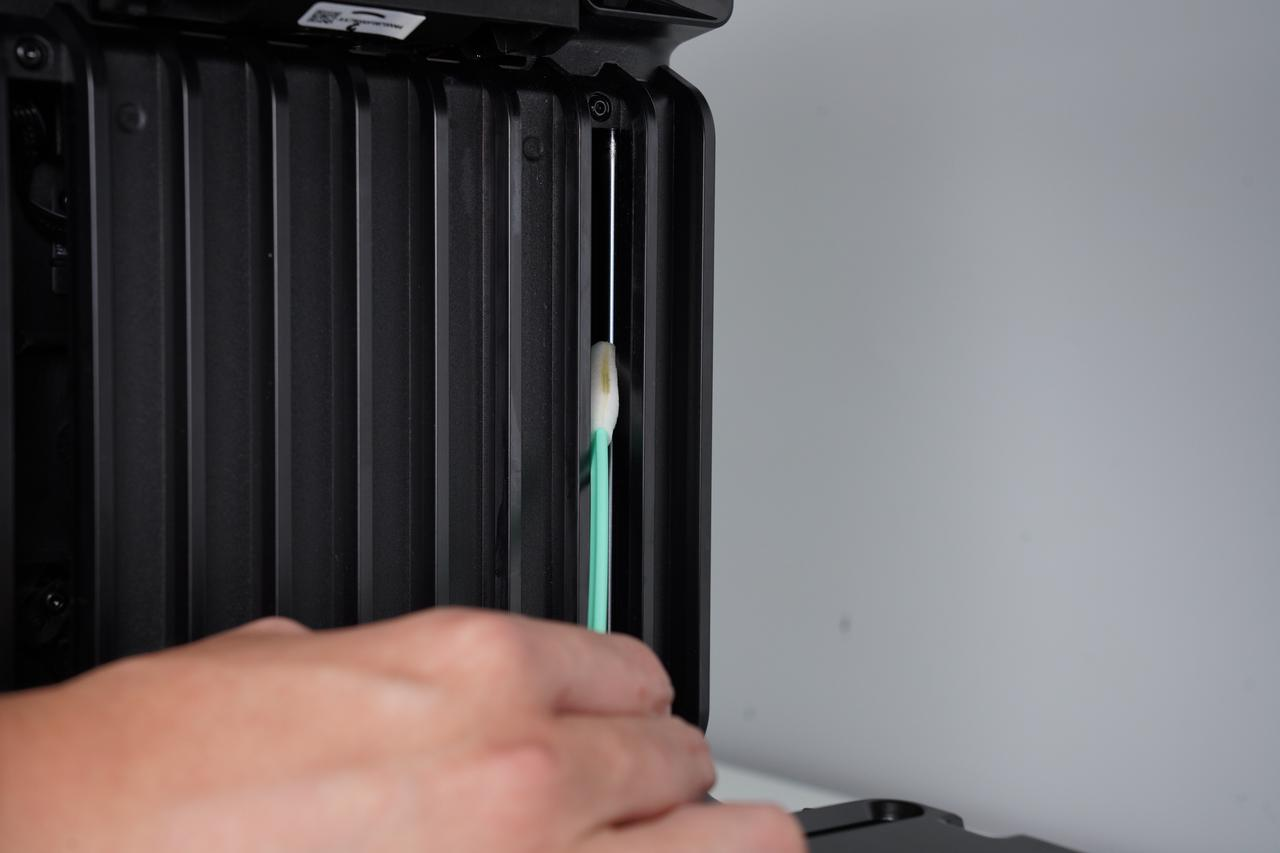
X-Axis Rail Cleaning
If you observe dust or oil buildup on the X-axis rail, wipe it with a dry lint-free cloth (no cleaning solution).
Carefully remove debris whilst trying to leave the existing lubrication intact.
⚠️ Caution: Avoid touching the encoder strip and do not use cleaning solution on the rail.
-
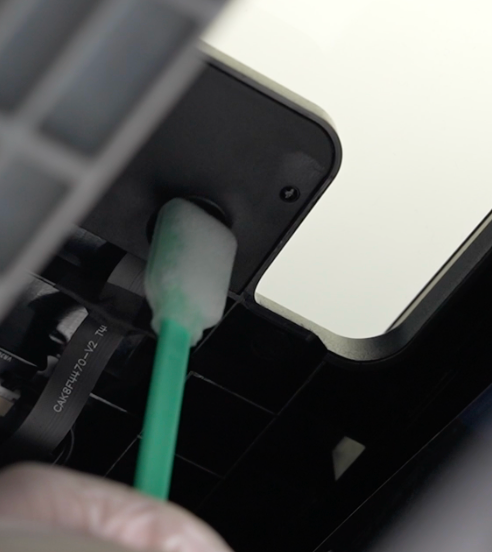
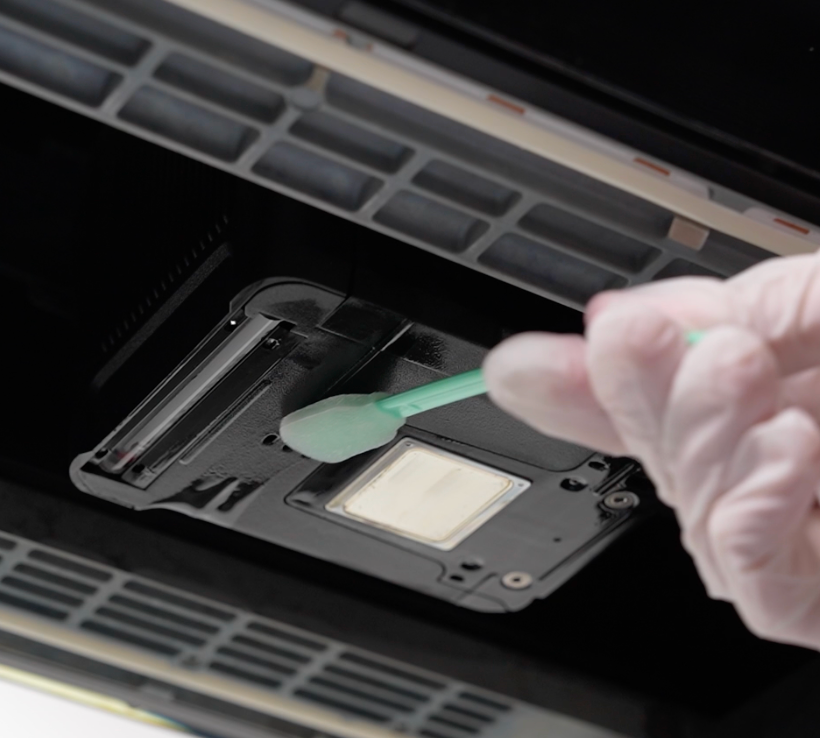
Camera Protection Cover Cleaning
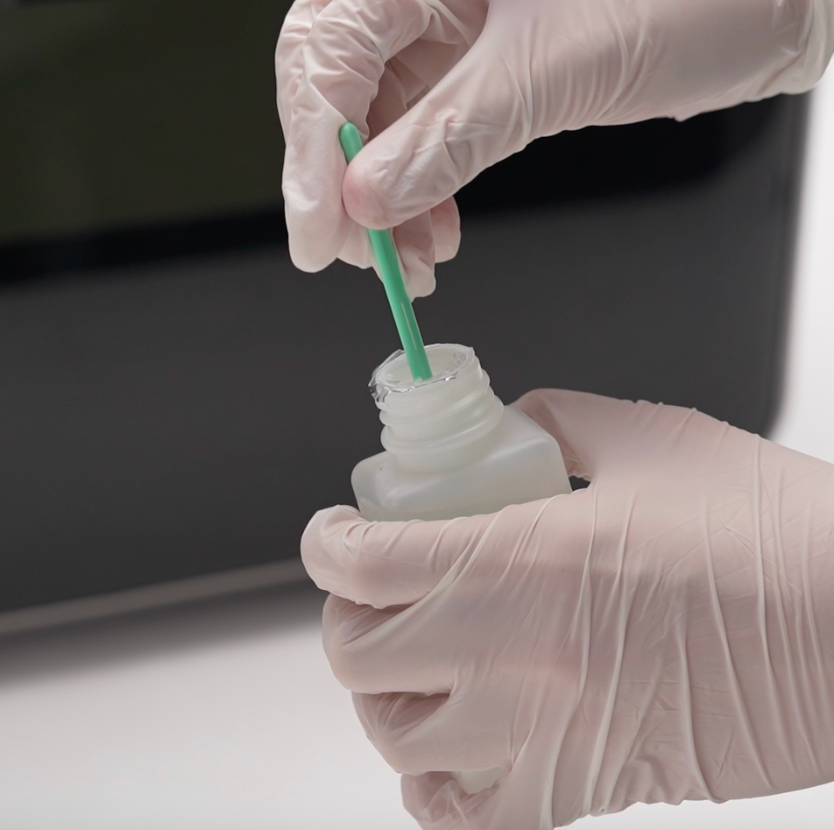
Moisten a lint-free swab with cleaning solution.
Gently wipe the protective cover over the camera until all smudges are gone.
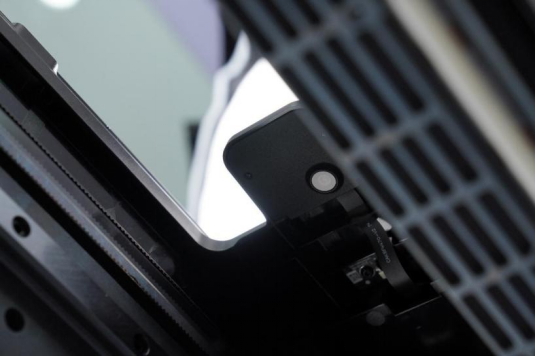
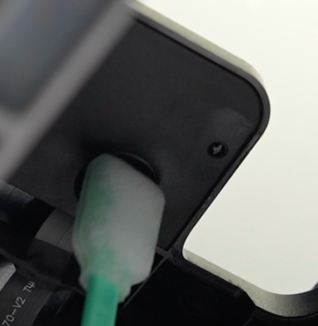
Use a clean, lint-free cotton swab to remove any excess solution and ensure the surface is dry and clean.
-
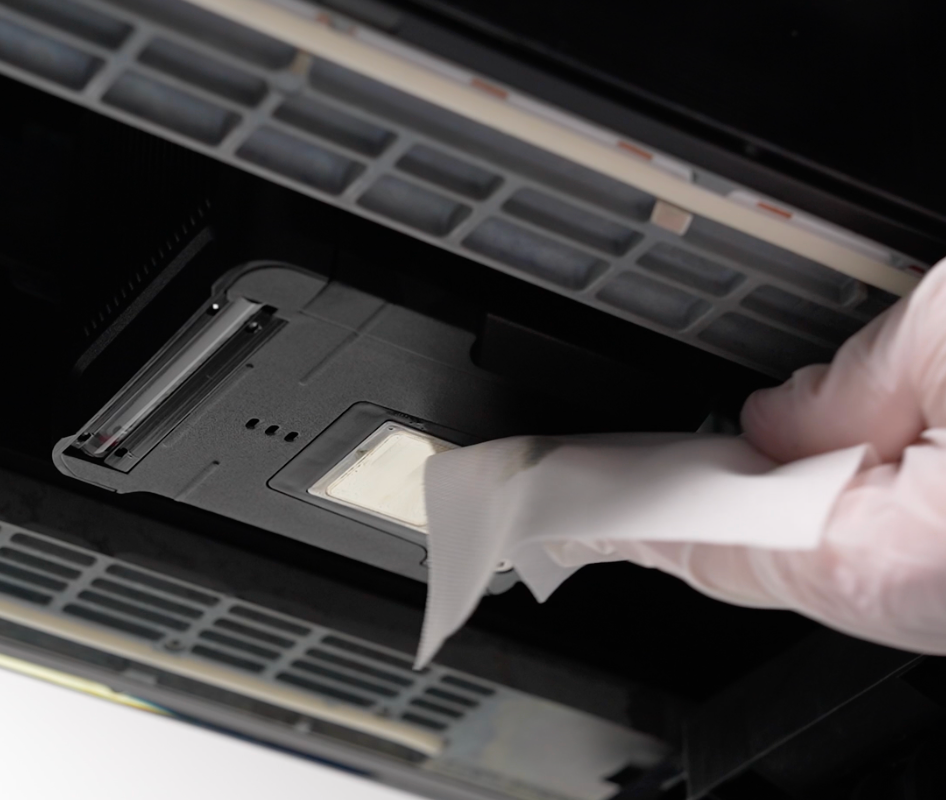
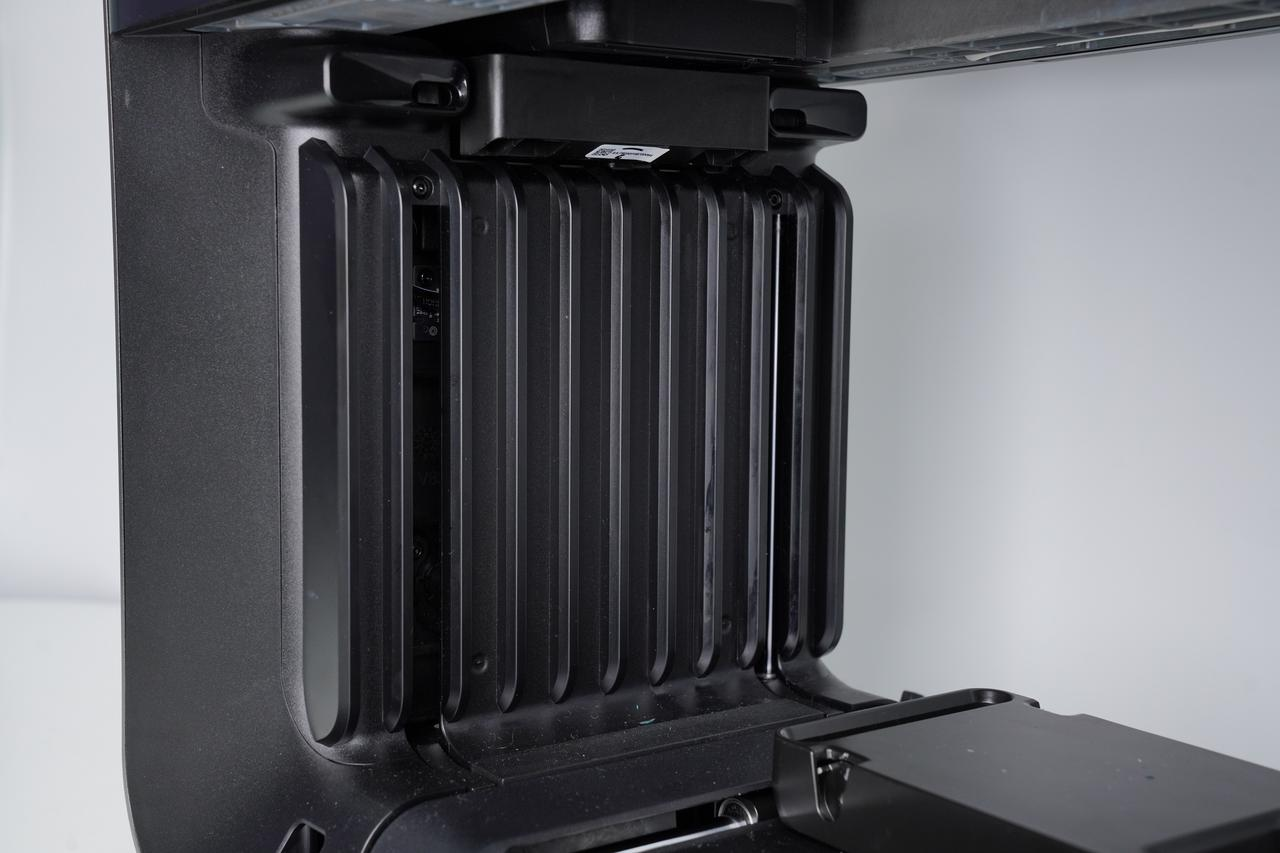
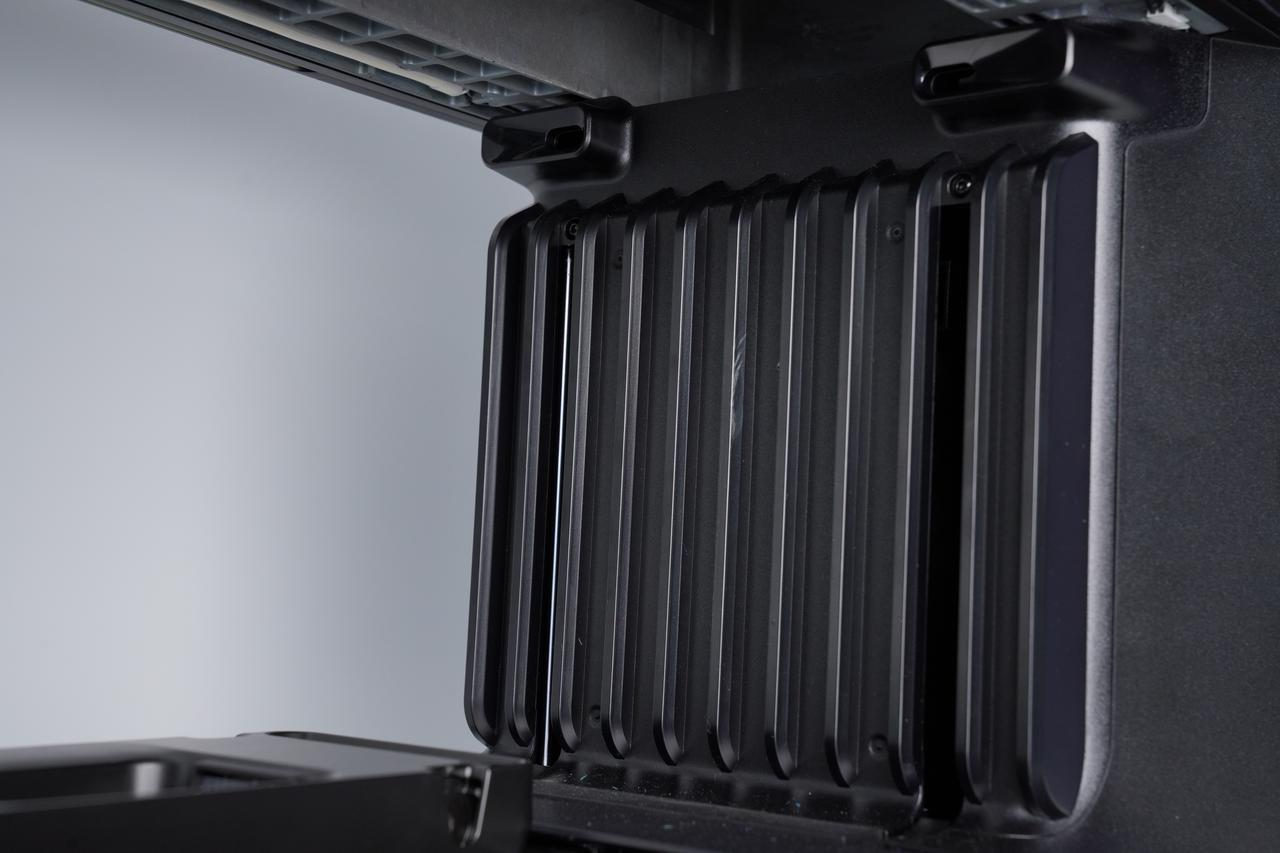
UV Lamp Surface Cleaning
Moisten a lint-free swab with a cleaning solution.
Gently wipe the entire UV lamp surface until no visible residue remains.
Use a clean, lint-free cloth to remove any excess solution and ensure the surface is dry and clean.
-
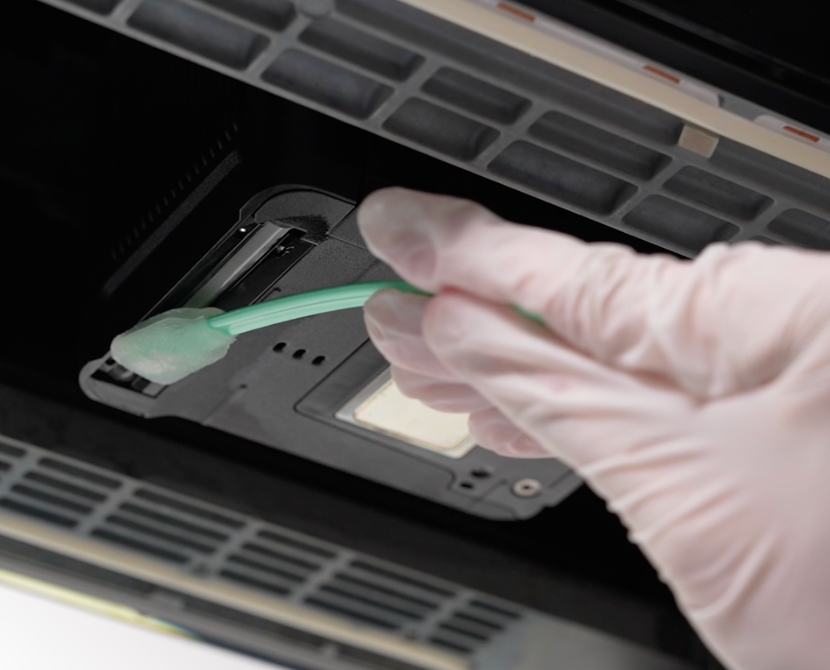
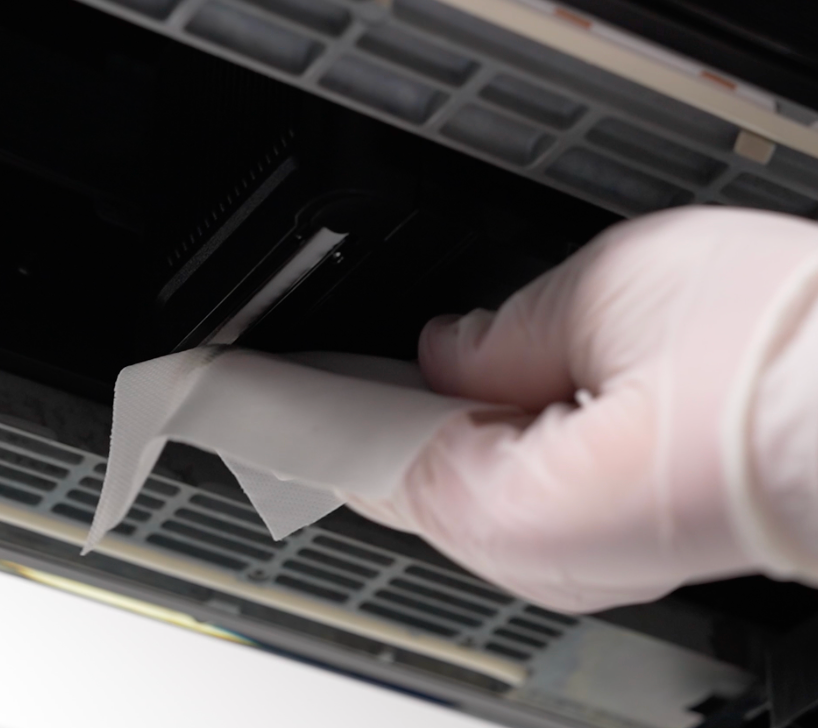
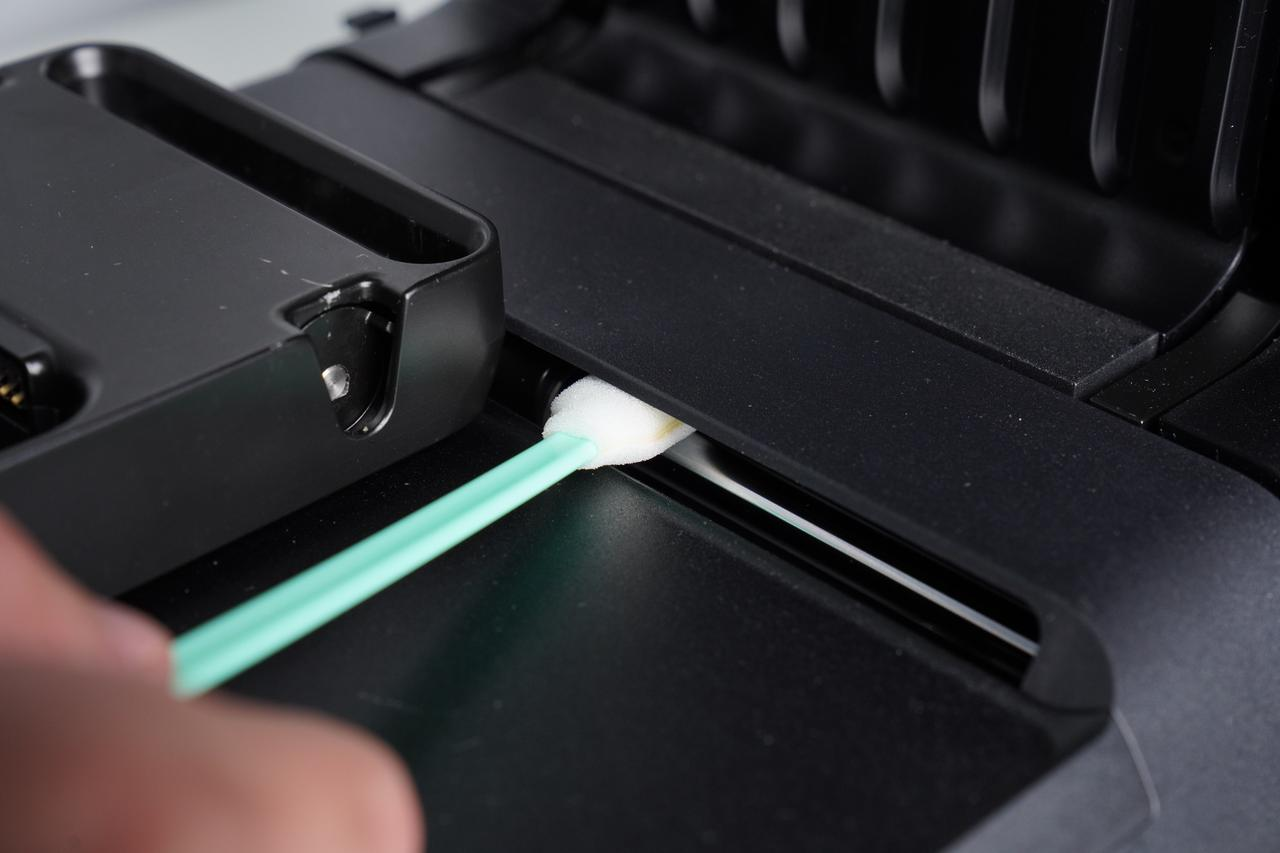
Printhead Surroundings Cleaning
Moisten a lint-free swab with a cleaning solution.
Carefully wipe around the printhead area to remove ink splatters.
Repeat until the area is free of visible ink.
Use a clean lint-free cloth to dry the area completely.
⚠️Caution: Do Not use the cleaning solution for manual cleaning of the nozzle area.
-
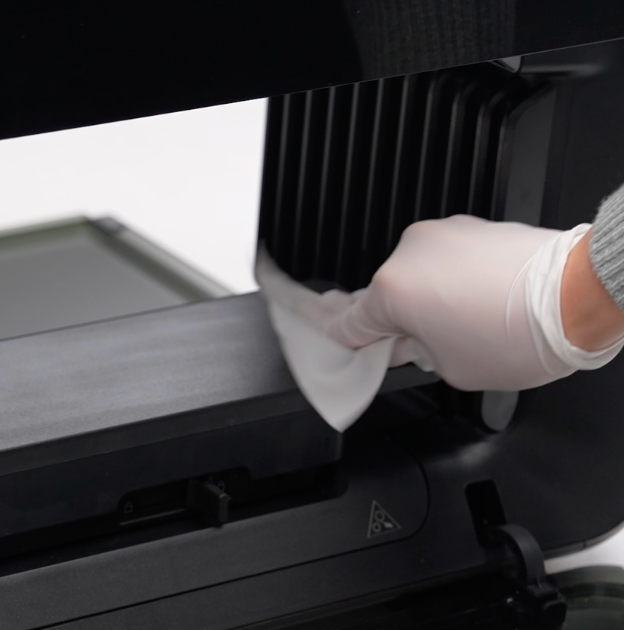
Flatbed Cleaning
Moisten a lint-free cloth with a cleaning solution.
Wipe the entire flat bed surface thoroughly.

Use a dry, lint-free cloth to remove any leftover solution.
-
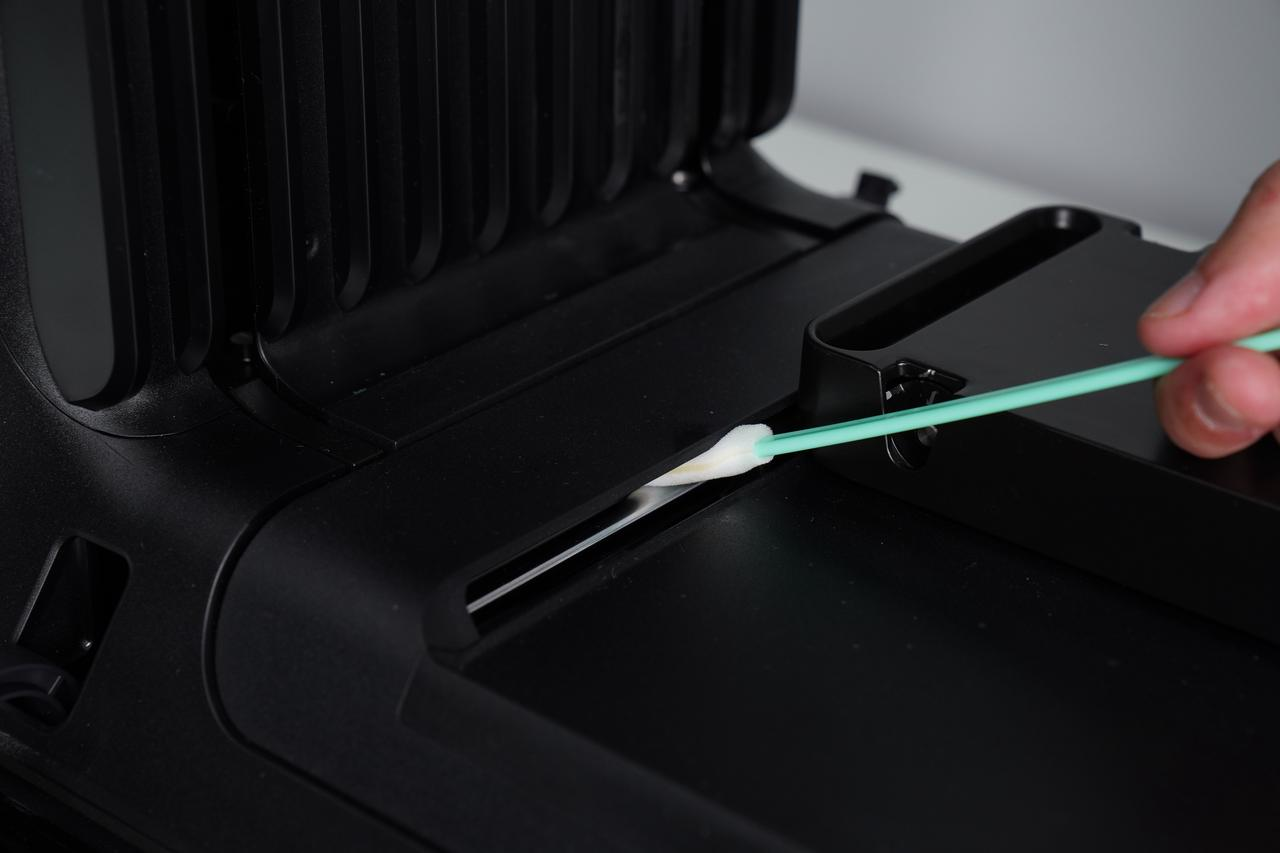
Ink Station Cleaning
Moisten a lint-free swab with a cleaning solution.
Clean the scraper blade and ink pad until no ink residue remains.
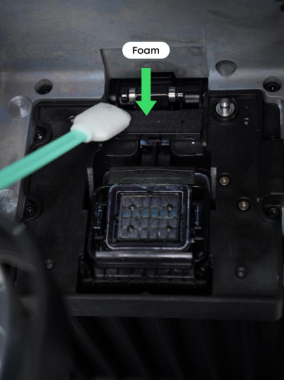
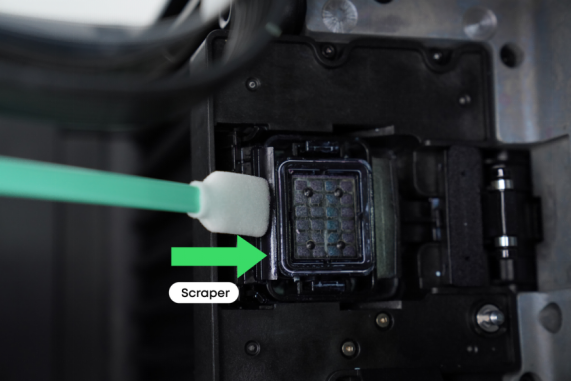
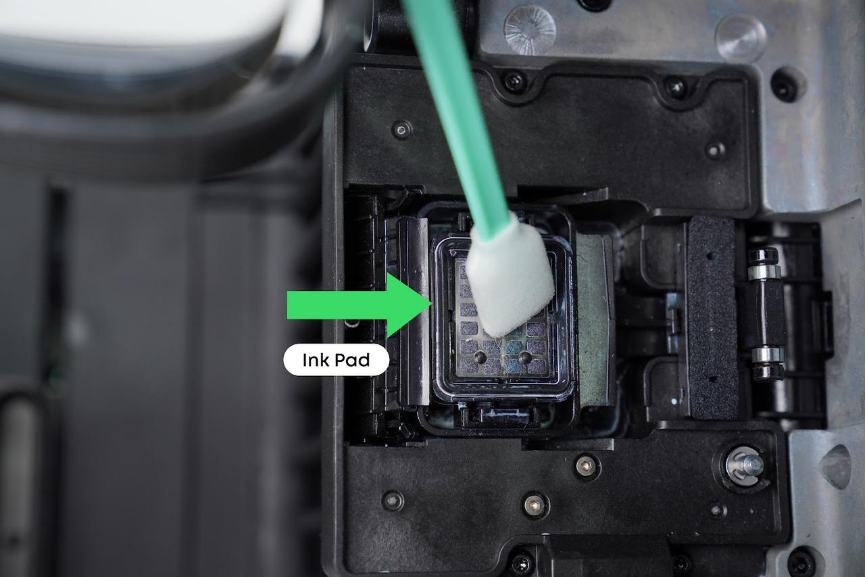
⚠️ Caution: Do not touch the encoder strip to avoid calibration errors!
-
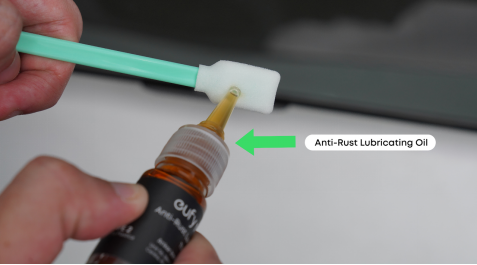
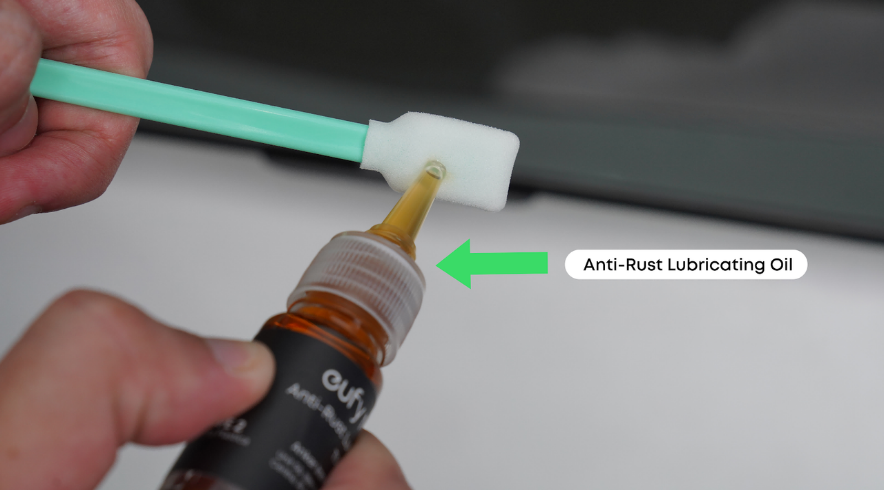
X-Axis Guide Rod Lubrication
Apply anti-rust lubricating oil by lint-free swab to upper and lower areas of X-Axis rail.

-
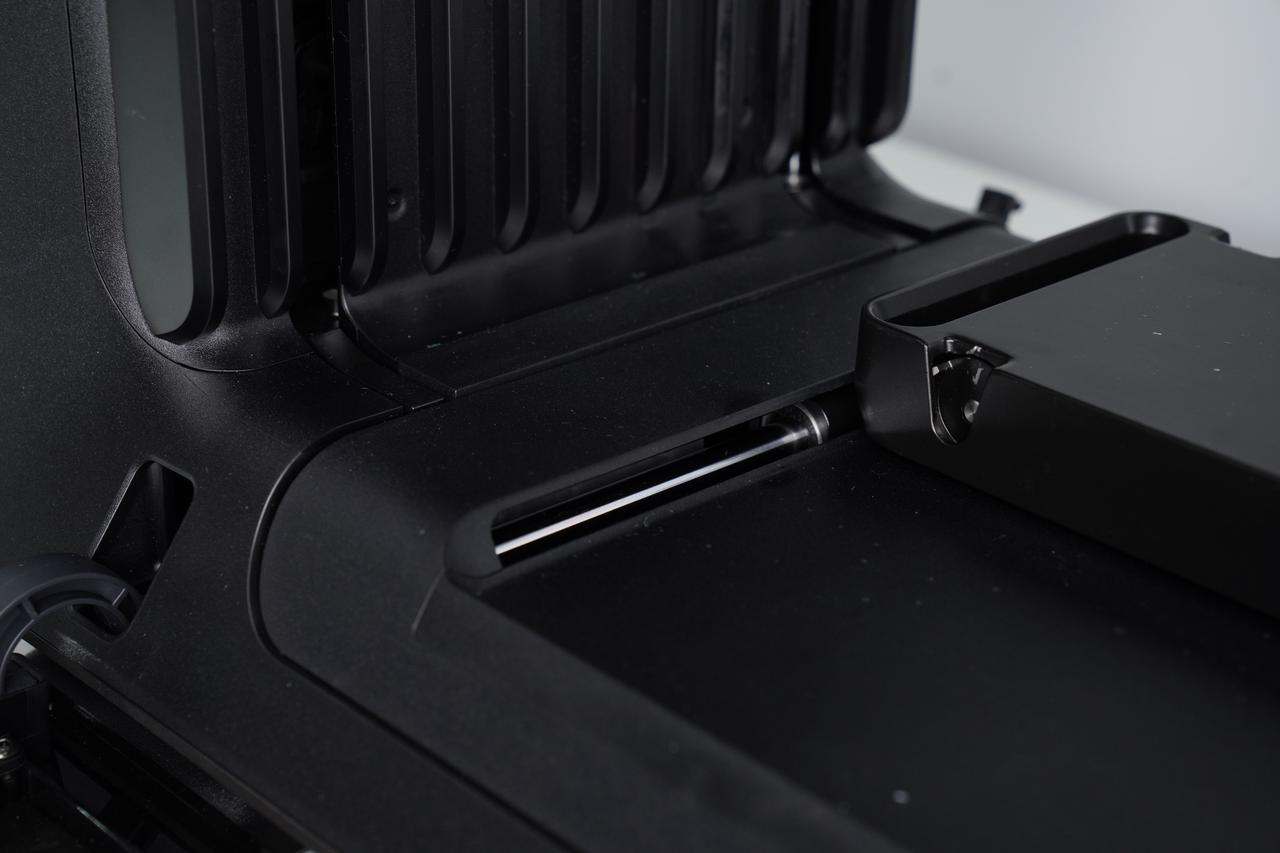
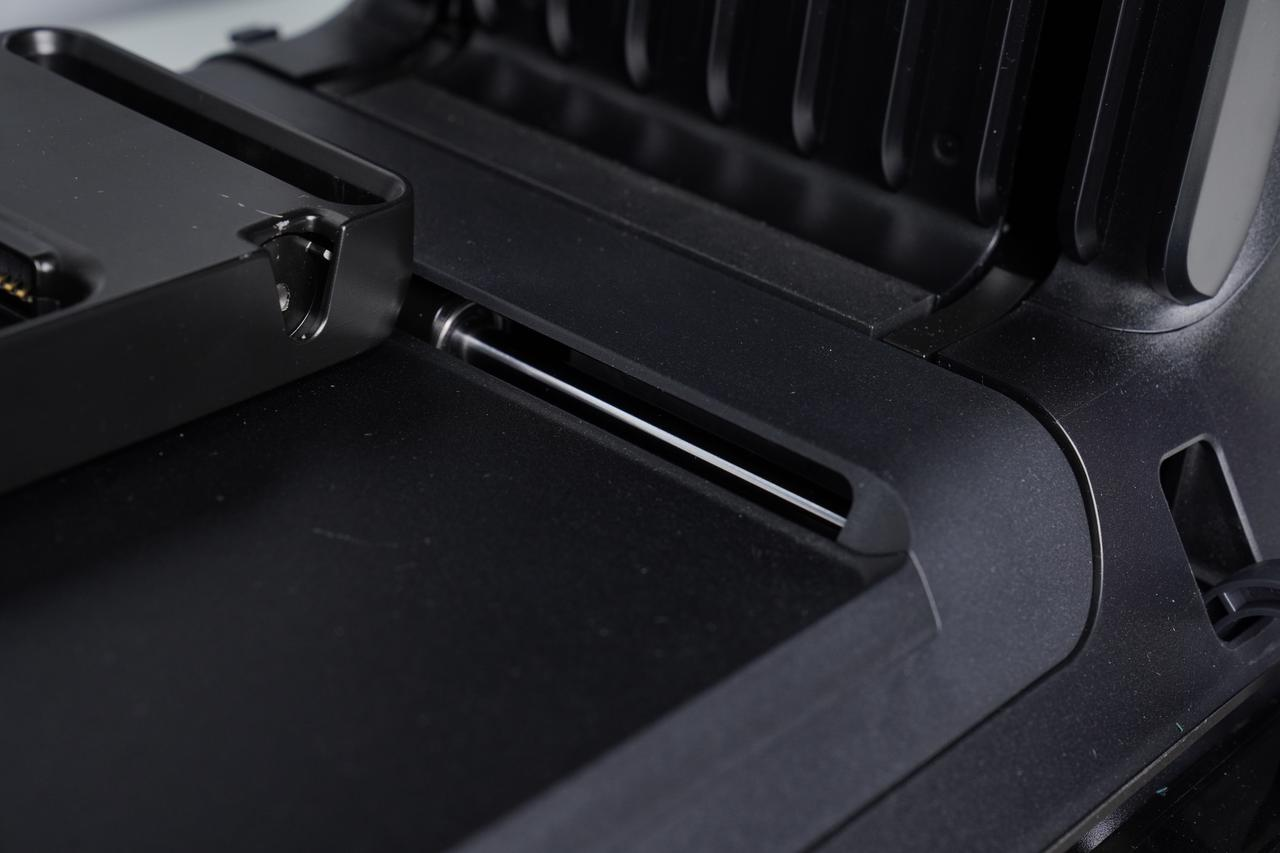
Y-Axis Guide Rod Lubrication
Apply a lubricating oil by lint-free swab to both guide rods from the gap in the left and right sides of Y-Axis.
-
Z-Axis Guide Rod Lubrication
Apply a lubricating oil by lint-free swab to four guide rods from the gap in the right and left sides of Z-Axis.
-
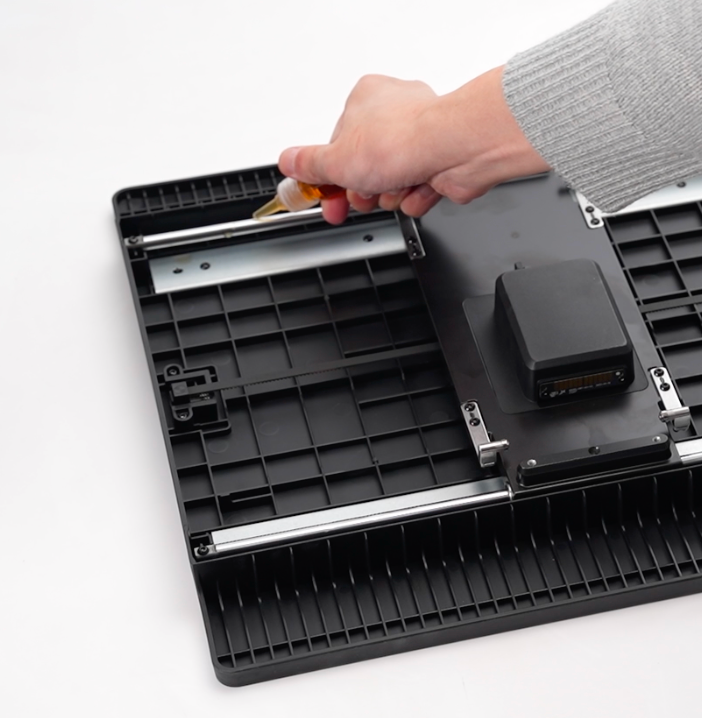
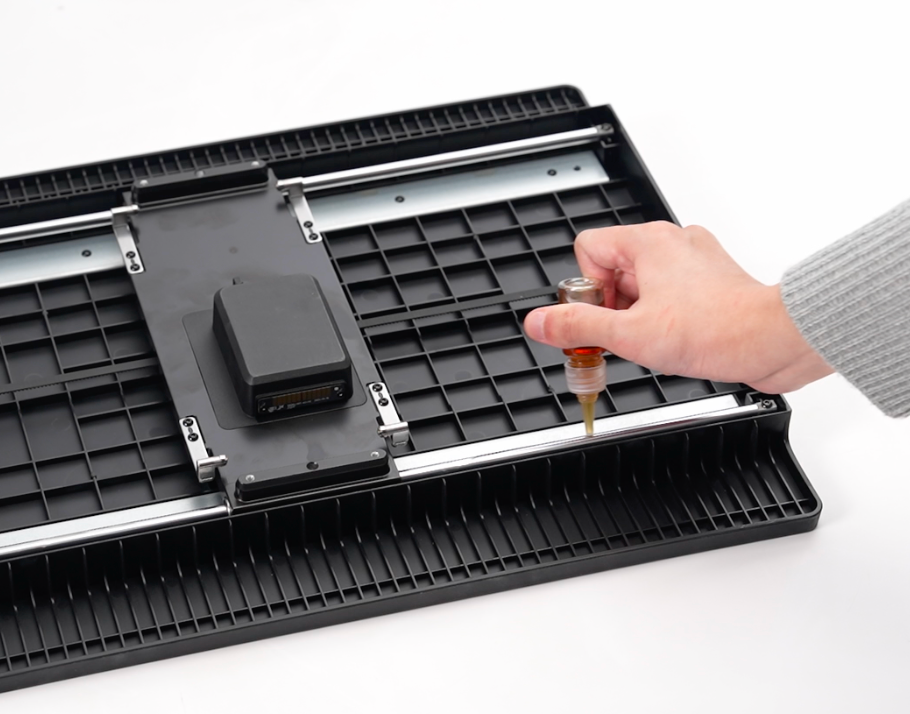
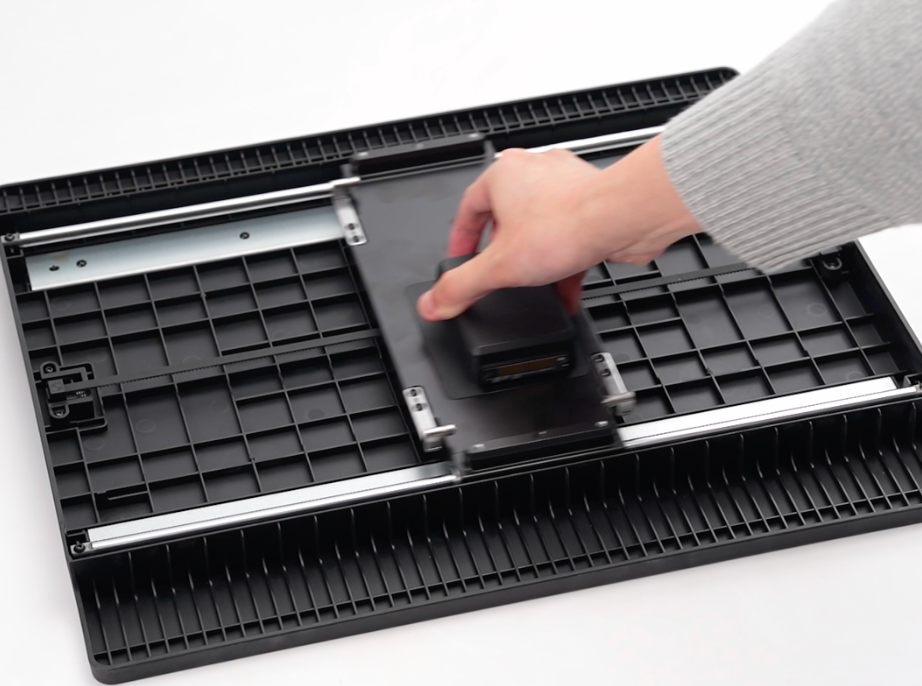
Standard Flatbed Guide Rod Lubrication
Invert the print bed assembly.
Apply lubricating oil to both guide rods, then move the bed base plate back and forth to distribute the oil evenly.