How Snapshot Works
When you start the Snapshot function, the system first checks whether the printer is idle and whether the printing platform is installed correctly.
-
If either check fails, a notification will appear.
-
If both checks pass, the printer measures the height of the print material and then captures an image.
Fault Symptom
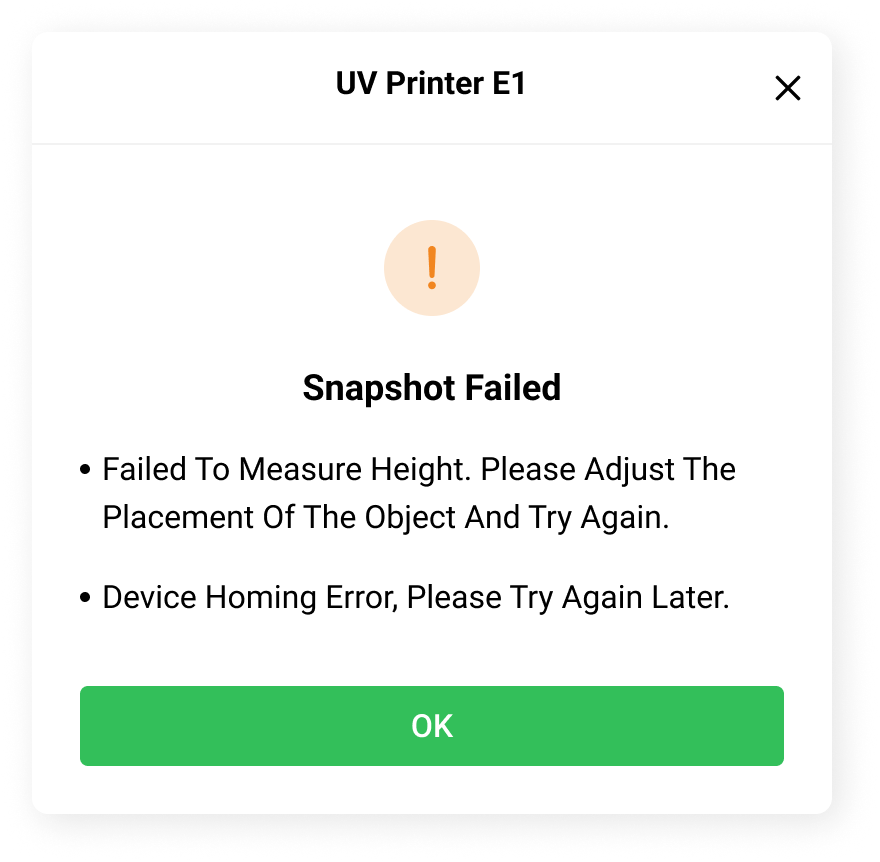
When attempting to use Snapshot before printing, the system displays a Snapshot Failed error.
Cause Analysis & Troubleshooting Steps
First, retry the Snapshot operation. Most temporary errors can be resolved by trying again.
If the issue persists, complete the following troubleshooting steps in order.
Step 1: Check the Print Material
-
Confirm that the print material does not exceed 60 mm in height. Material taller than 60 mm may cause height measurement to fail.
-
If the material exceeds 60 mm in height, use Zero-Point Alignment mode, which supports materials up to 130 mm high.
-
When using Zero-Point Alignment for the first time, or after replacing the adhesive mat, complete zero-point calibration before printing.
-
Retry Snapshot after completing the above checks.
Step 2: Restart the Software
-
Close the eufyMake App or eufyMake Studio, reopen it, and then retry Snapshot.
Step 3: Run a Device Self-Check
Run a device self-check through the eufyMake App or eufyMake Studio.
During the self-check, the printer automatically checks each hardware module for faults, which can help identify the cause of the issue. The process may take several minutes and may consume a small amount of ink.
-
Start the device self-check through the eufyMake App or eufyMake Studio.
-
If the self-check reports a hardware error code, open the eufyMake Knowledge Base troubleshooting page:
https://wiki.eufymake.com/en/Troubleshooting
-
Under Hardware Errors & Malfunctions, locate the troubleshooting guide for the reported error code.
-
Follow the instructions provided for that error.
-
After resolving the reported issue, retry Snapshot.
Step 4: Inspect and Clean the Camera
Dust, ink residue, or other contamination on the camera lens may interfere with image capture and contour recognition.
-
Inspect the camera lens for dust, ink residue, or foreign objects.
-
If the lens is dirty, gently clean it using a clean, soft, lint-free cloth.
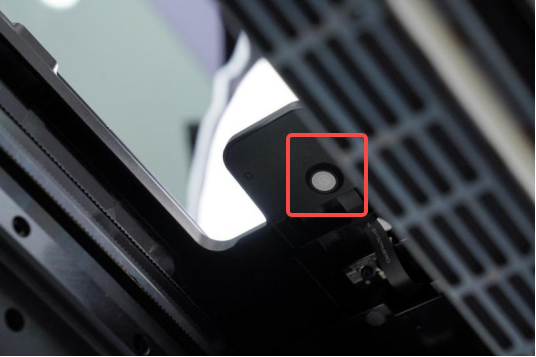
For detailed cleaning instructions, refer to the Camera Protection Cover Cleaning section of the Deep Cleaning Guide:
https://support.eufymake.com/s/article/Deep-Manually-Cleaning-for-UV-Printer-E1
-
After inspecting and cleaning the camera, retry Snapshot.
Step 5: Restart the Printer
Restarting the printer can clear temporary software errors and reset the hardware status.
This may resolve issues involving:
-
Homing
-
Axis movement
-
Height measurement
-
Image capture
-
Emergency stop activation
Restarting takes approximately 1 minute and does not consume ink.
-
Disconnect the printer’s power cable.
-
Wait for 10 seconds.
-
Reconnect the power cable and turn on the printer.
-
After startup is complete, retry Snapshot.
Step 6: Check the Network Connection
After the printer captures the image, it must upload the image to the server for contour recognition. An unstable or unavailable network connection may cause the upload to fail.
-
Confirm that the printer is connected to Wi-Fi.
-
If the Wi-Fi signal is weak or unstable, connect the printer to a mobile hotspot for testing.
-
Once the network connection is stable, retry Snapshot.
Support Contact
If the issue persists after completing the above steps, please contact eufyMake Customer Support at support@eufymake.com with the following information:
-
Your Order Information
-
Printer SN. Please refer to: https://support.eufymake.com/s/article/How-to-Check-the-Device-Serial-Number-SN
-
Printer and App Logs. Please refer to: https://support.eufymake.com/s/article/Log-Upload-Process-App-PC-Overview
-
Relevant photos and videos.