Video link:
https://youtu.be/POaEbzXFAlM?si=yP9Vl1Zy2mOl-vmH
Fault Phenomenon:
The printhead moves irregularly or becomes stuck on the X-axis guide rail, and abnormal noise occurs during movement.
Error code: 0xFD010D0001
Cause Analysis:
-
The printhead is locked at the capping station and cannot move out, preventing it from returning to the home position.
-
The printhead movement is blocked or jammed by a foreign object, preventing it from returning to the home position.
-
The X-axis photoelectric switch is faulty, resulting in a failure to home.
-
The X-axis motor is malfunctioning.
Troubleshooting Steps:
-
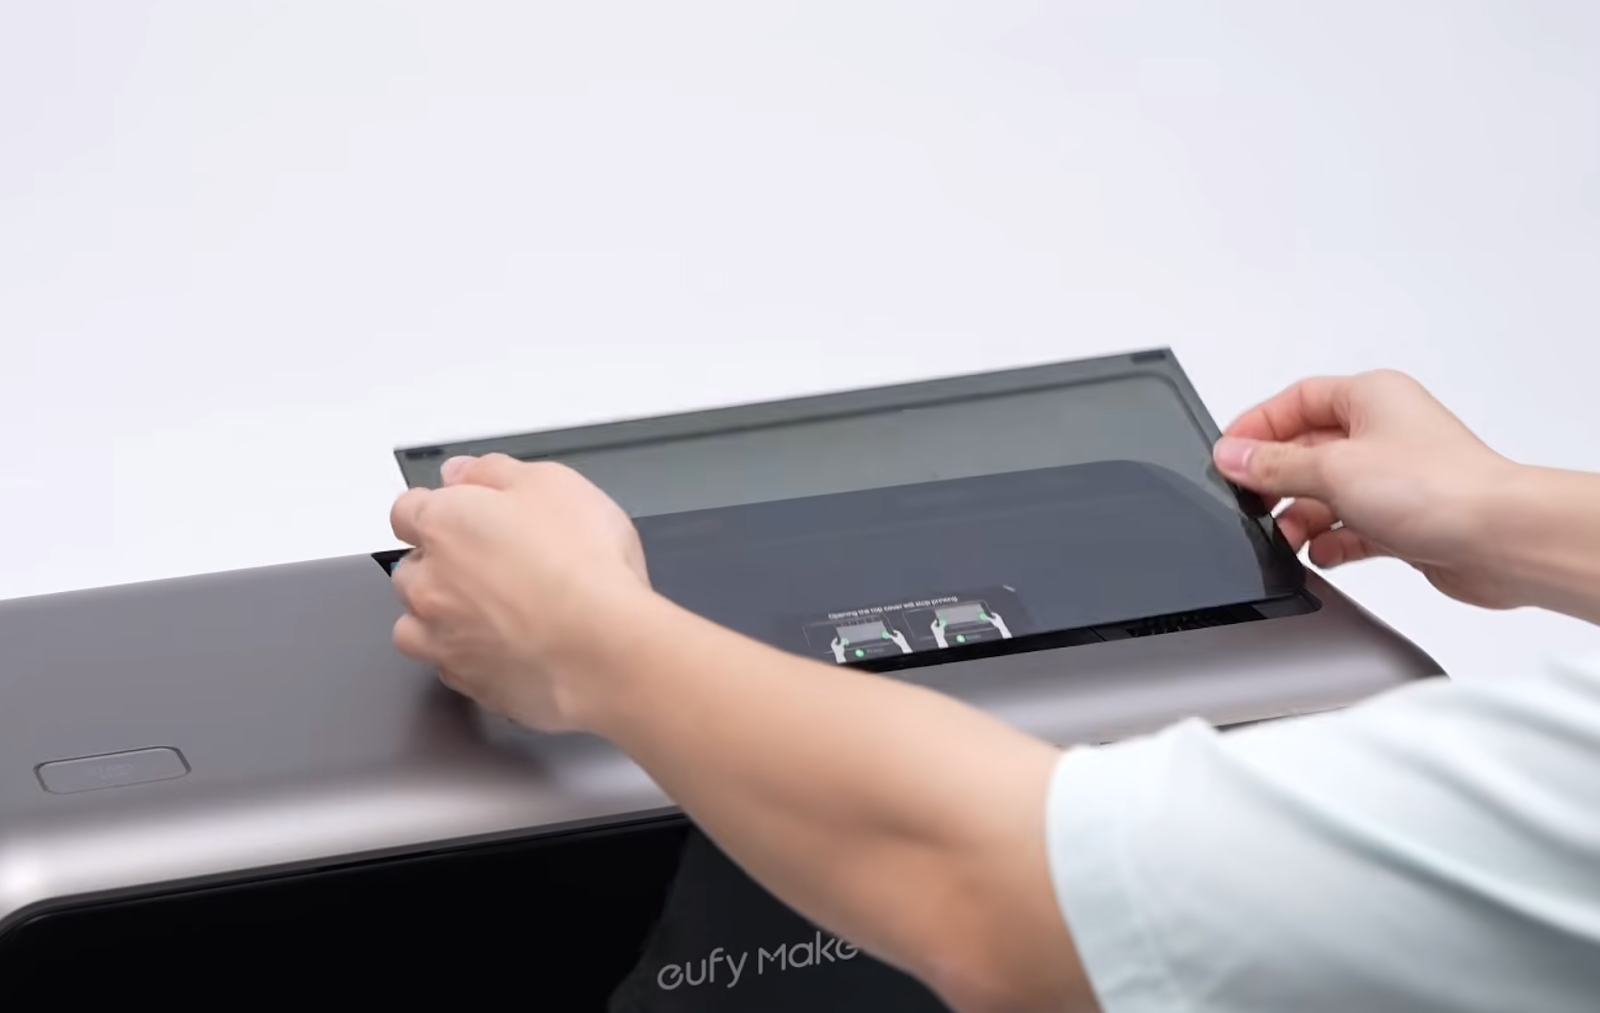
Remove the printhead cover panel.
-
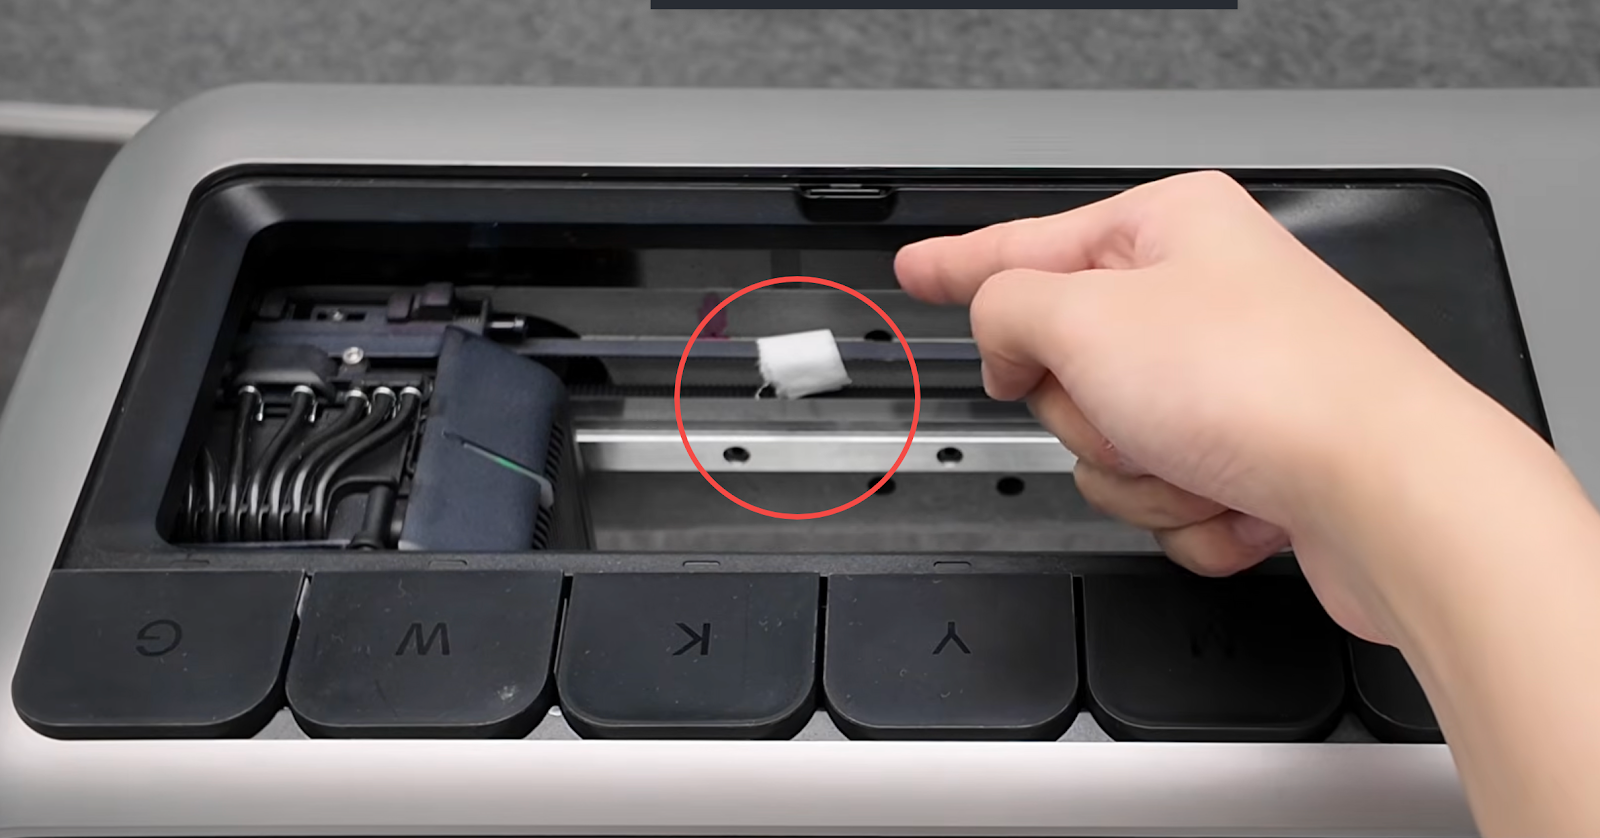
Check whether any foreign objects are blocking the X-axis movement. If any are found, remove them.
-
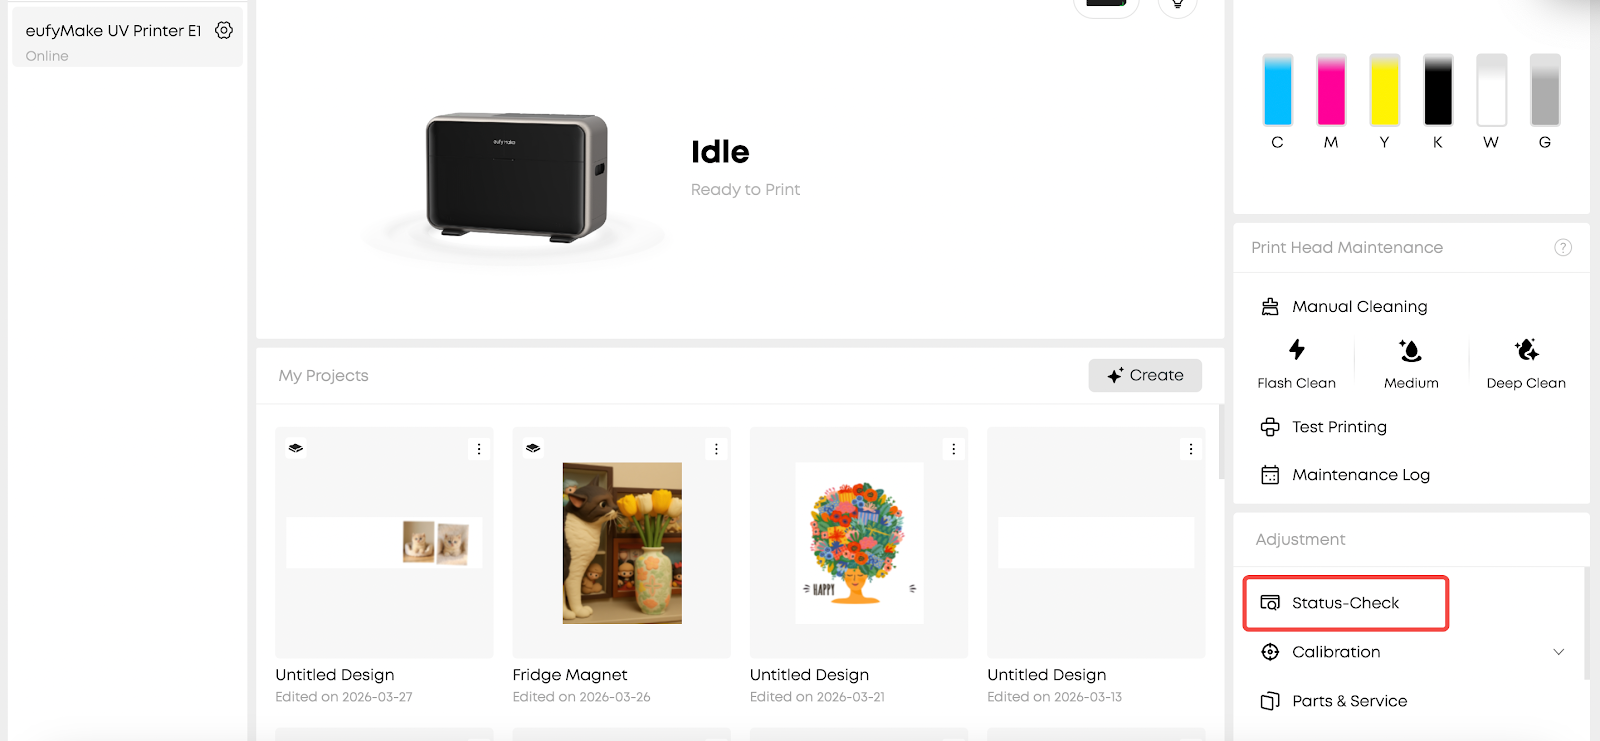
Re-run the self-check. There are two methods:
-
Perform the self-check via eufyMake software.
-
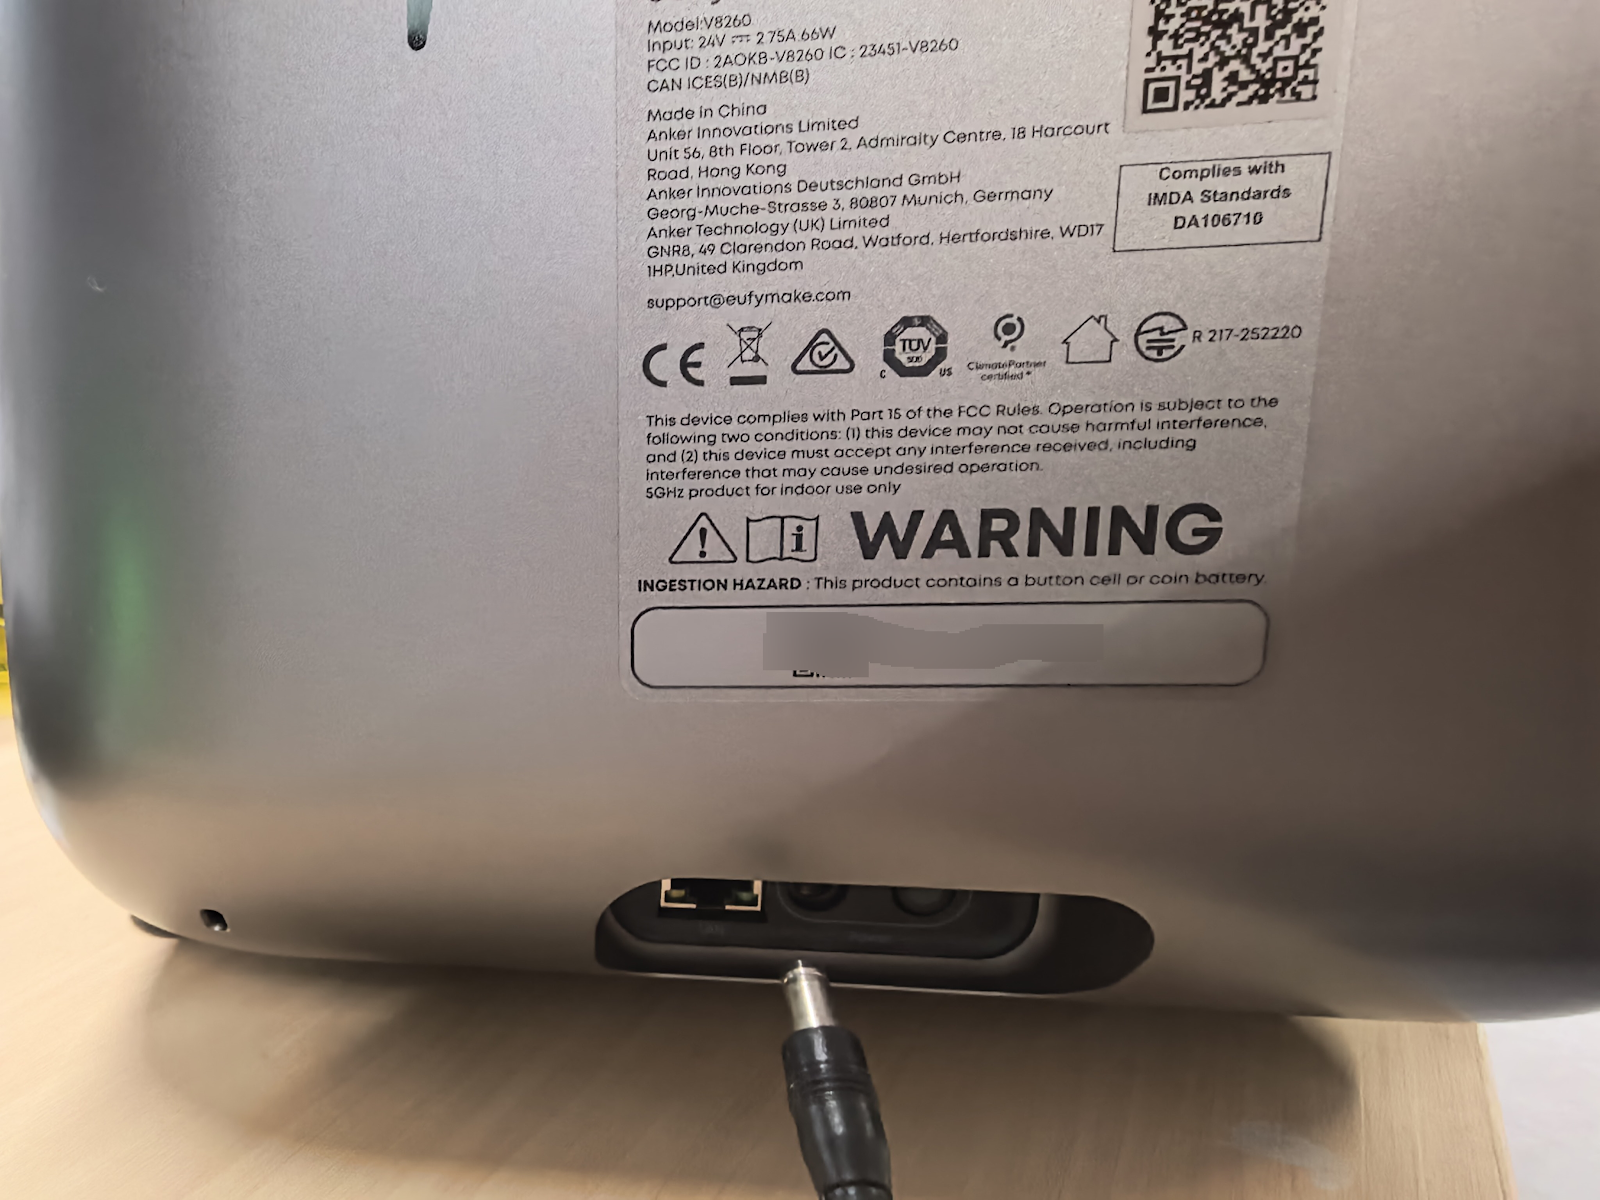
If the software option is unavailable (grayed out), unplug and reconnect the power cable to trigger the self-check process.
-
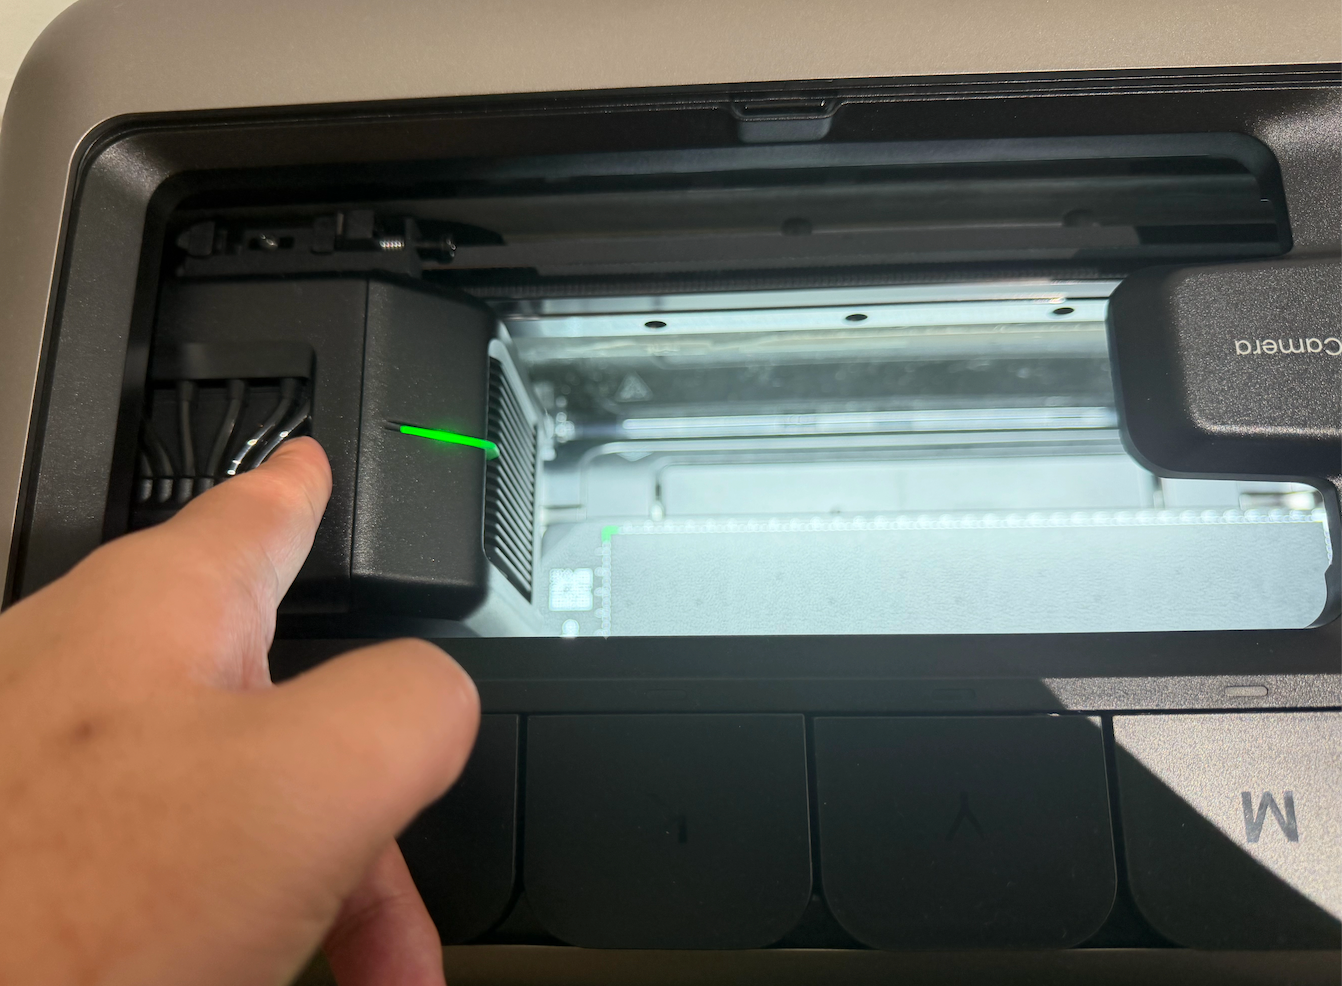
After starting the self-check, observe whether the printhead moves out of the capping station.
-
If it does not move and you hear a clicking sound, it may be stuck at the mechanism.
-
Record a video and provide it to eufyMake Customer Support.
-
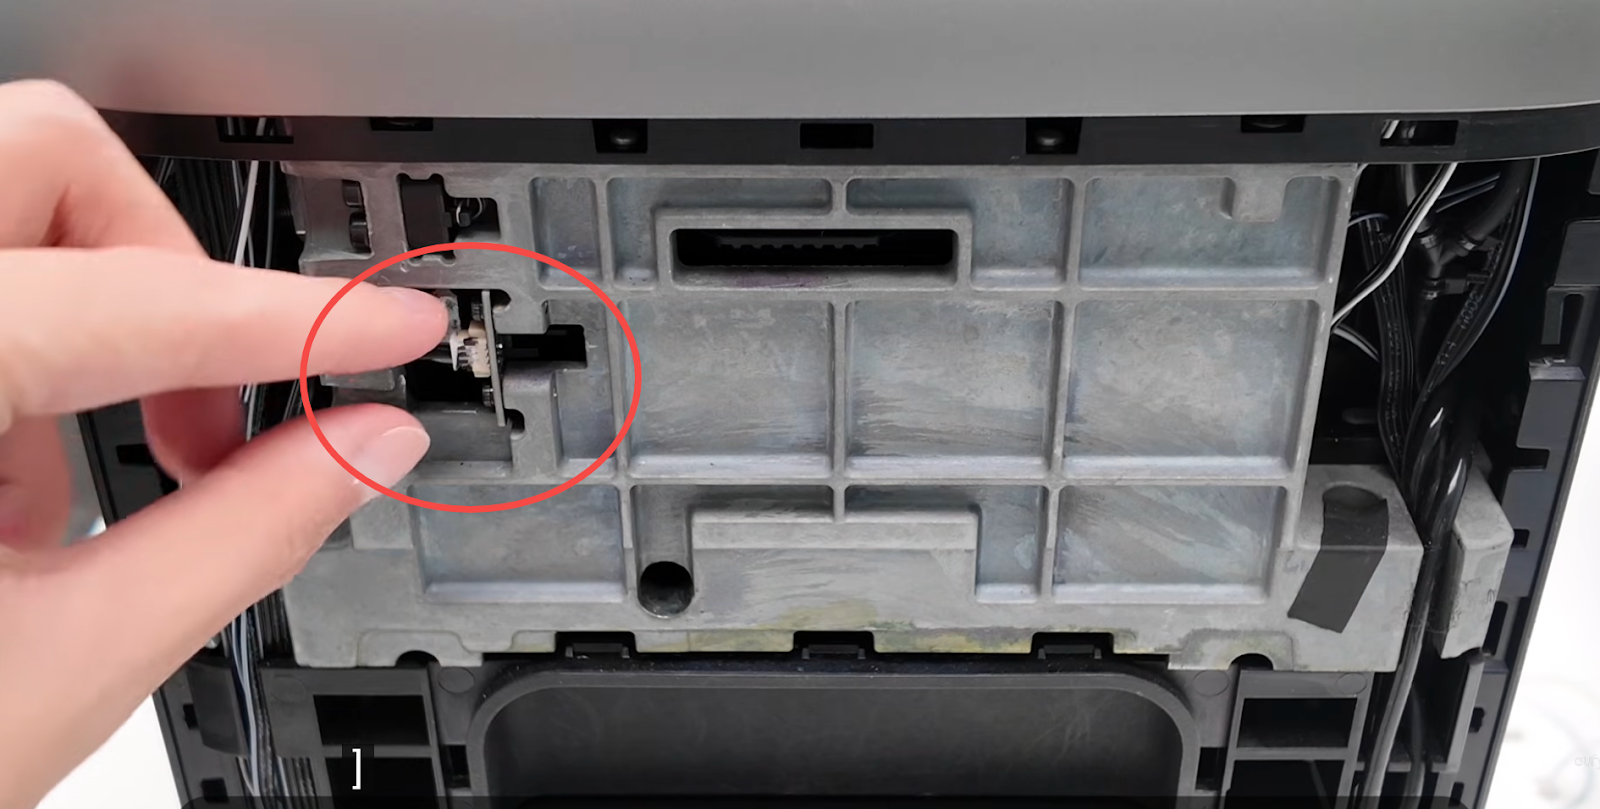
If the printhead moves normally during self-check but the error persists, check the photoelectric switch:
-
Remove the left-side cover of the printer using a hard card or disassembly tool.
-
https://support.eufymake.com/s/article/Printer-Cover-Disassembly-and-Assembly-SOP
-
Check whether the X-axis photoelectric switch is securely installed and not loose.
-
If any abnormality is found, record a video and send it to eufyMake Customer Support.
-
Test the X-axis homing function:
-
Re-run the self-check process.
-
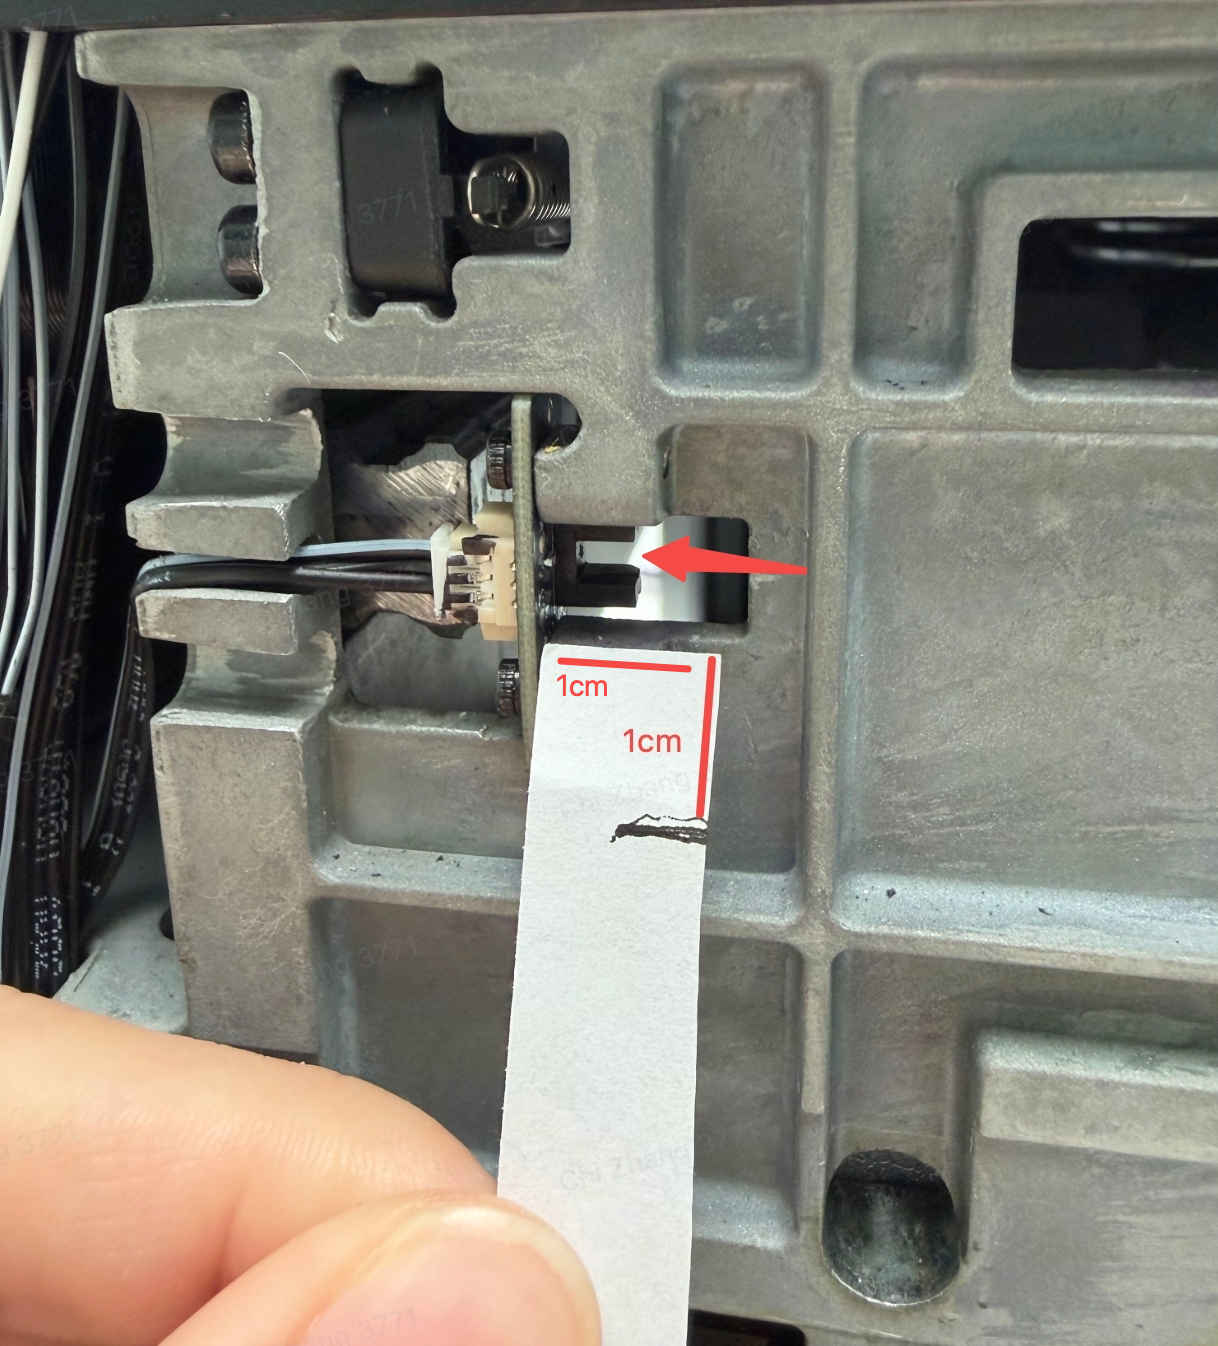
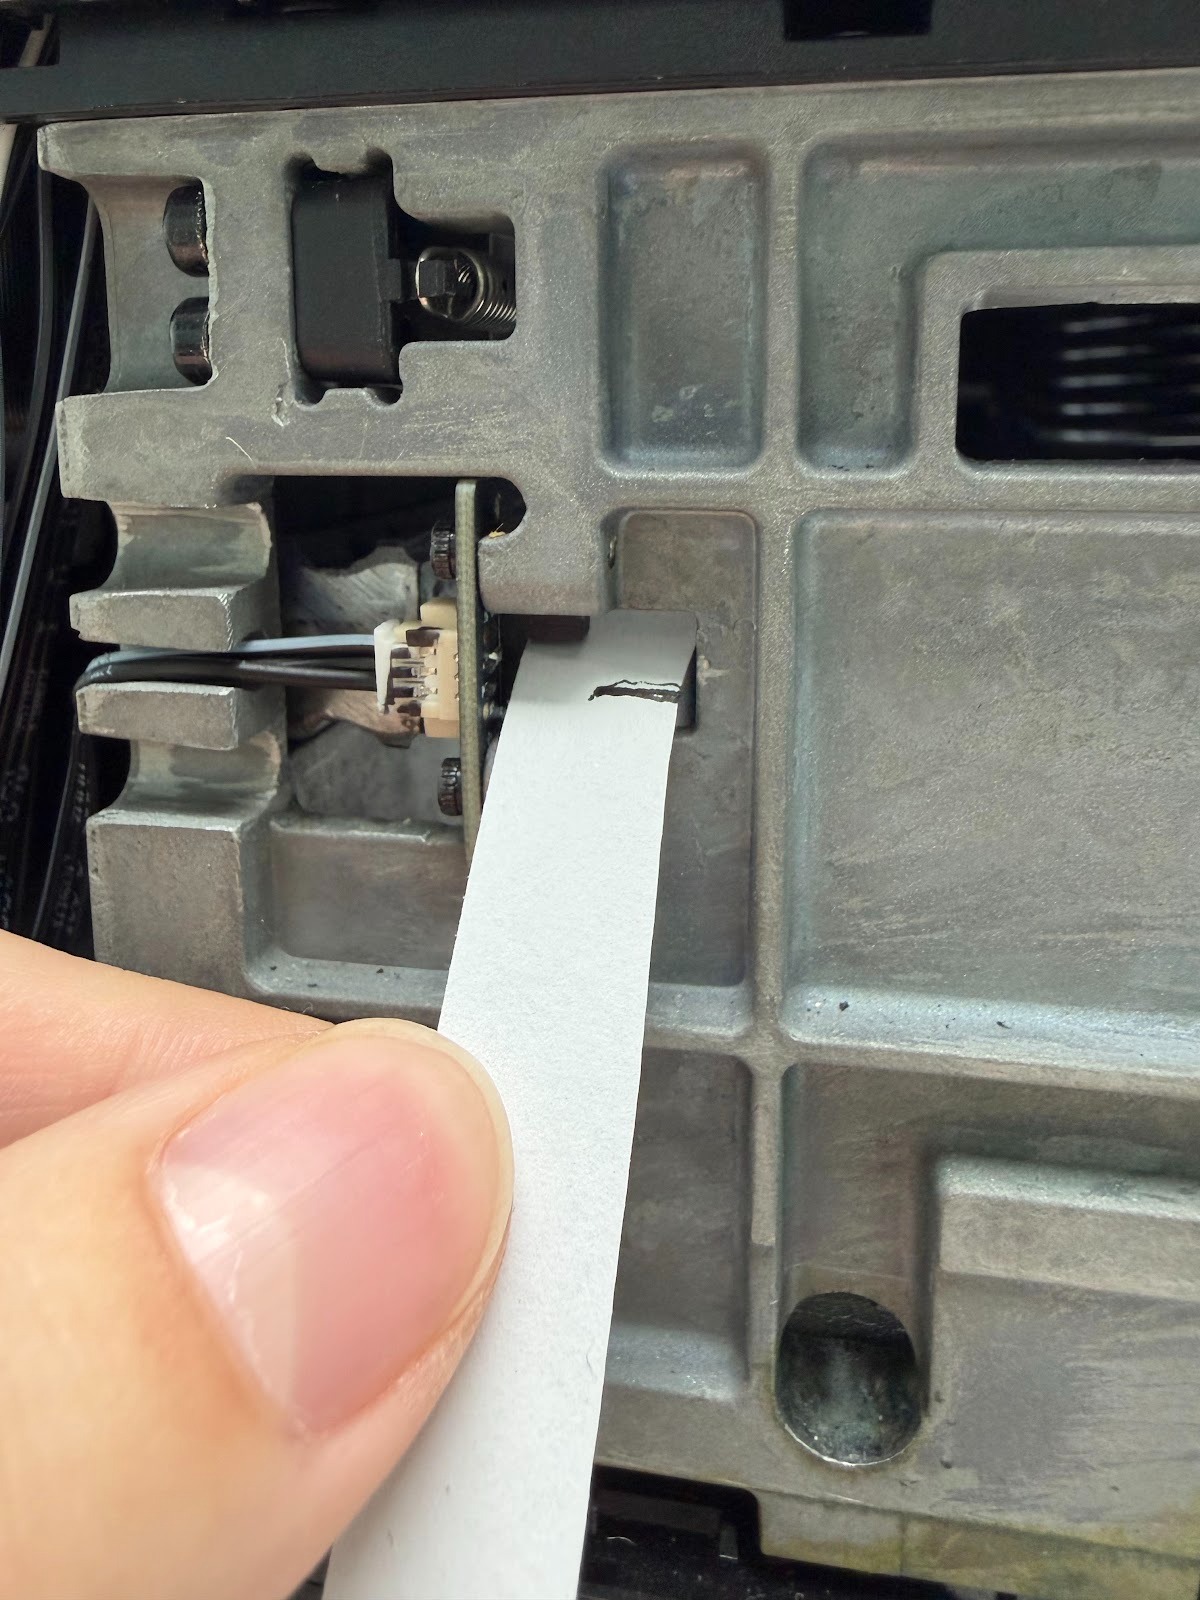
After the printhead moves out of the capping station, use a 1 cm wide paper strip to block the photoelectric switch.
-
Observe whether the printhead stops moving.
-
If the printhead stops, the photoelectric switch is functioning correctly.
If this step is unclear, refer to the troubleshooting video at the top of this article.
-
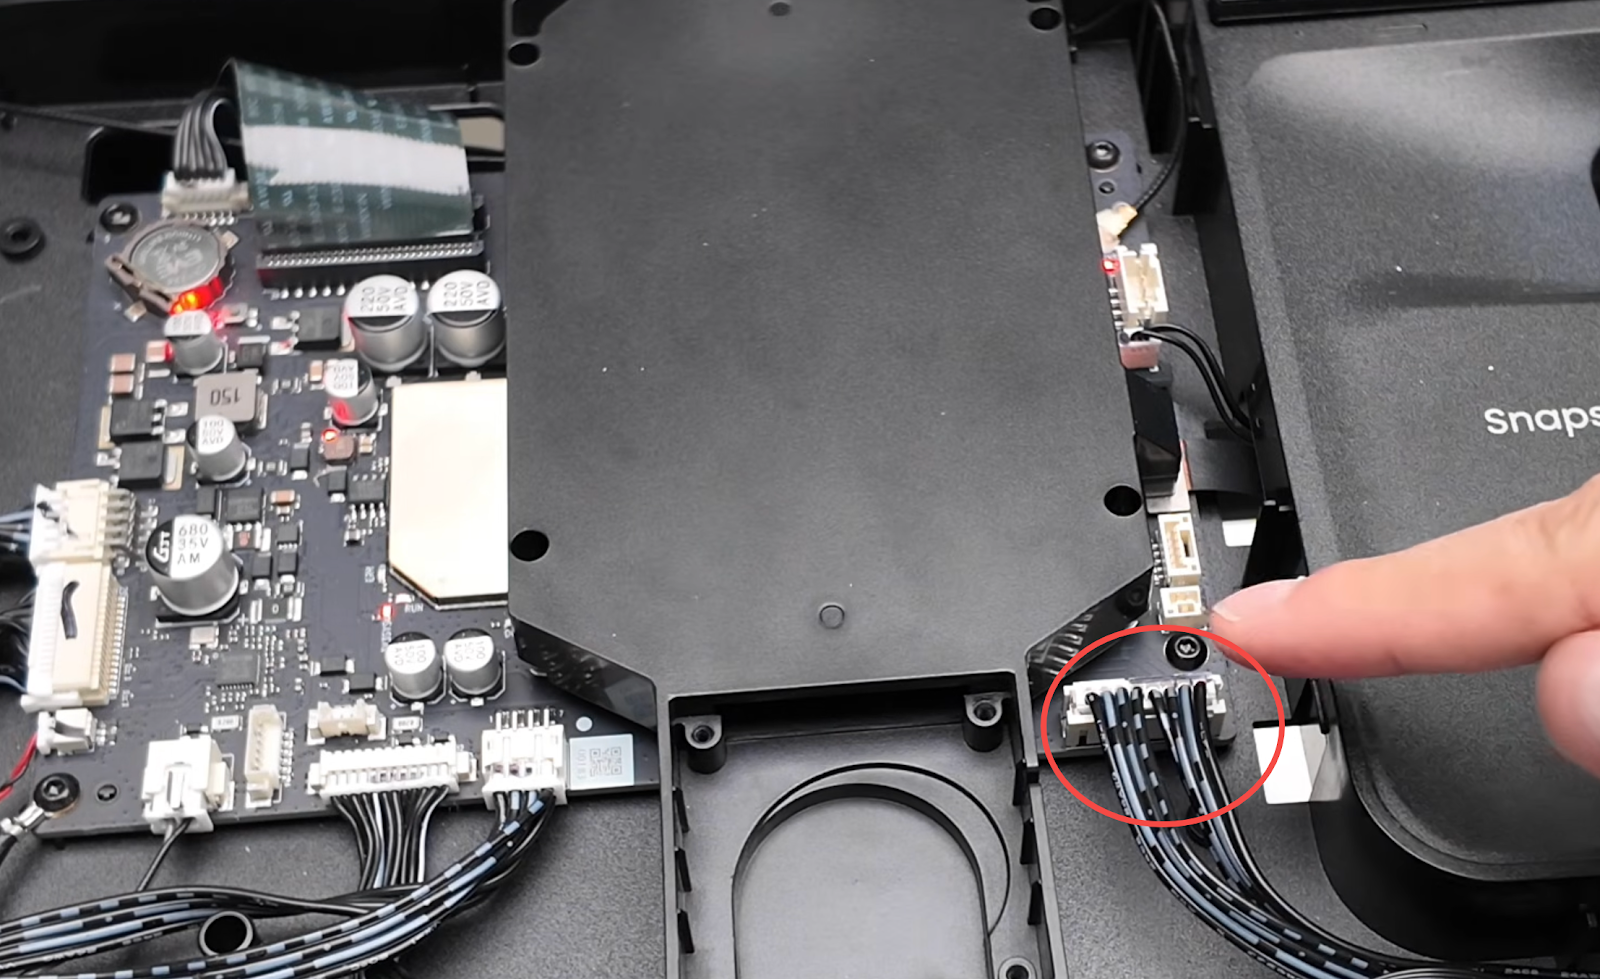
If the printhead does not move at all and no abnormal noise is present during self-test, the X-axis motor may be faulty.
Remove the printer’s upper cover using a hard card or disassembly tool.
Refer to:
-
Check whether the X-axis motor cable is securely connected.
Support Contact
If the issue persists after completing the above steps, please contact eufyMake Customer Support at support@eufymake.com with the following information:
-
Your Order Information
-
Printer SN. Please refer to: How to Check the Device Serial Number (SN)
-
Printer and App Logs. Please refer to Log / Feedback Upload Process (App & PC) – Overview
-
Relevant photos and videos.