Overview of Operation
This section introduces the core functions of the editors available on each software platform. Using the editor, you can efficiently bring your creative ideas to life.
Core Application Scenarios and Operational Processes
Creating on Web / PC
The corresponding functions available on the web/PC editor are explained in detail below.
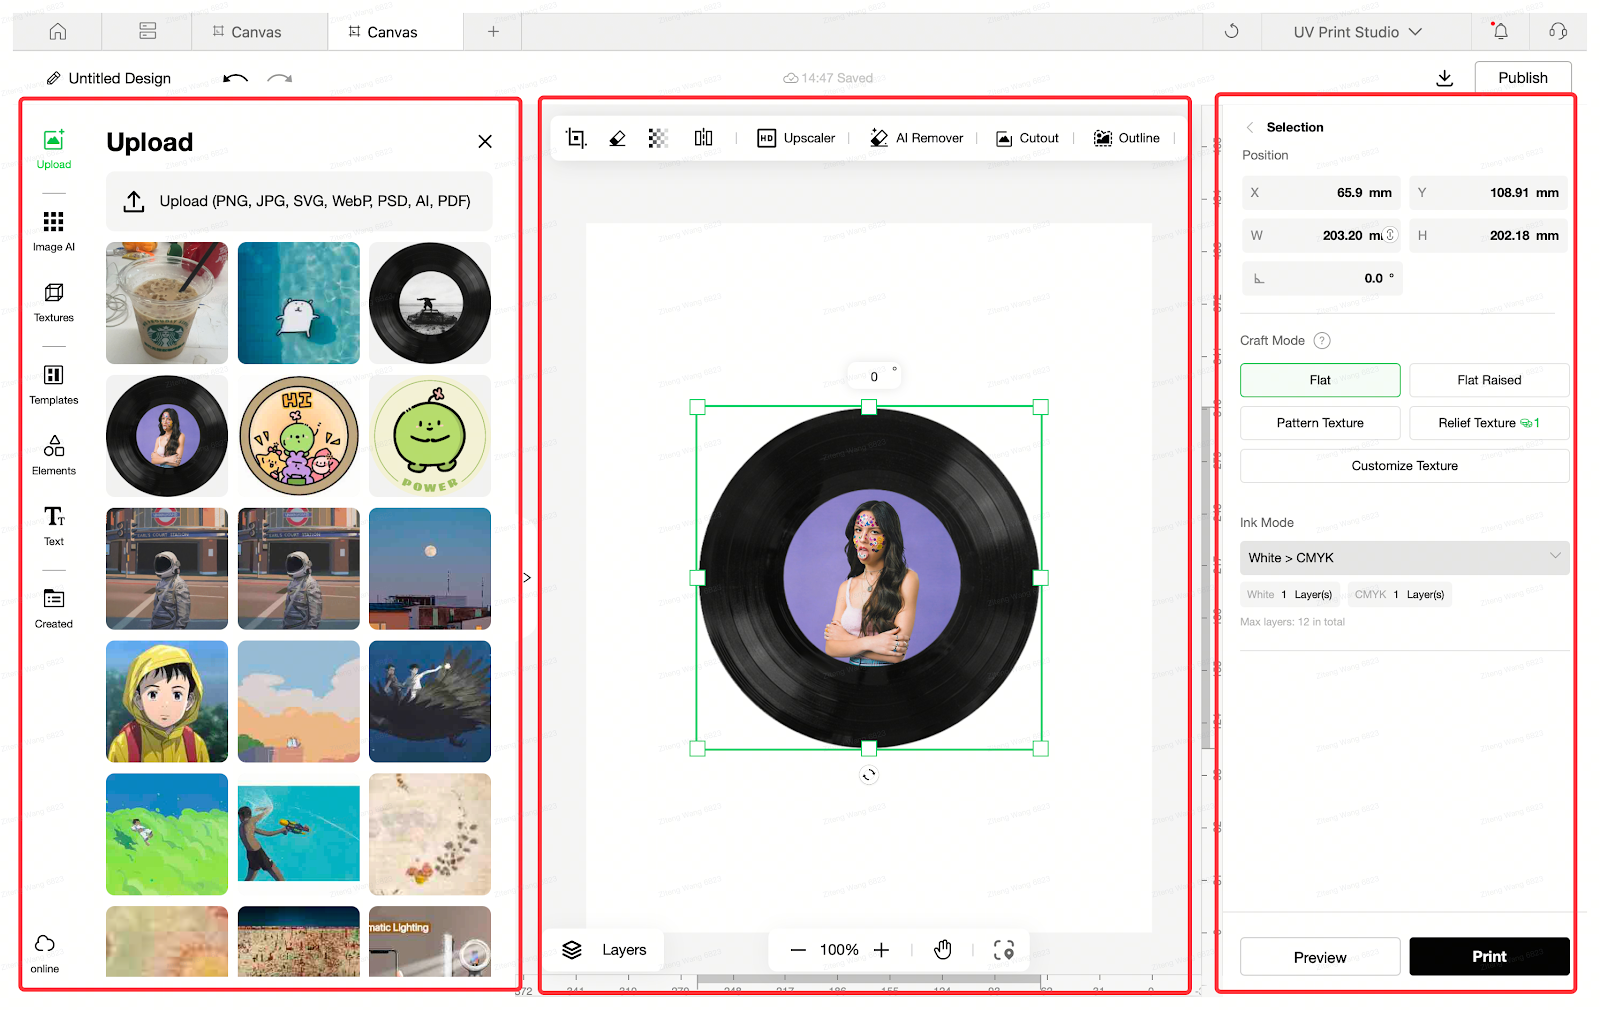
The editor is divided into three main parts:
-
Add content to canvas
-
Canvas & Toolbar
-
Print Settings & Layer Settings

|
Add content to canvas
|
-
Upload
You can upload your own files to add to the canvas. Supported file formats include PNG, JPG, SVG, WebP, PSD, AI, and PDF.
Previously uploaded files will appear below; you can click to re-add them to the canvas or batch-manage/delete them.
|
|
-
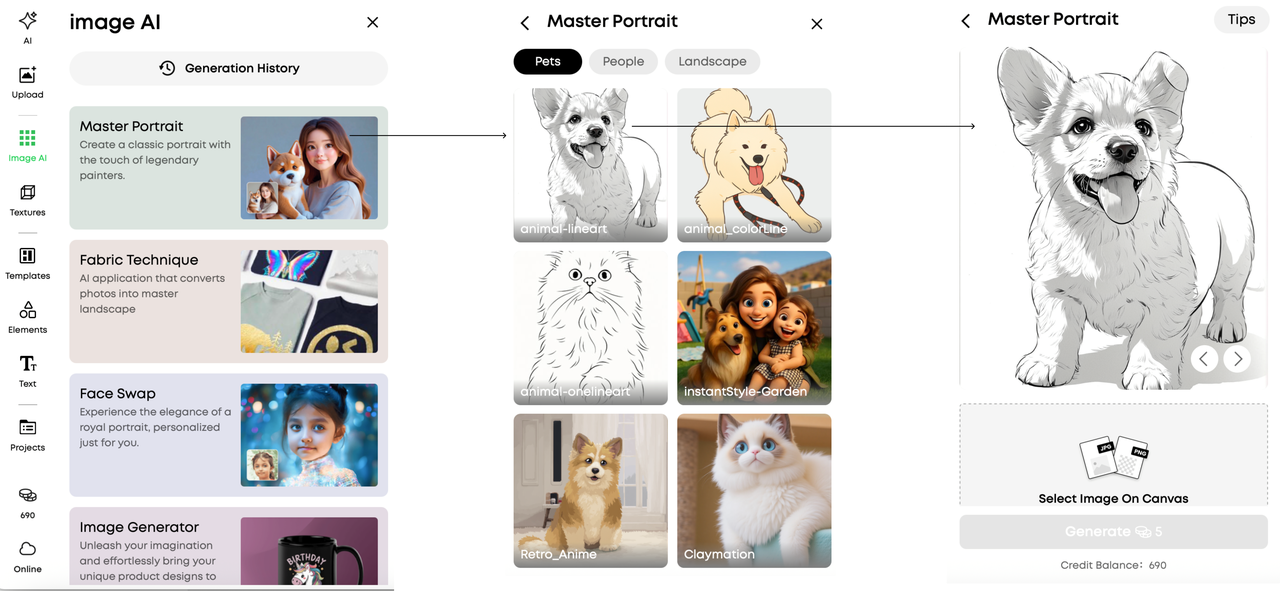
Image AI
Use AI capabilities to create images in various styles. Select a style, upload an image, and generate an AI-remade version.
|
|
-
Textures
Provides a selection of high-quality texture materials that you can apply to your work.
|

|
-
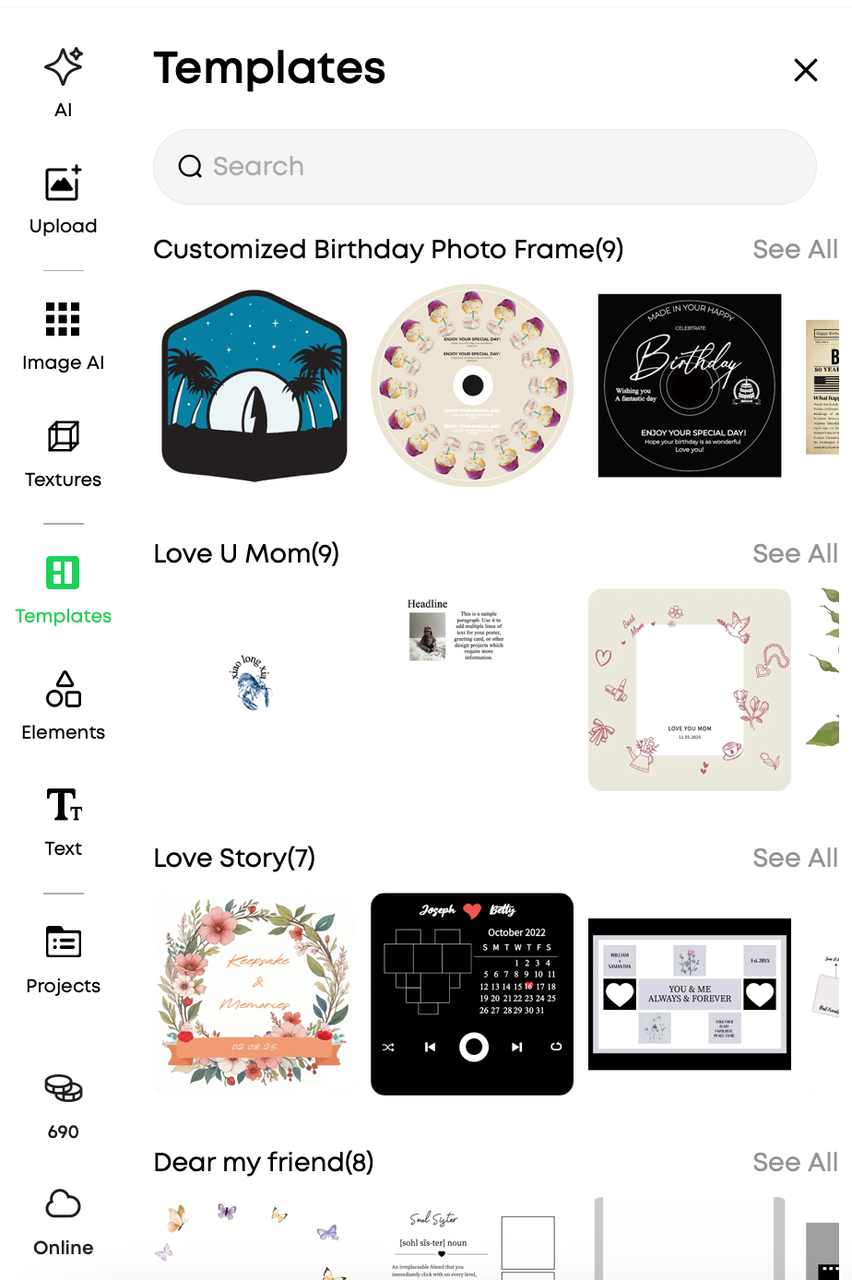
Templates
A variety of ready-to-use templates are available. You can select any template and combine it with your own ideas.
|
|
-
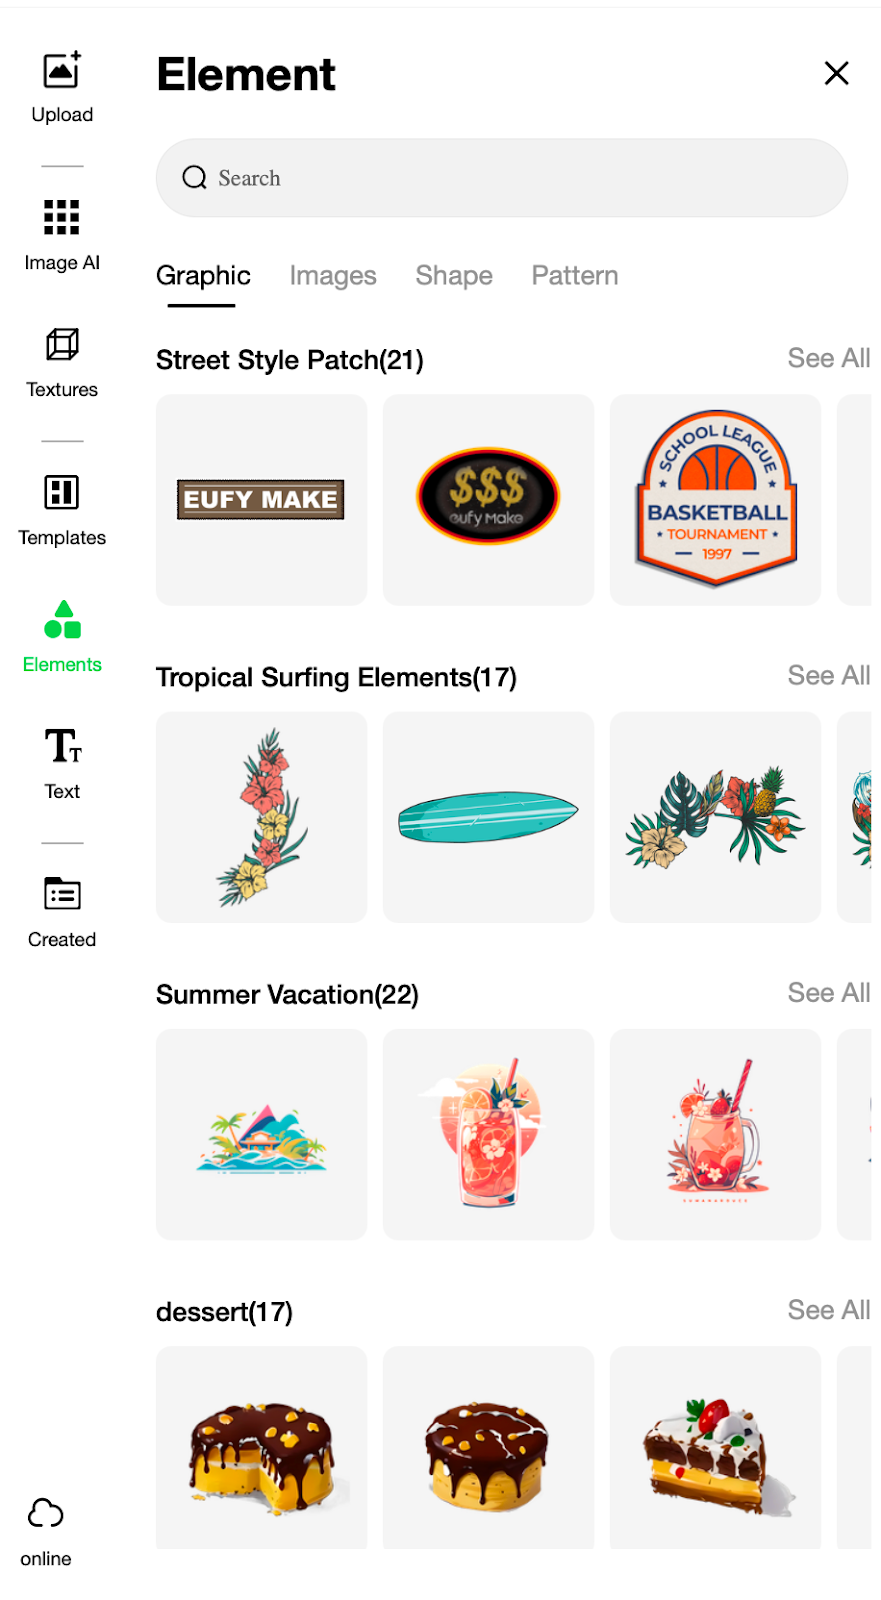
Element
A library of elements such as shapes, graphics, images, and patterns. You can add them as needed.
|
|
-
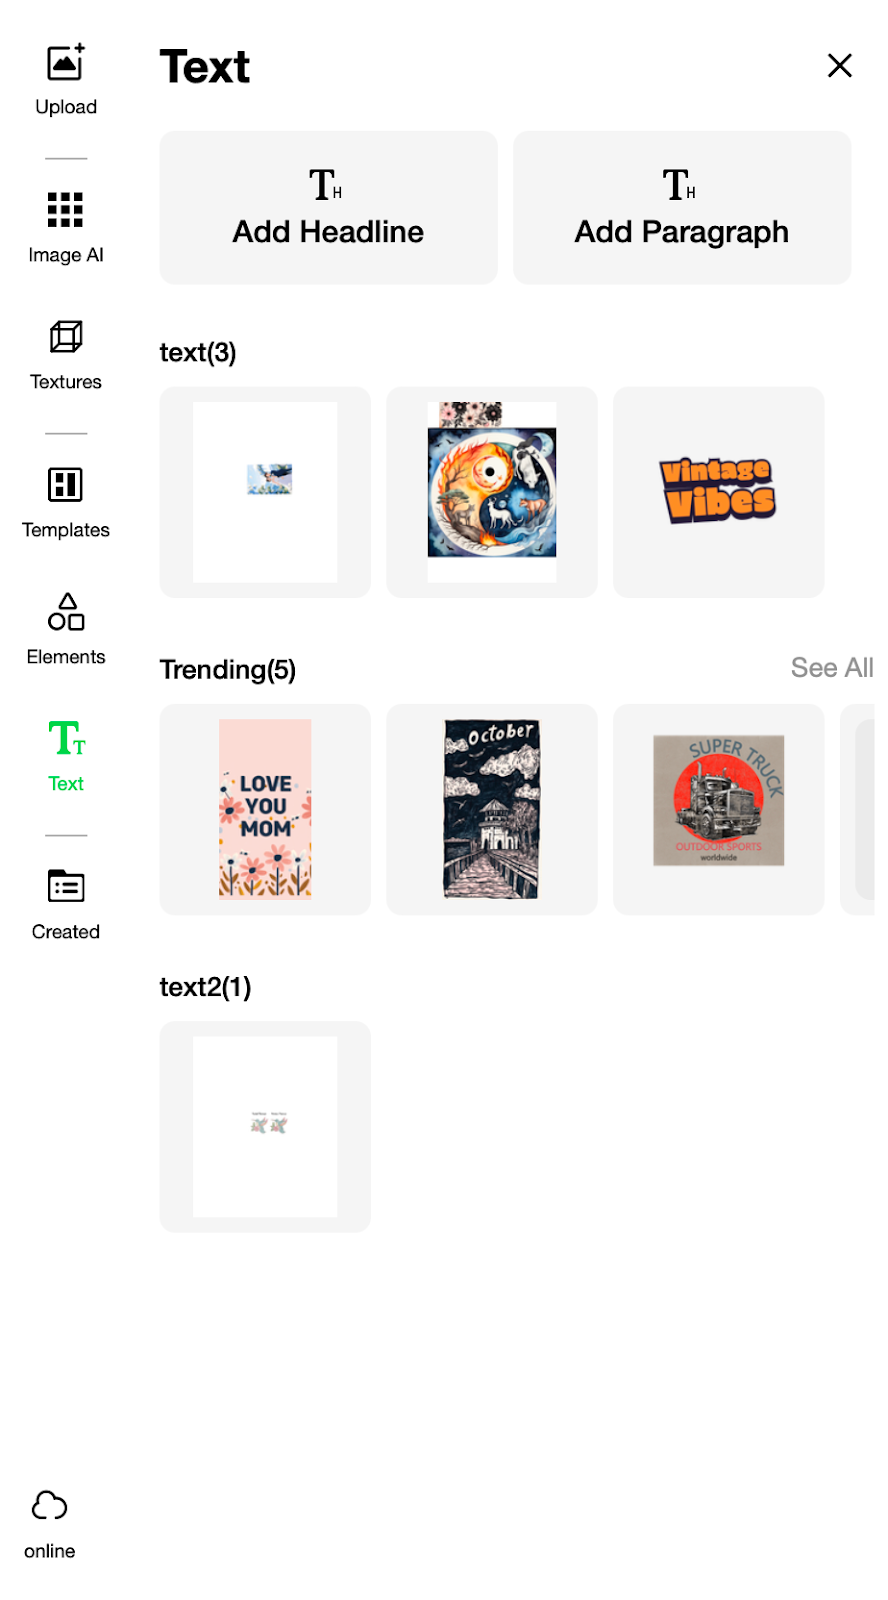
Text
Add text content such as titles or body text. Editable text templates are provided.
You can customize text content and format in the editing area.
|
|
-
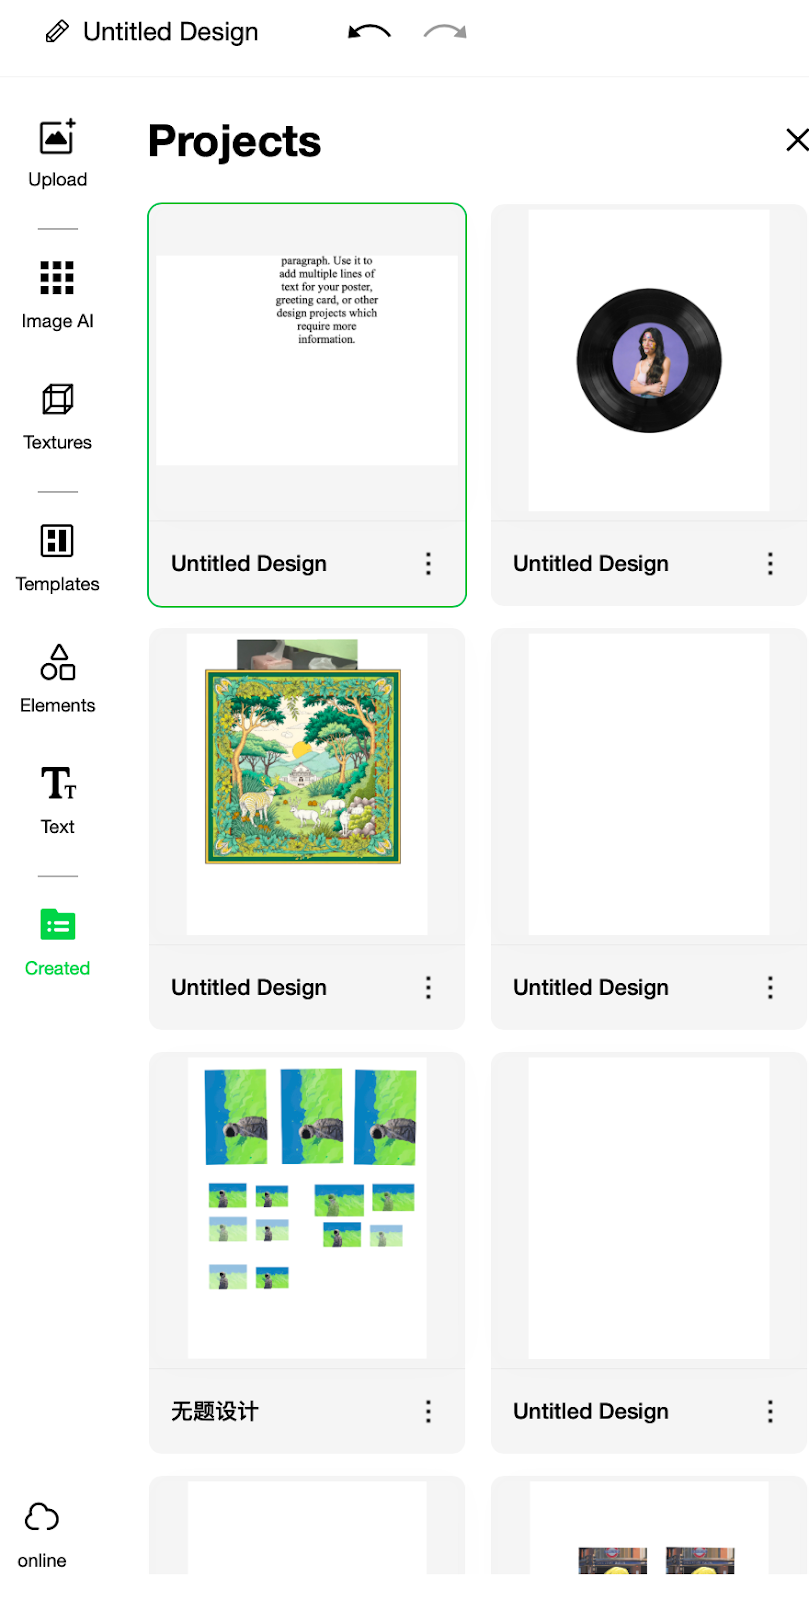
Created
Shows your previously created projects. You can revert to earlier versions or batch-manage projects.
|
|
|
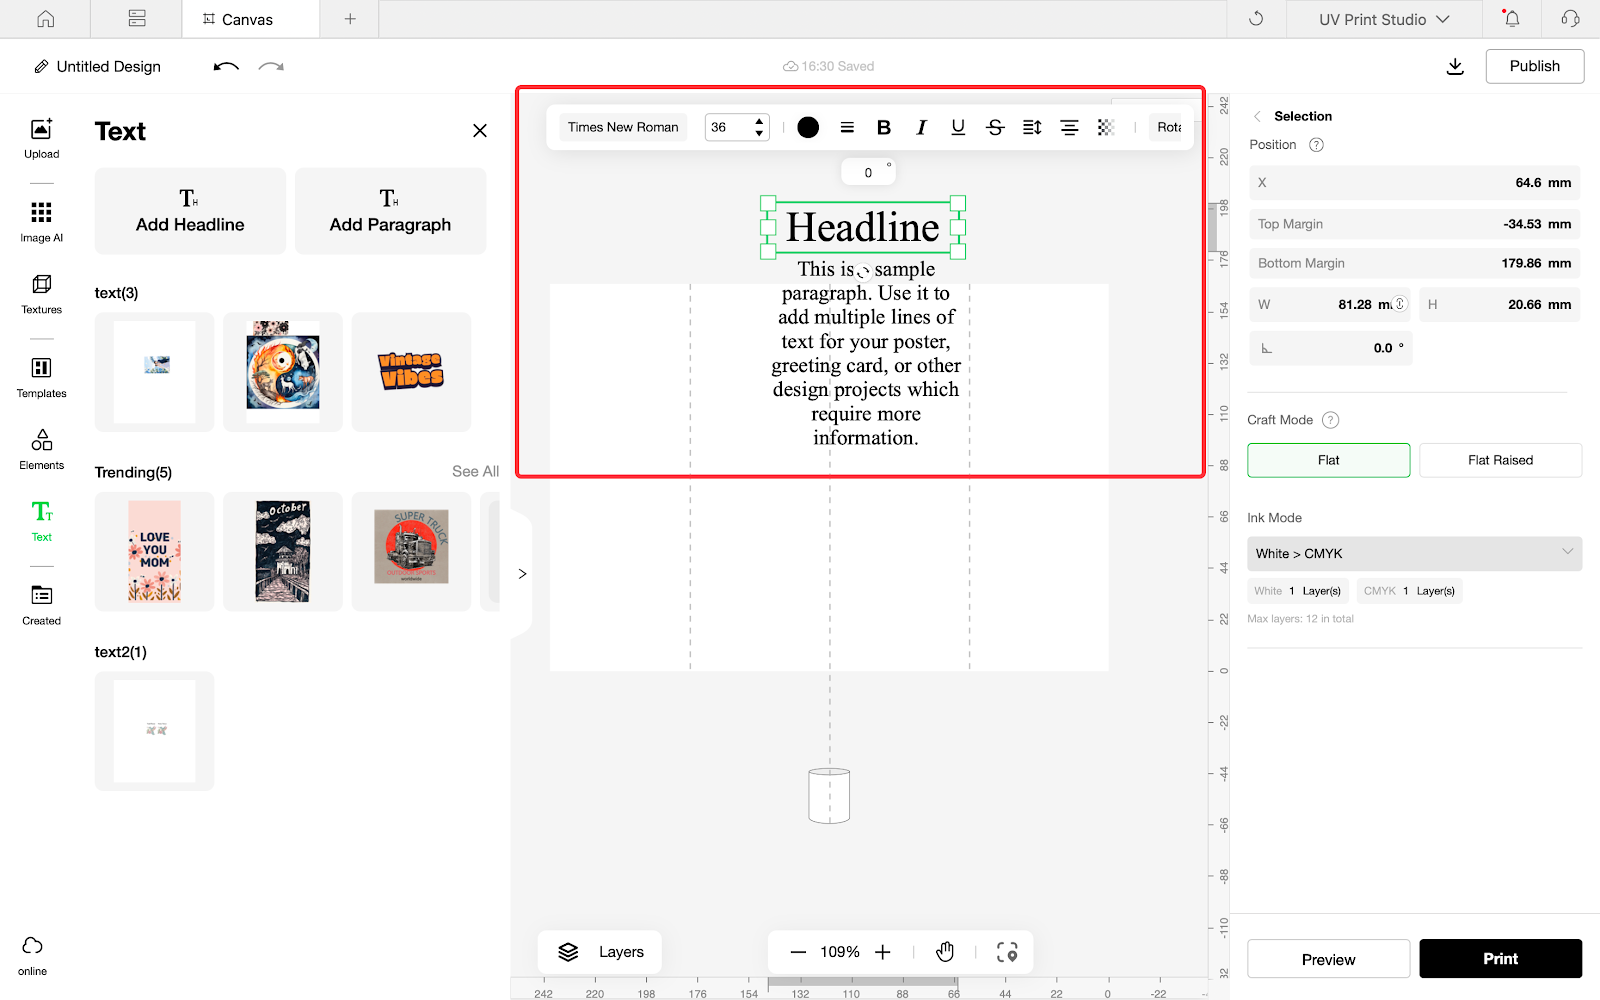
Part 2 Canvas & Tool bar
|
|
Here you can edit your work in detail and use AI tools to assist creation.
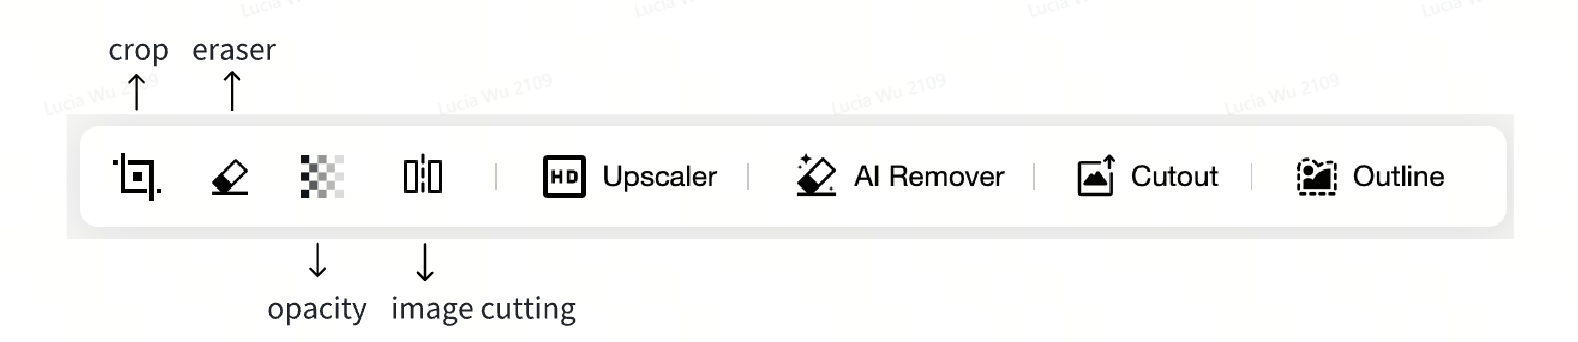
-
Crop - Crop the image; supports multiple shape options
-
Eraser - Erase a selected area
-
Opacity - Adjust image transparency
-
Image Cutting - Split an image evenly into multiple sections
-
Upscaler - Automatically enhances image resolution
-
AI Remover - Removes background and keeps the main subject
-
Cutout - Extract a new layer via AI or brush, and overlay it
-
Outline - Add a custom border to the selected image
|
|
|
Part 3 Print setting & layer setting
|
|
For detailed process and parameter tutorials, see: https://support.eufymake.com/s/article/Guide-to-Process-Design-Parameter-Settings
Click the blank area of the editor:
-
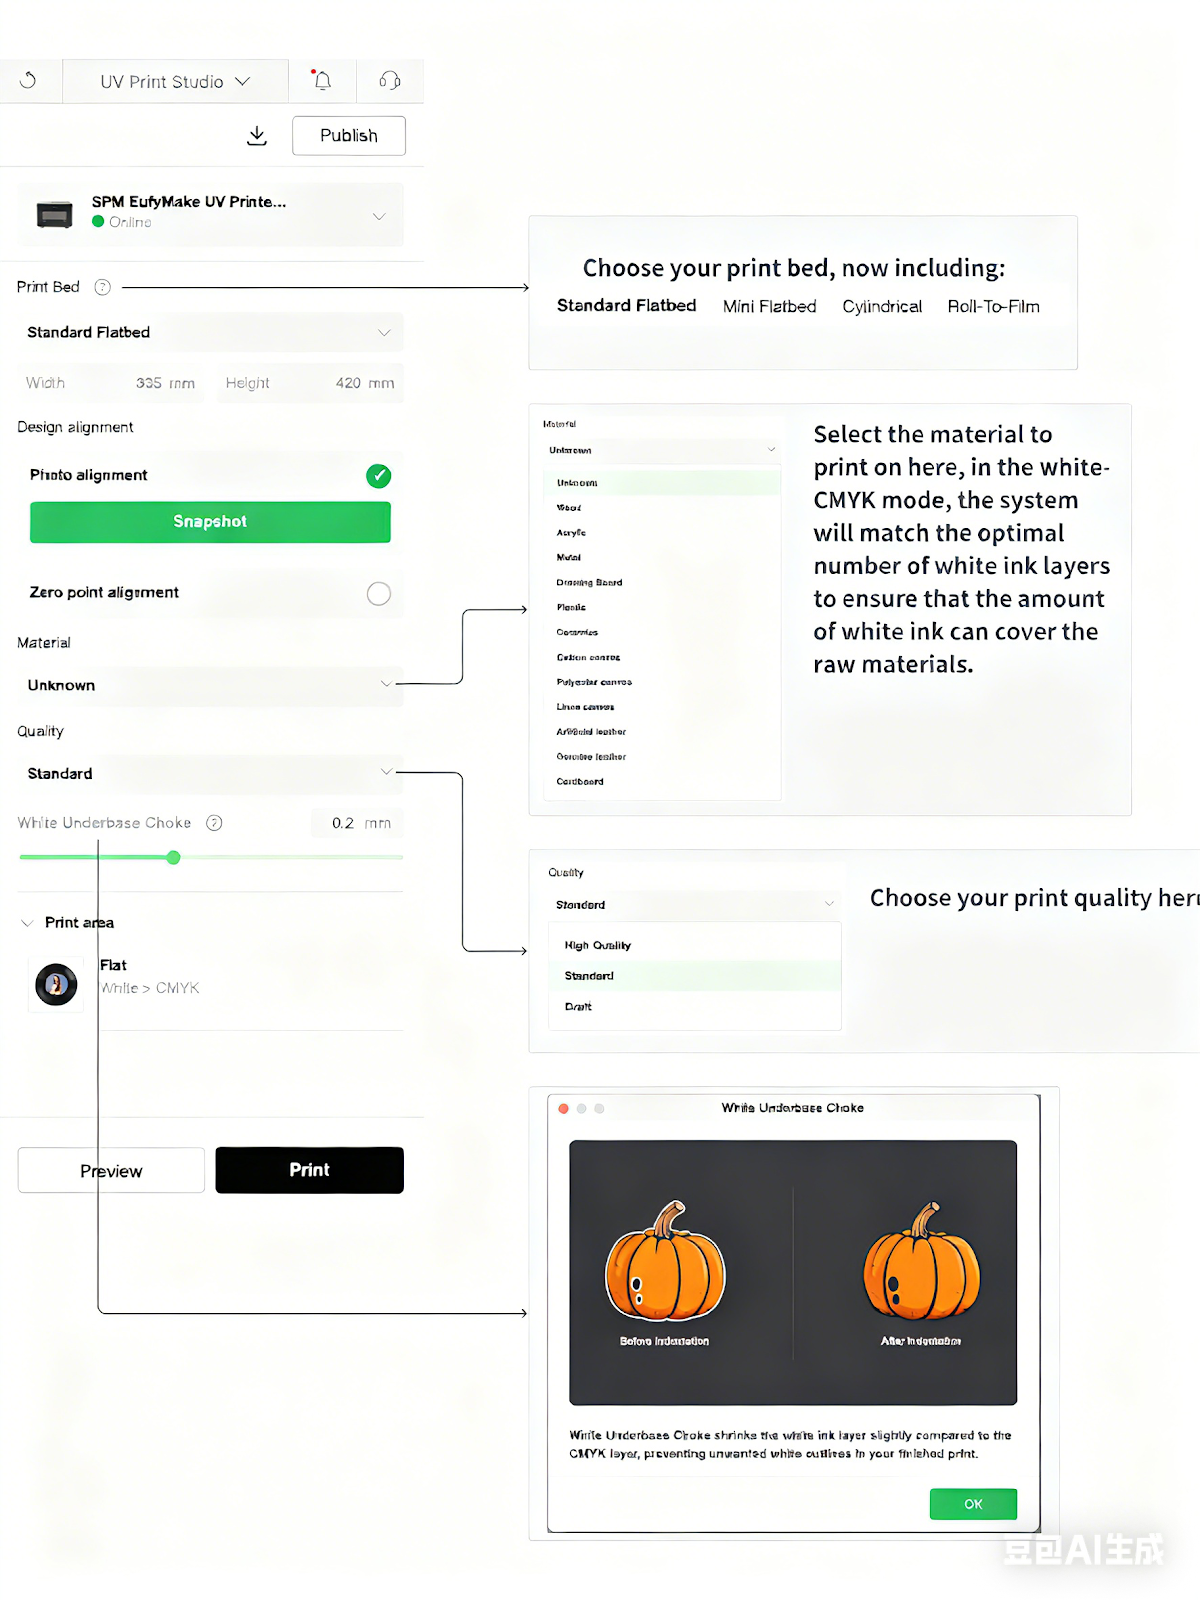
You can select the correct print bed, material, and quality settings.
-
After selecting a material, when in the white-CMYK mode, the system will match the optimal number of white ink layers to ensure the white ink covers the raw materials.
-
The preview area lets you see the printing effect of the corresponding layers in real time. You can preview the printing effect of your design and start your print.
|
|
|
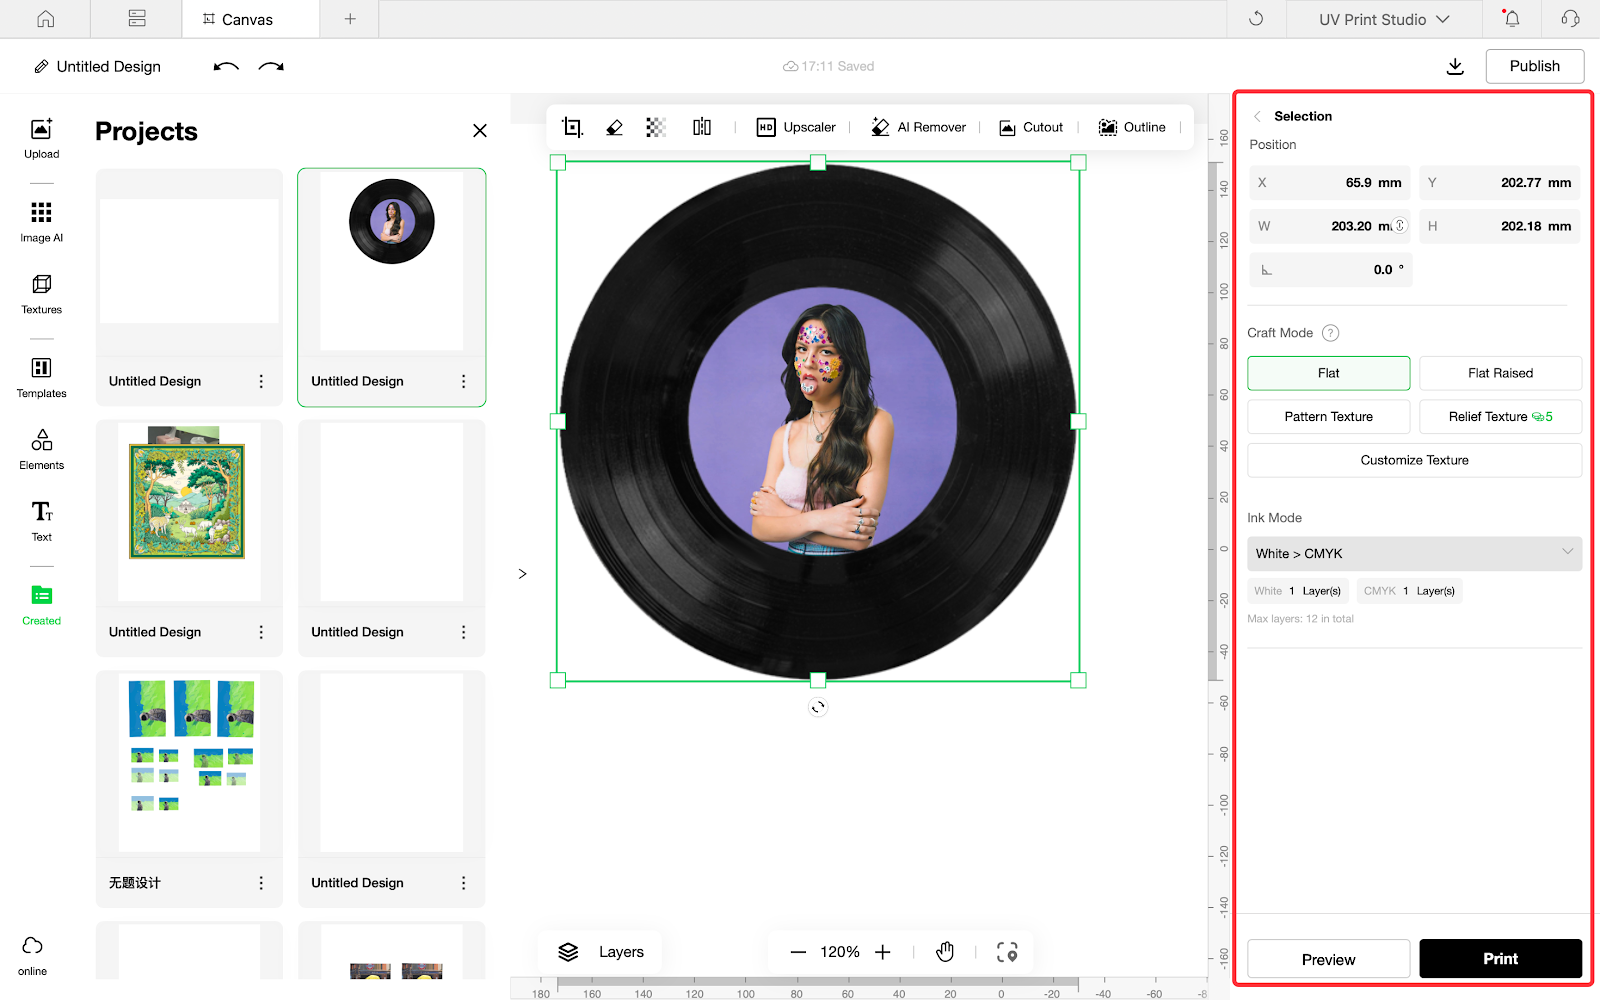
Click an image:
This area shows:
|
|
Keyboard shortcuts available in the web/pc editor
|
Function
|
Shortcut (Mac)
|
Shortcut (Windows)
|
Remarks
|
|
Undo
|
Command + Z
|
Ctrl + Z
| |
|
Copy
|
Command + C
|
Ctrl + C
| |
|
Paste
|
Command + V
|
Ctrl + V
| |
|
Zoom (In)
|
Command + +
|
Ctrl + +
| |
|
Zoom (Out)
|
Command + -
|
Ctrl + -
| |
|
Select All
|
Command + A
|
Ctrl + A
| |
|
Group Layers
|
Command + G
|
Ctrl + G
| |
|
Show/Hide Grid
|
Command + '
|
Ctrl + '
| |
|
Left Align
|
Command + Shift + L
|
Ctrl + Shift + L
| |
|
Center alignment
|
Command + Shift + C
|
Ctrl + Shift + C
| |
|
Right Align
|
Command + Shift + R
|
Ctrl + Shift + R
| |
|
Vertically center alignment
|
Command + Shift + M
|
Ctrl + Shift + M
| |
|
Bottom alignment
|
Command + Shift + B
|
Ctrl + Shift + B
| |
|
Text line break
|
Enter
|
Enter
| |
|
Delete
|
Backspace
|
Backspace
| |
|
Drag the canvas
|
Space + Mouse Drag
|
Space + Mouse Drag
|
Releasing the spacebar does not support canceling the drag
|
|
Crop Canceled
|
ESC
|
Esc
| |
|
Center Zoom
|
Alt
|
Alt
| |
|
Move the object horizontally/vertically
|
shift + Mouse Move Direction
|
Shift + Mouse Move Direction
| |
|
Select Through
|
Command + Mouse Click
|
Ctrl + Mouse Click
| |
|
Print
|
Command+P
|
Ctrl + P
| |
|
Zoom in and out of content
|
+ / -
|
+ / -
| |
|
Add Selection Object
|
Shift + Multi-select (Click to Select Multiple)
|
Shift + Multi-select (Click to Select Multiple)
| |
|
Zoom Canvas
|
Command + Mouse Scroll Wheel
|
Ctrl + Mouse Scroll Wheel
| |
|
Duplicate
|
Command + Shift + V
|
Ctrl + Shift + V
| |
|
Scroll the canvas up and down
|
option + Mouse Scroll Wheel
|
Alt + Mouse Scroll Wheel
| |
Creating on the APP
On the app, you can complete creations easily and quickly. Although less comprehensive than the PC editor, it is highly convenient for fast creation and printing.
Frequently Asked Questions
Q1: Will my edited or printed content be visible to the backend or leaked?
A: According to the User Privacy Agreement, we strictly protect user privacy. Your private creations are not visible to others unless you choose to publish them.
Q2: Will my AI-generated data be used for AI training?
A: According to the AI Usage Agreement, we do not use user data for training. In the future, an AI data donation program may be launched, and only voluntarily donated data will be used.


