Applicable Product: eufyMake UV Printer E1
Video Guide: https://youtu.be/3DZgXasYgH8?si=lGB8q3p3Mzt8QZhz
Problem Description
When changing device users, transferring or reselling the printer, or troubleshooting certain software issues, you may need to remove the printer from the current account.
You can either:
-
Remove the printer from the current account without resetting it
-
Remove the printer and restore it to factory settings
Choose the appropriate method based on your situation.
Method 1: Remove the Device through the software
This is the recommended method when the printer is connected and can be accessed through the eufyMake software.
-
Open Device Management
Open the eufyMake App or eufyMake Studio and go to the Device Management page.
-
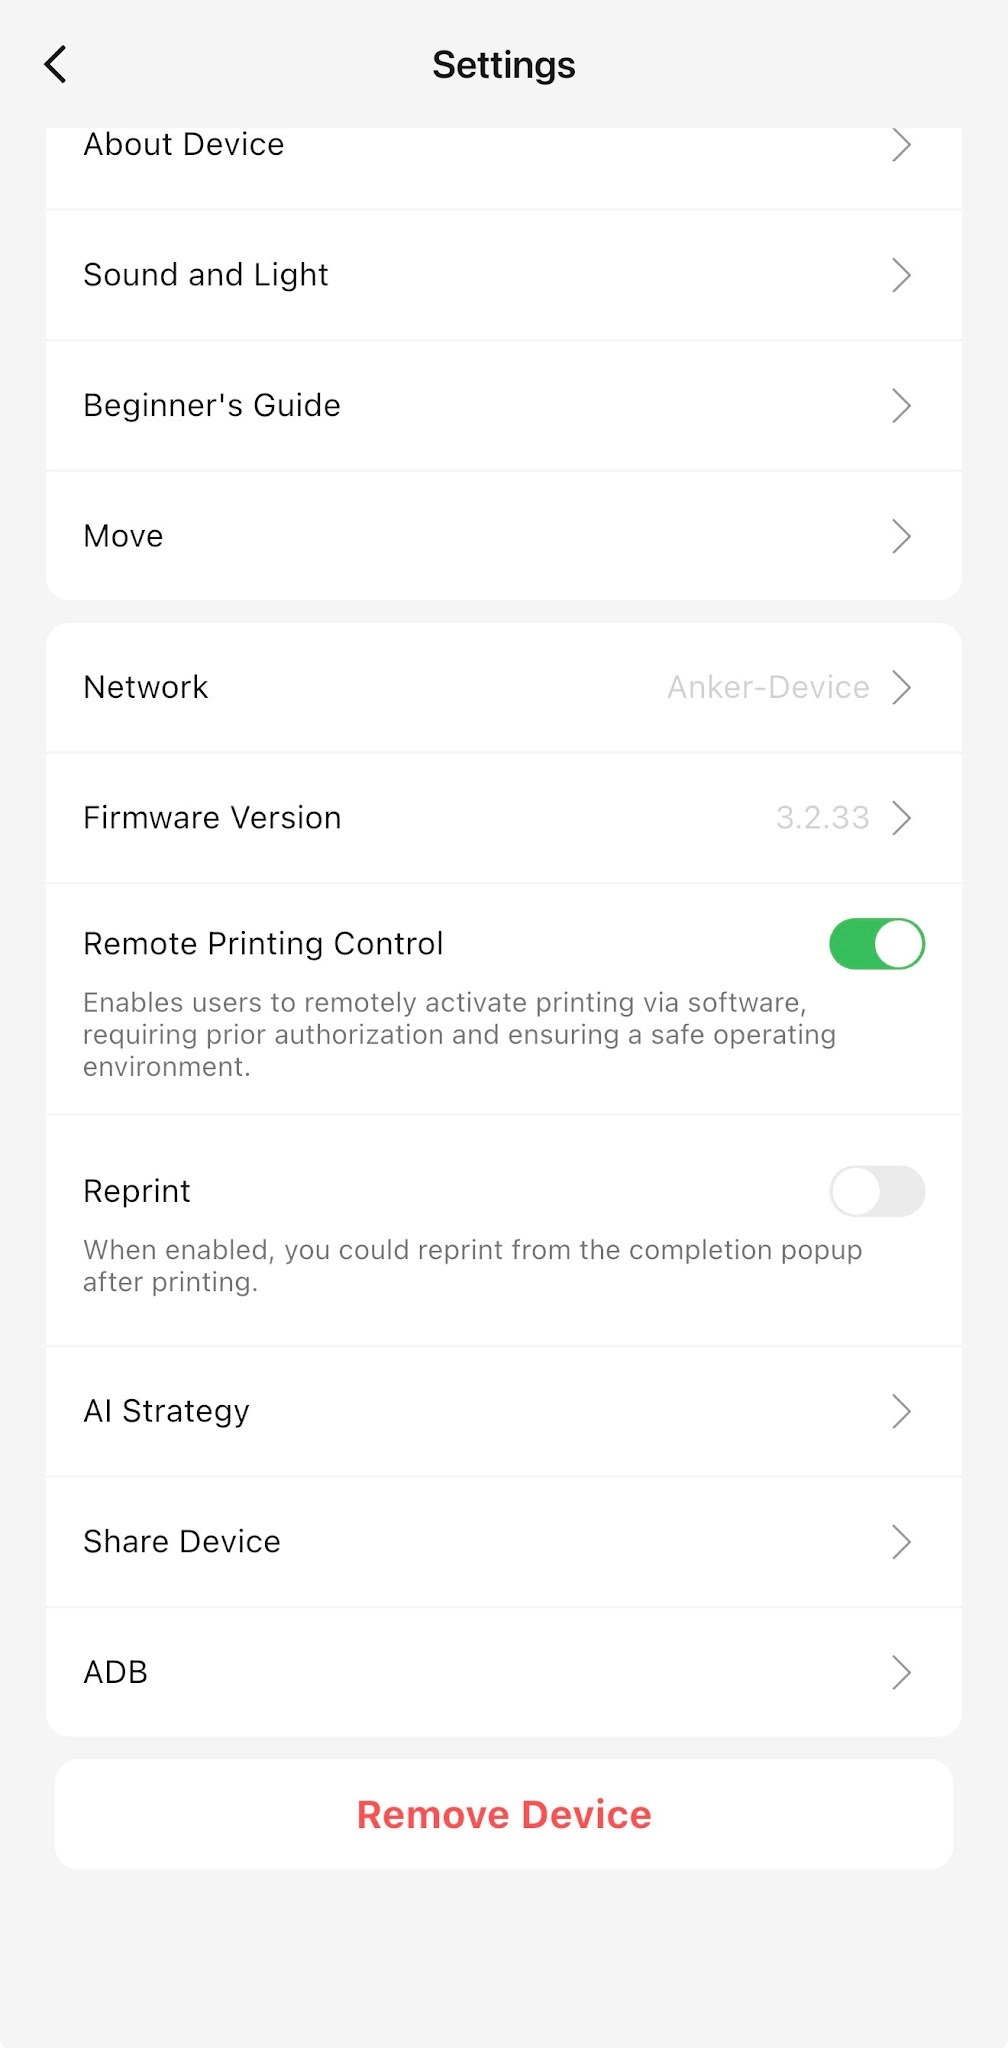
Select Remove Device
Open the device settings and select Remove Device.
-
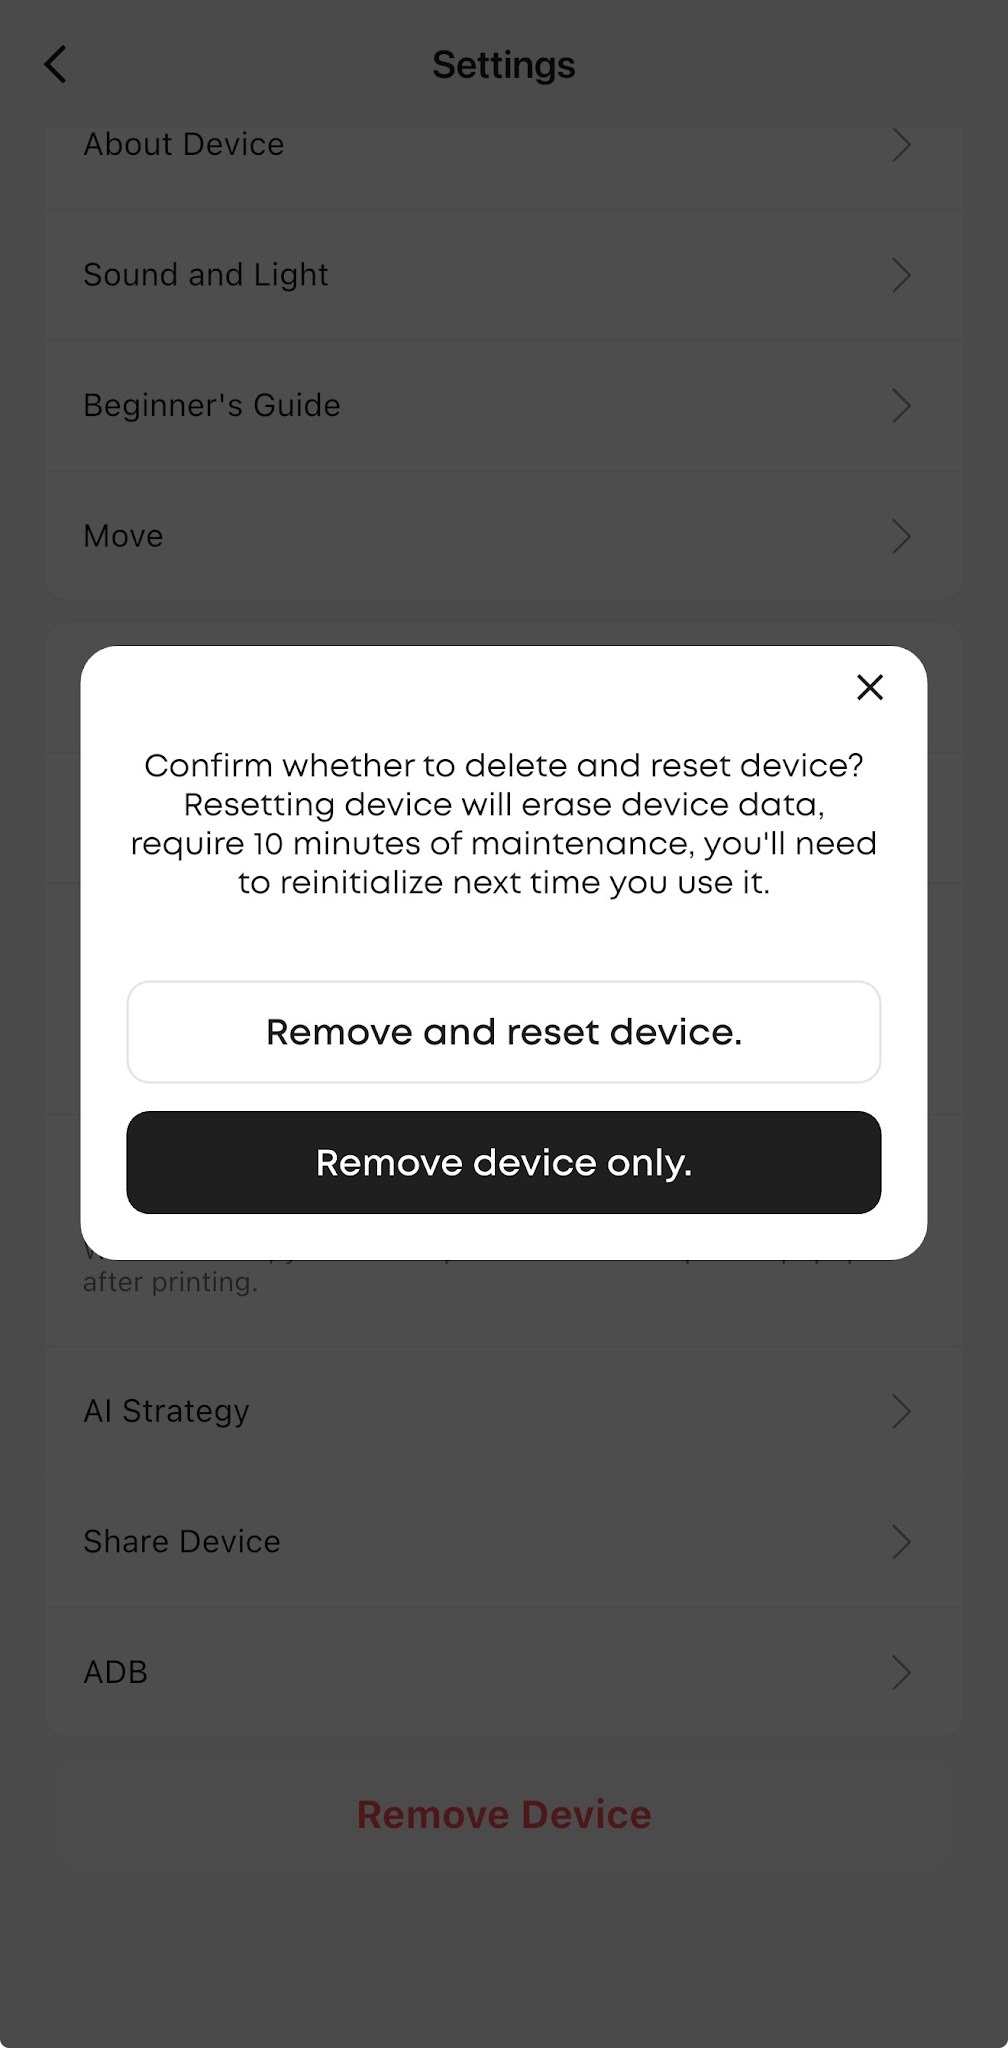
Choose an Unbinding Option
A confirmation window will display two options.
Choose the option that matches your needs.
Option 1: Remove Device
What it does:
-
Removes the printer from the currently signed-in account
-
Retains the printer’s existing data and network configuration
-
Does not restore the printer to factory settings
When to use it:
Use this option when you no longer want to manage the printer from the current account, but the printer will continue to be used or may be bound again later.
Option 2: Remove and Reset Device
What it does:
-
Removes the printer from the current account
-
Restores the printer to factory settings
-
Deletes all user data and network configuration stored on the printer
When to use it:
Use this option when:
-
Transferring or reselling the printer
-
Troubleshooting a complex device issue
-
Performing a completely fresh setup
Note: After you select Remove and Reset Device, the printer first performs a cleaning and moisturizing cycle. It then deletes the stored user data and restarts automatically. The complete process takes approximately 10 minutes.
Method 2: Force a Factory Reset Using the Printer Buttons
Use this method when the software cannot connect to the printer or the normal software controls are unavailable.
1. Locate the Buttons
Locate the following buttons on the printer:
-
Power Button
-
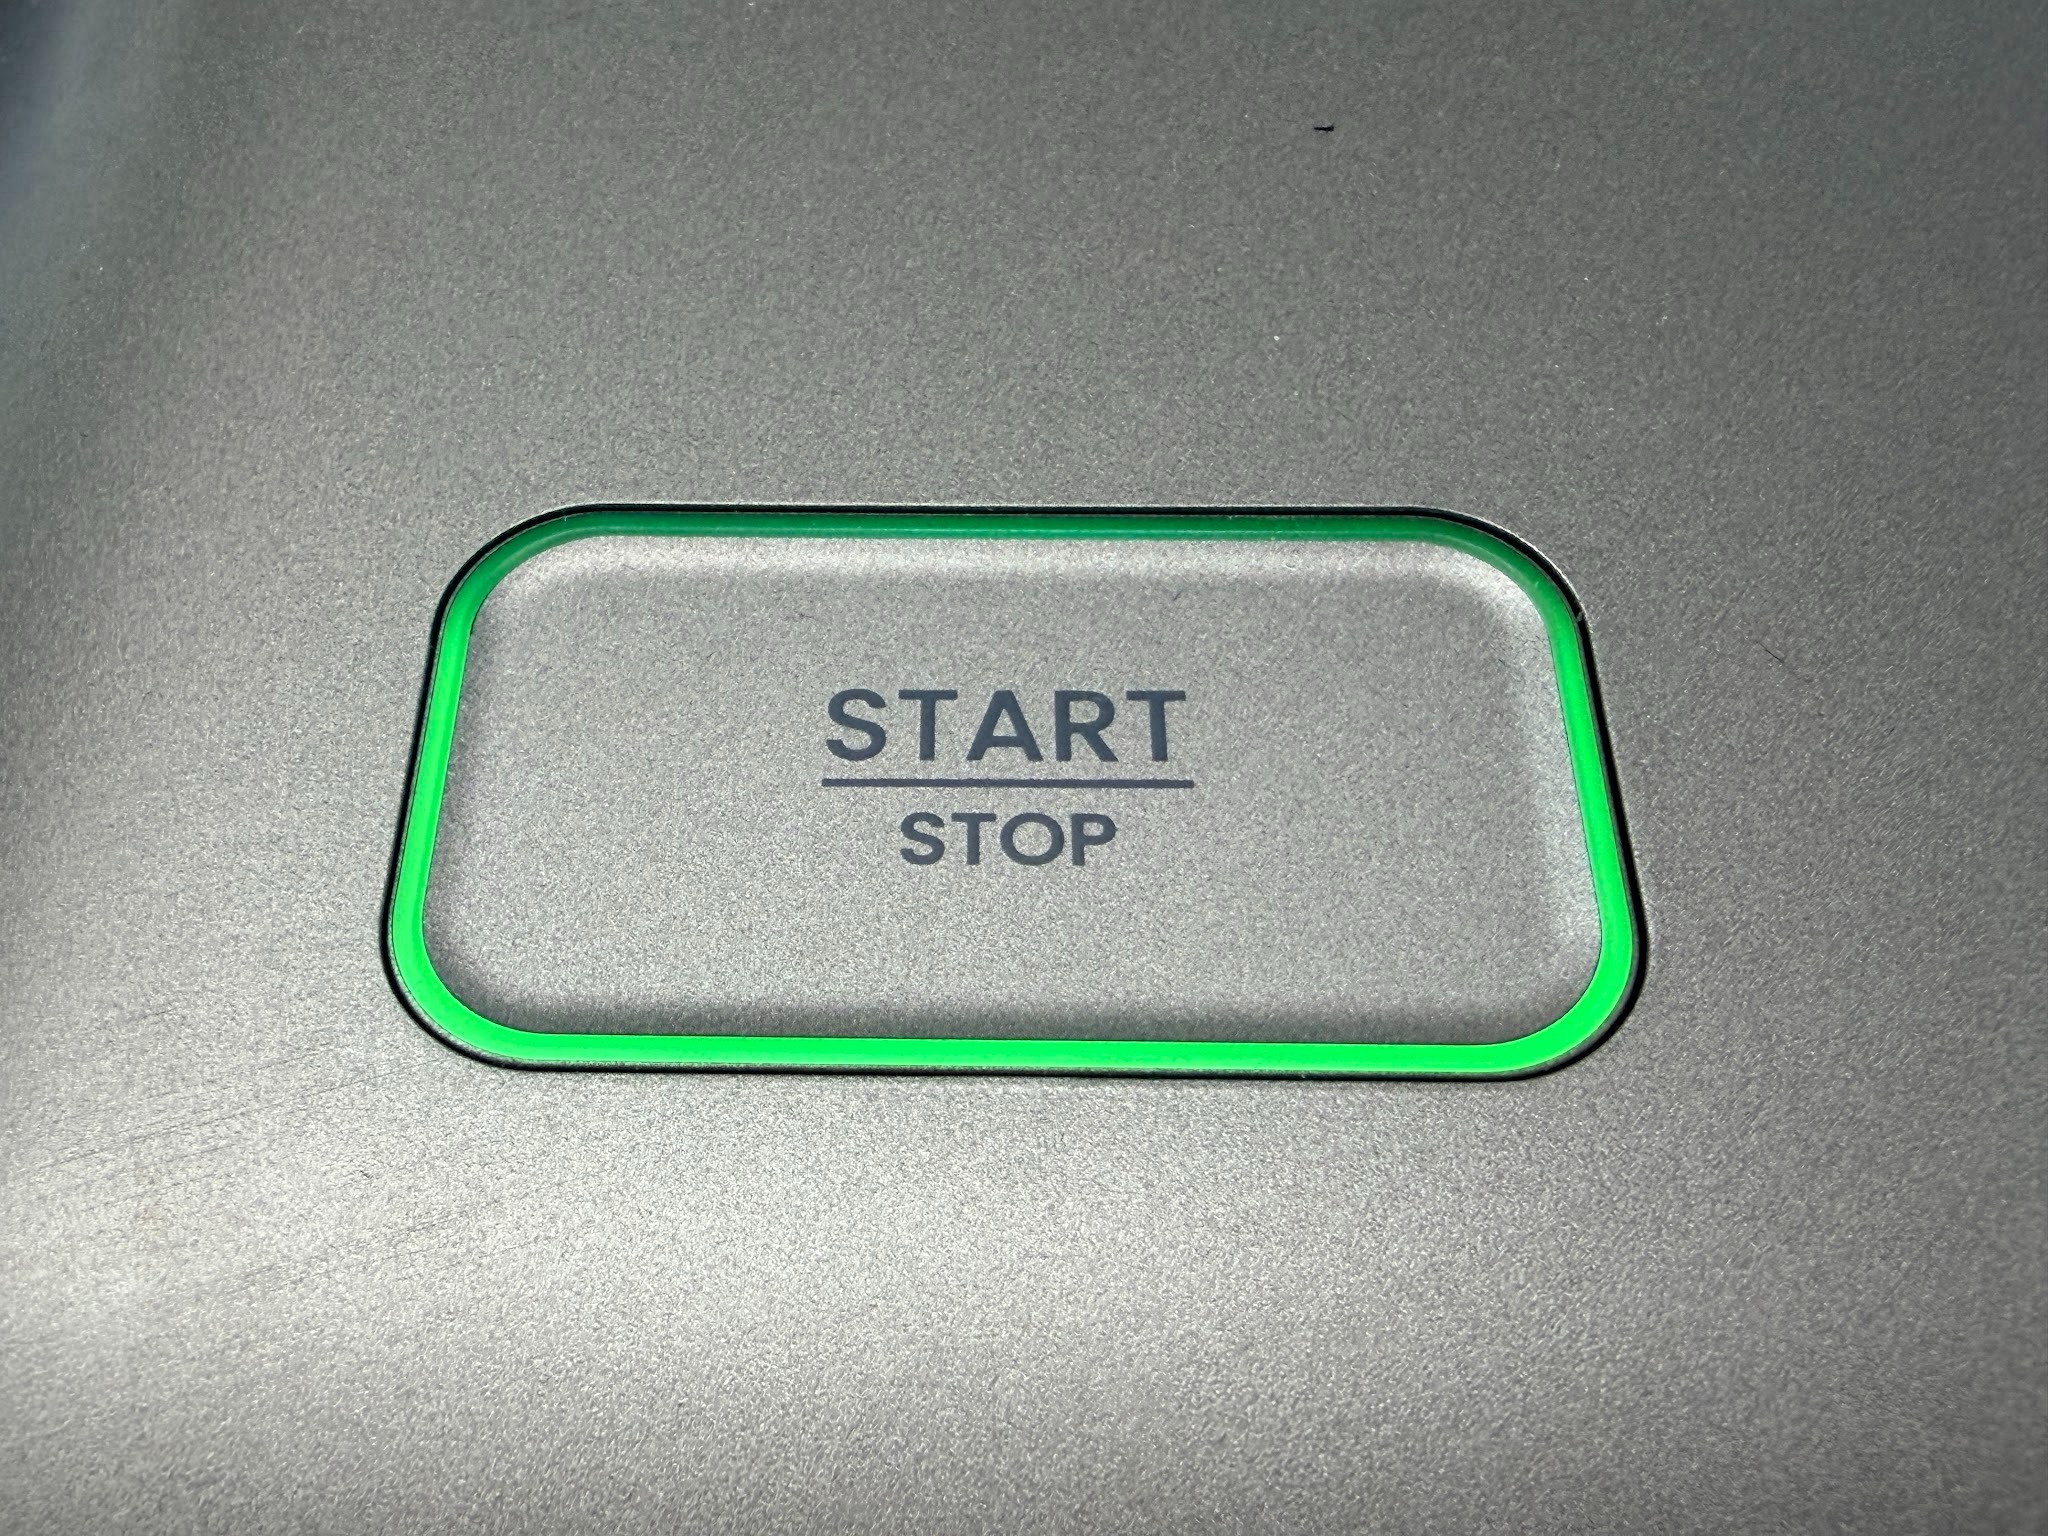
Start/Stop Button
Start the Factory Reset
Press the Power Button, then immediately press and hold the Start/Stop Button.
Continue holding both buttons for more than 5 seconds.
3. Wait for the Reset Process to Complete
After the printer receives the command, it will:
-
Perform a cleaning and moisturizing cycle
-
Delete all stored user data
-
Restore the factory settings
-
Restart automatically
The complete process takes approximately 10 minutes.
Do not disconnect power during this process.
4. Confirm the Reset
After the printer restarts, it has been restored to its factory state and is ready to be set up again.
⚠️ Device Status After Factory Reset (Important)
Device-Side Status:
-
After restart, the device will be in blue light pairing mode, waiting to be re-bound.
-
Factory reset is an independent self-cleaning action on the device. The device has been unbound, and the binding relationship with backend services has been disconnected.
Client-Side Status:
-
The client (App) may still show the device's binding record, with the device displayed as offline.
-
This is a display artifact caused by the client's local cache. The device is already unbound from the backend, and this does not affect re-binding.
Regarding the Offline Display:
-
The residual device on the client shows as offline because the device has been factory reset and is no longer connected to its previous network.
-
Once the device reconnects to the network and completes network configuration and binding, it will return to normal online status.
Solution:
-
Method 1 (Recommended): Re-bind directly via the App — ignore the residual device record on the client. The device is in blue light pairing mode and can be directly discovered and re-bound by the App.
-
Method 2: Select "Remove Device" in the App first, then re-bind — if you wish to clear the residual record, first select "Remove Device" in the App's device list to clean it up, then re-bind normally.
Important Notes
Back Up Any Required Data
A factory reset permanently deletes all user data stored on the printer, including:
-
Stored print jobs
-
Network configuration
-
Account binding information
-
Other device settings
Before proceeding, confirm that there is no information you need to retain.
Complete the Initial Setup Again
After a factory reset, the printer behaves like a new device.
You must complete the following setup procedures again:
-
Network configuration
-
Account binding
-
Initial device setup
-
Ink injection