Fault Phenomenon
Temperature and humidity error
Error code:
0xFD0111000D
0xFD01110001
0xFD01110002
0xFD01110003
Cause Analysis
-
The ambient temperature or humidity of the printer is out of the normal operating range : Temperature 15°C~35°C, Humidity 20%~85% .
-
The connection line is loose, and a loose connection line will report: 0xFD01110001, 0xFD01110002, 0xFD01110003 error codes.
-
The temperature and humidity sensor is contaminated.
Required tools
-
Disassembly tool or hard card
-
1.5mm Hex Key Screwdriver
-
Temperature and Humidity Sensor
Troubleshooting Steps
-
Check the indoor ambient temperature and humidity. If an external temperature and humidity sensor is available, place it near the printer’s DC power connector.
-
Wait for more than 3 hours to allow the environment to stabilize.
-
After the waiting period, upload the printer logs and provide a photo showing the readings from the external temperature and humidity sensor placed near the printer.
-
If the external sensor readings exceed or approach the printer’s normal operating limits (temperature 15°C–35°C, humidity 20%–85%), the printer will prohibit print task initiation. This error pop-up is a normal protective mechanism, and printing is disabled when environmental conditions are outside the supported range.
-
If the external temperature and humidity readings are within the normal range and are not approaching the critical thresholds (15°C, 35°C, 20%, or 85%), contact after-sales service or technical support to analyze the printer logs.
-
If after-sales or technical support confirms that the temperature and humidity sensor is contaminated, the temperature and humidity sensor sub-board must be replaced. https://support.eufymake.com/s/article/UV-Printer-E1-Replacement-SOP-of-Temperature-and-Humidity-Sensor (Log verification by R&D is required before replacement.)
If the error pop-up displays error codes 0xFD01110001, 0xFD01110002, or 0xFD01110003, this indicates that the temperature and humidity sensor is not communicating properly. Proceed as follows:
-
Power off the printer and check whether the connection cable is loose or damaged. Disassemble the right-side casing and the upper casing.
For casing disassembly instructions, refer to the https://support.eufymake.com/s/article/Printer-Cover-Disassembly-and-Assembly-SOP
-
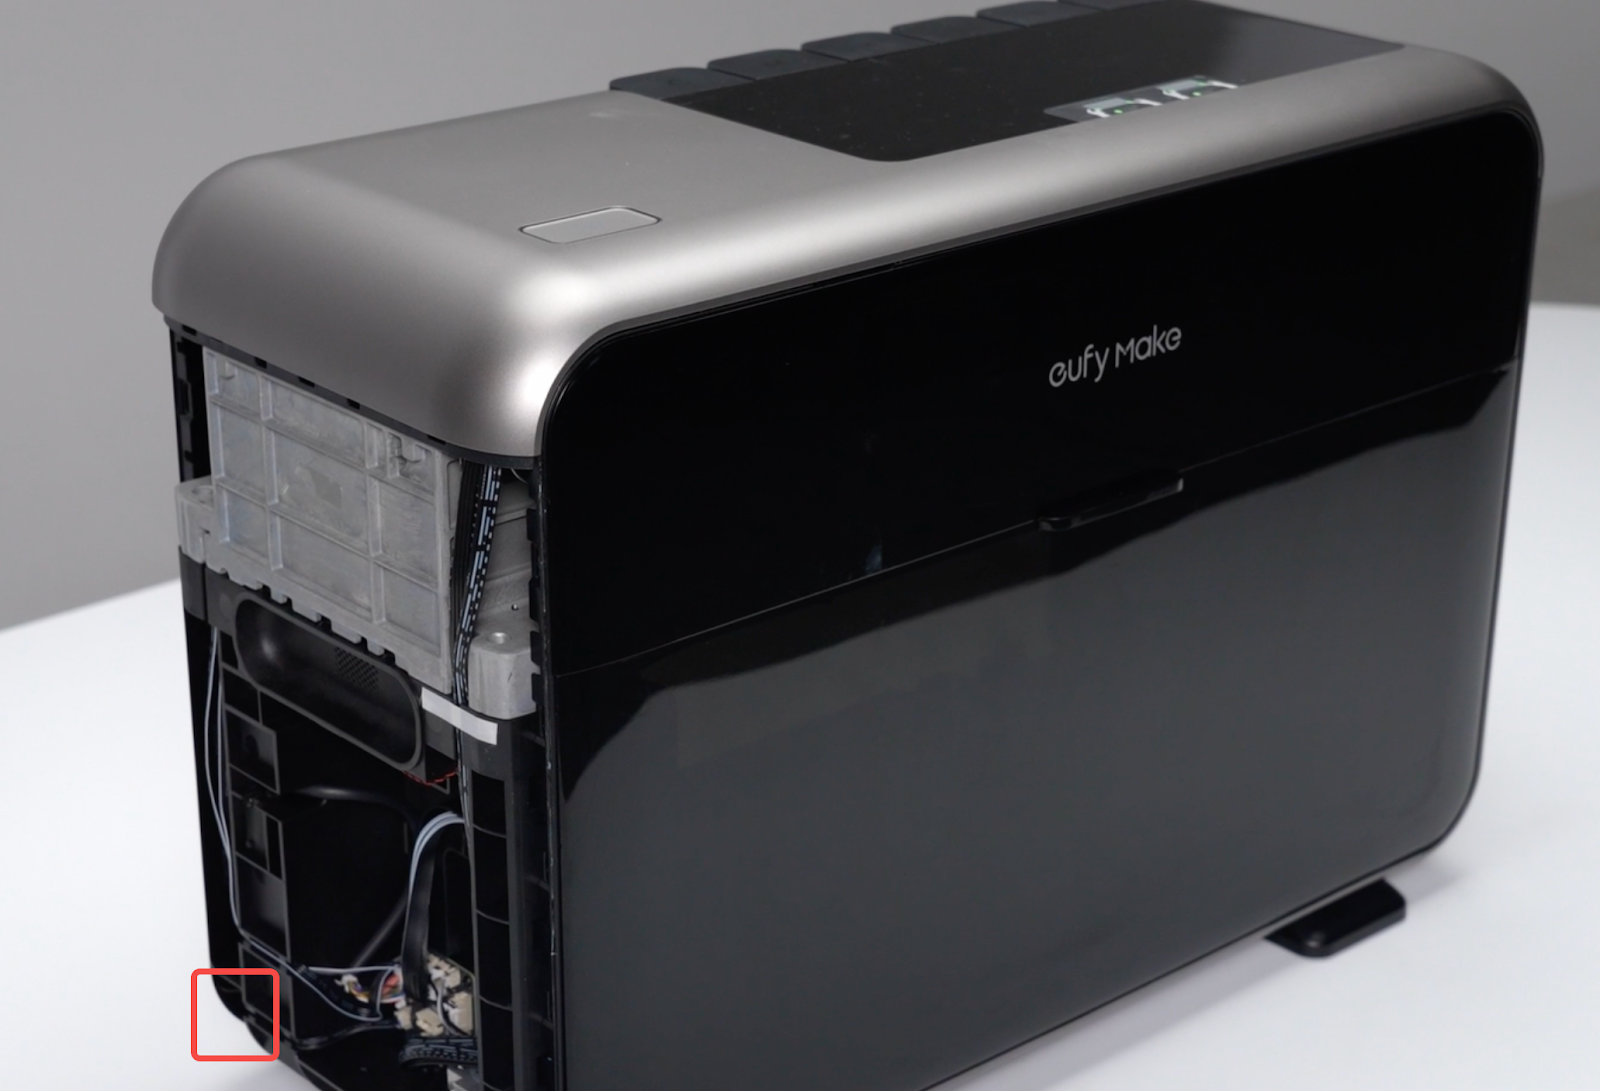
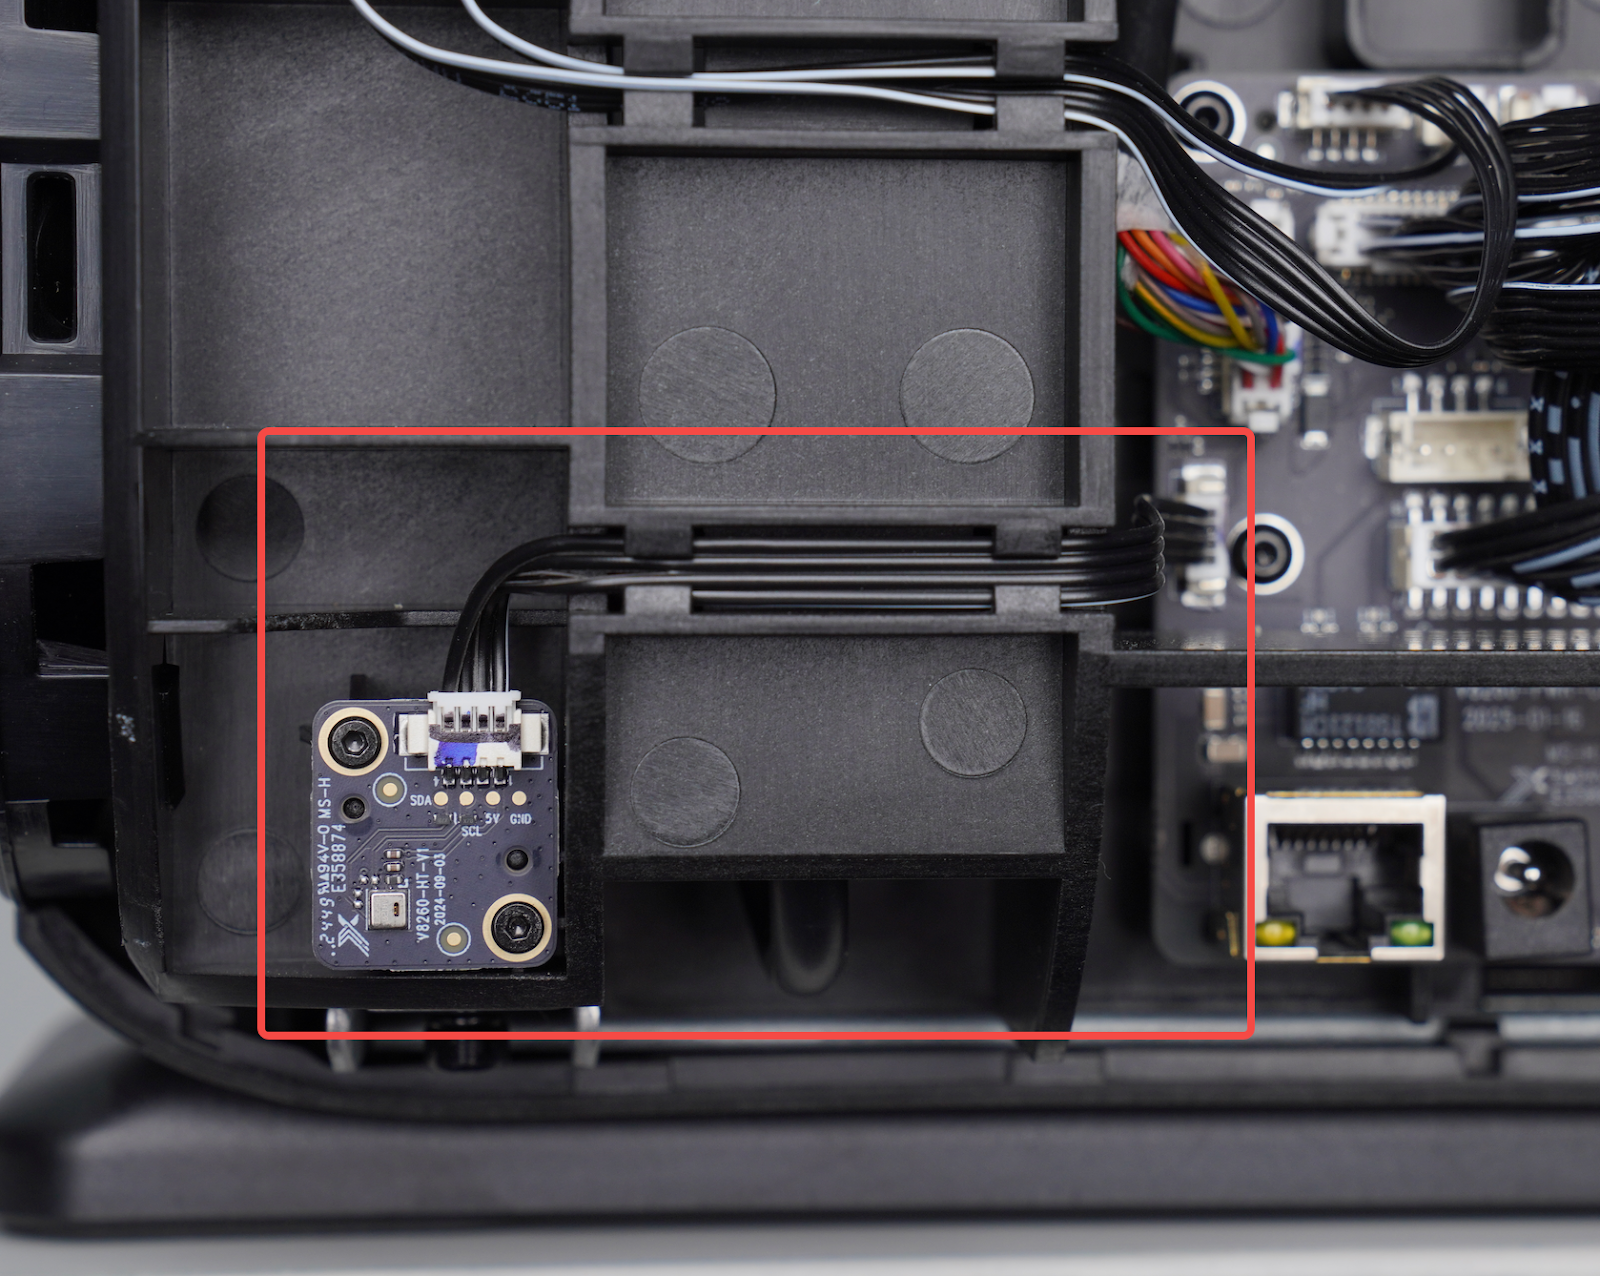
Check whether the temperature and humidity sensor connection cable is securely plugged in. The sensor cable is located inside the housing at the left rear of the machine, to the left of the power socket.
-
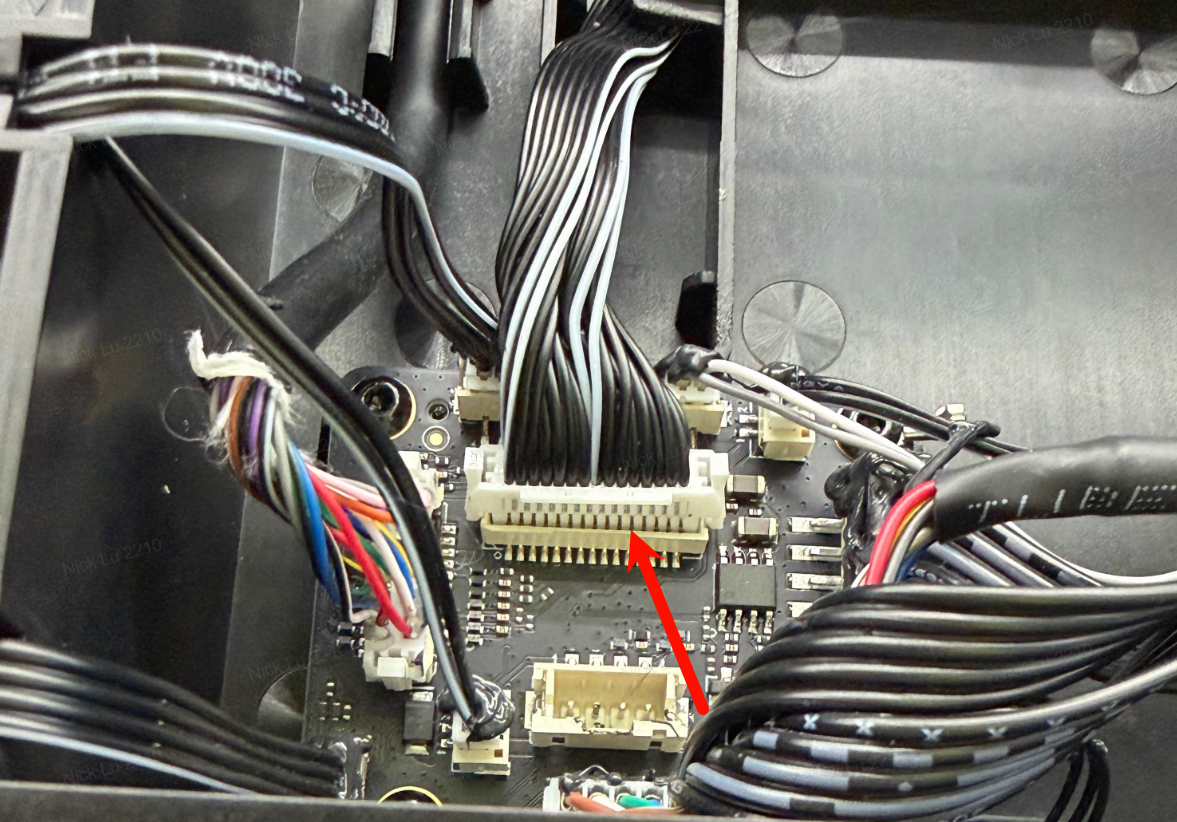
Check the signal connection cable from the motherboard to the power supply board:
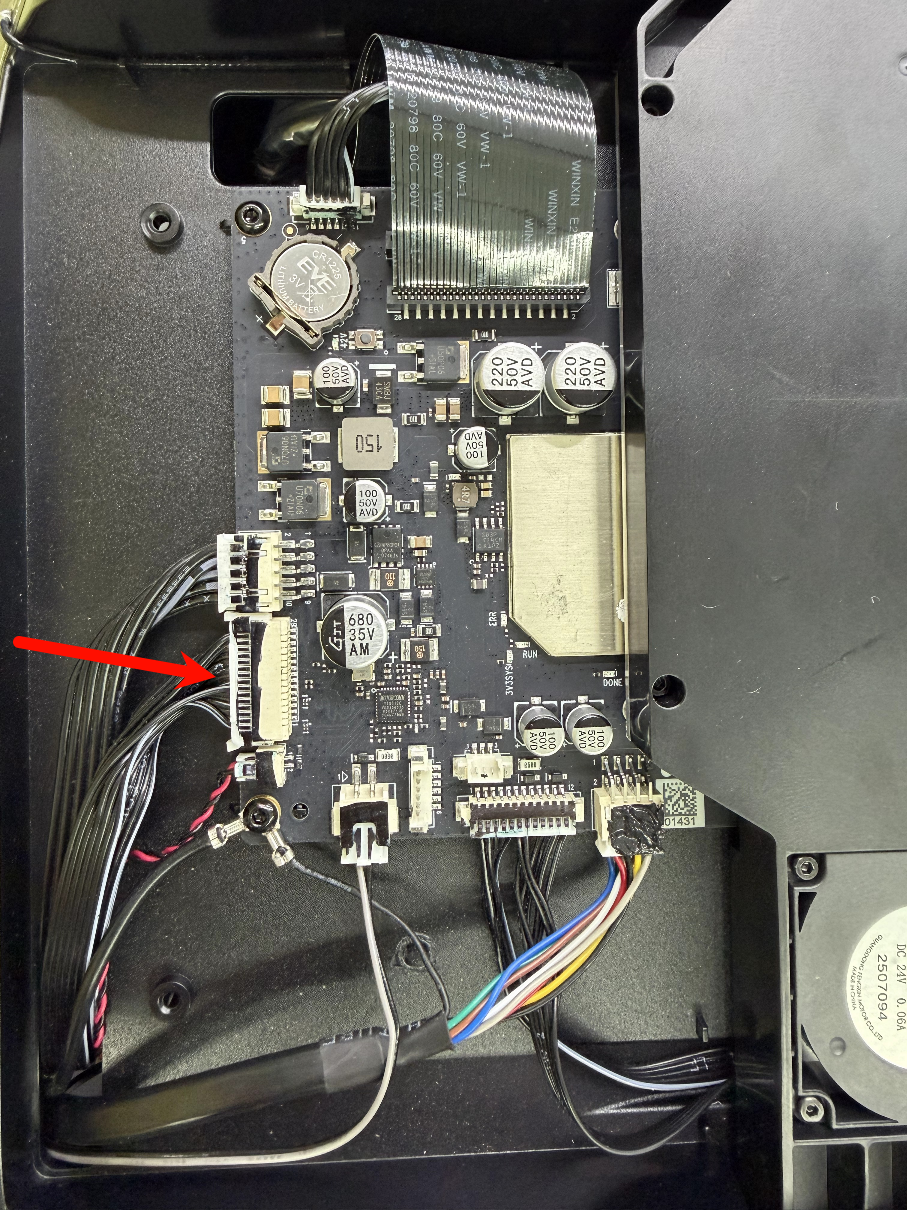
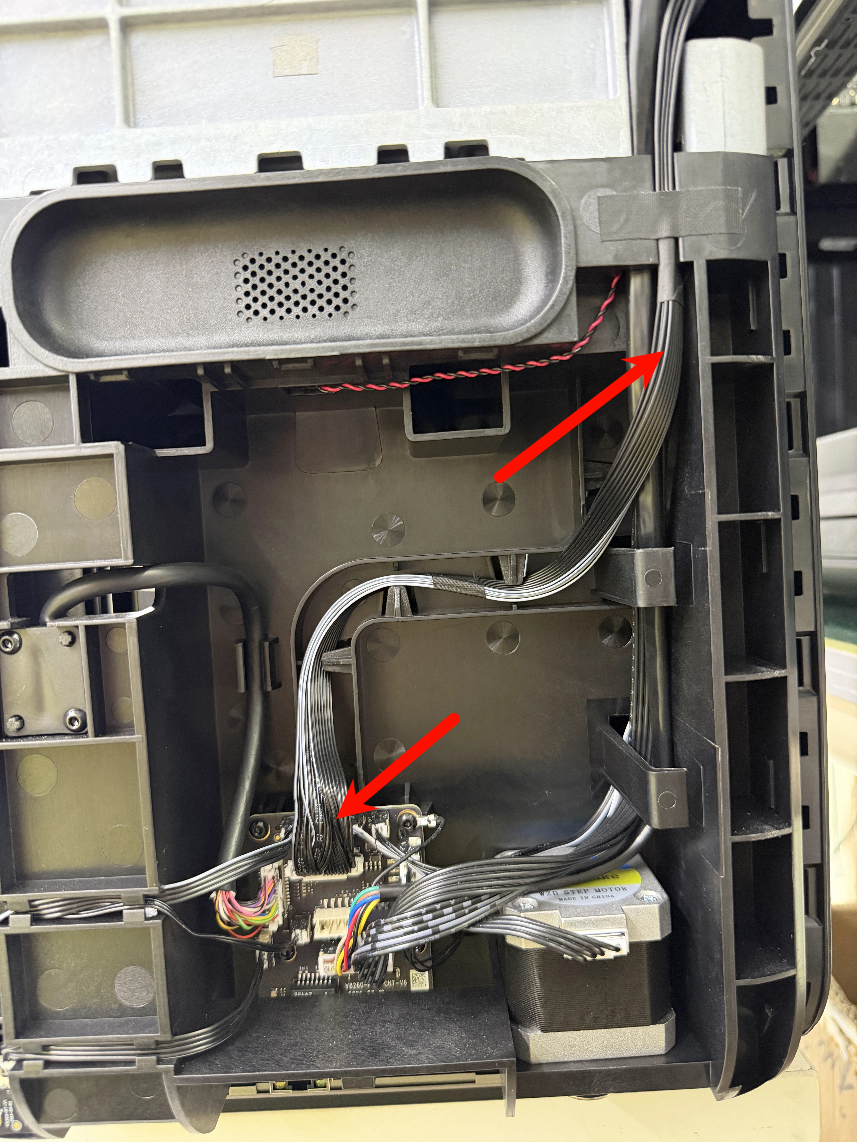
-
If the plug is not fully inserted or has become loose, reinsert it securely into the socket.

Support Contact
If the issue persists after completing the above steps, please contact eufyMake Customer Support at support@eufymake.com with the following information:
-
Your Order Information
-
Printer SN. Please refer to: https://support.eufymake.com/s/article/How-to-Check-the-Device-Serial-Number-SN
-
Printer and App Logs. Please refer to:https://support.eufymake.com/s/article/Log-Upload-Process-App-PC-Overview
-
Relevant photos and videos.


