Fault Phenomenon
-
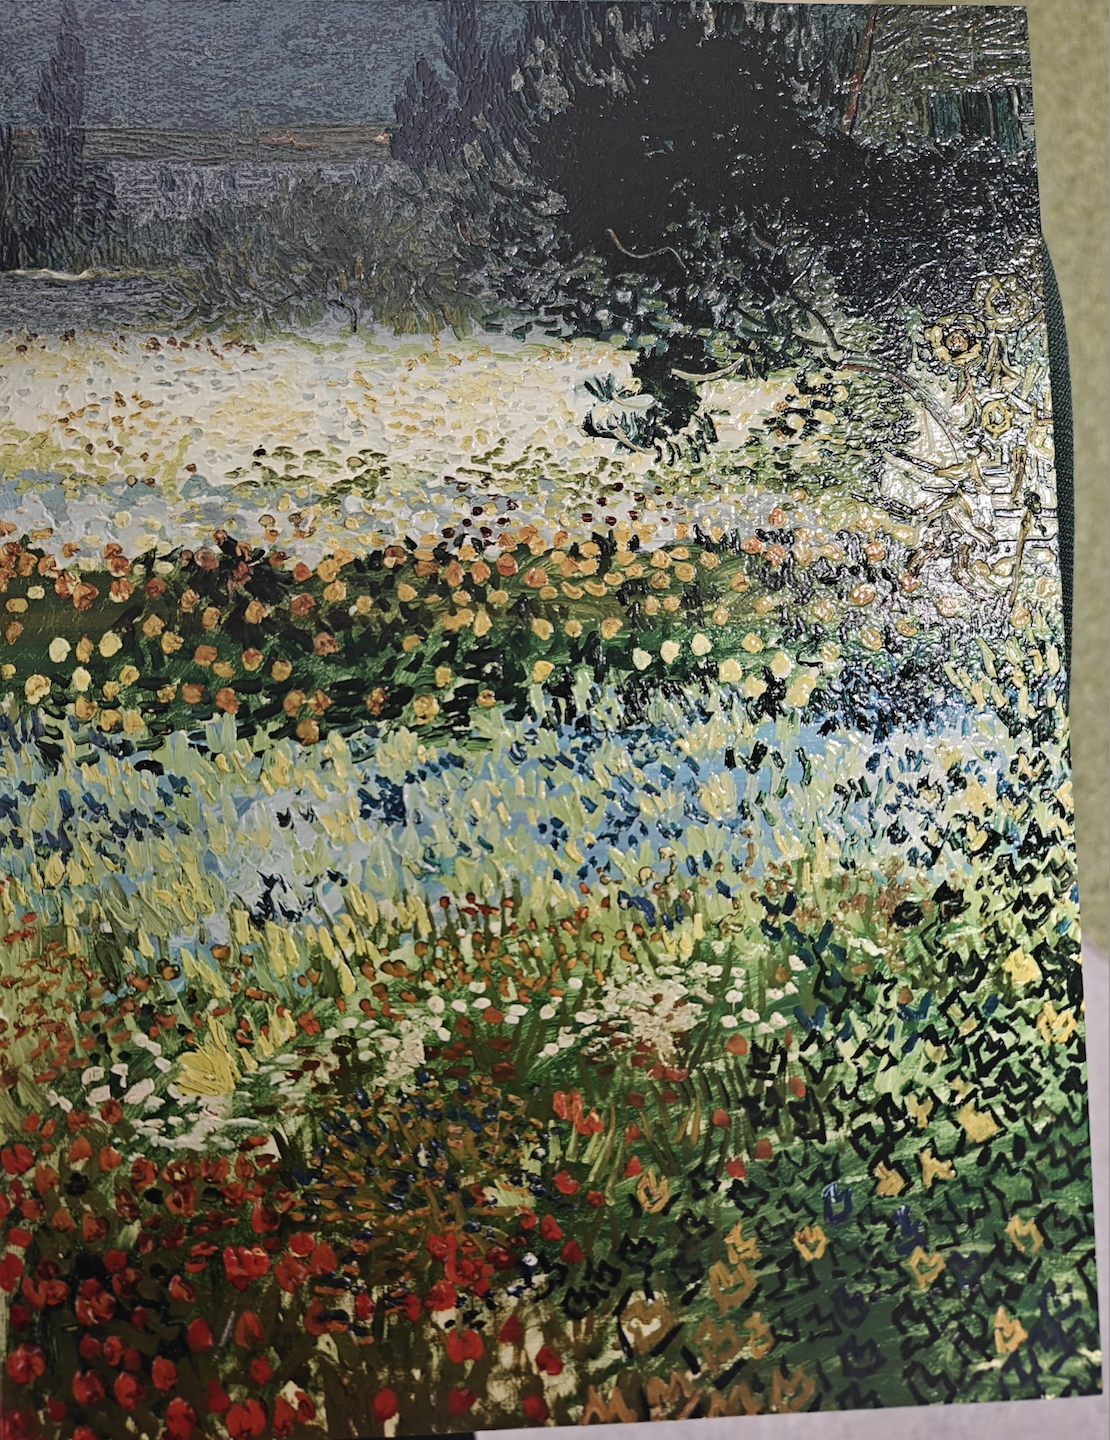
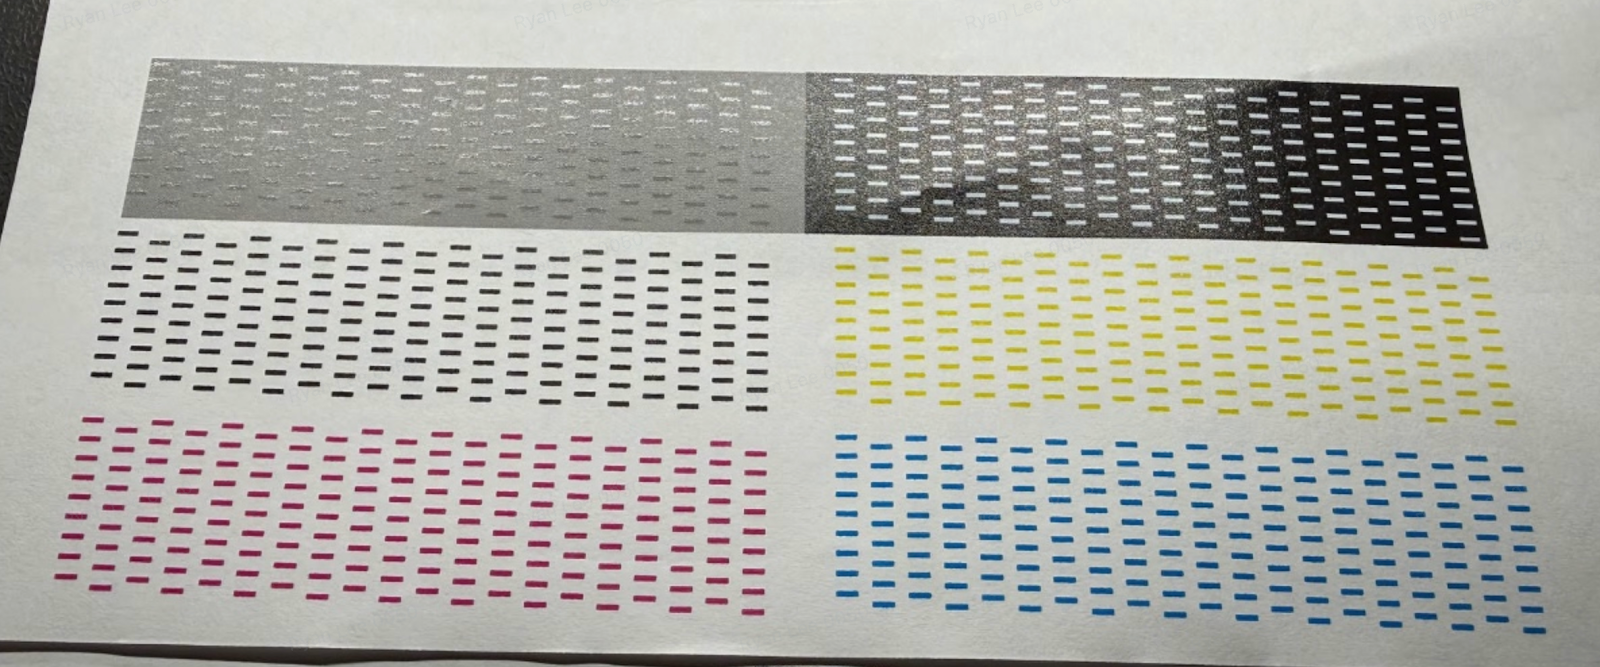
The color of the printed image does not match the original image and is mixed with other colors.

-
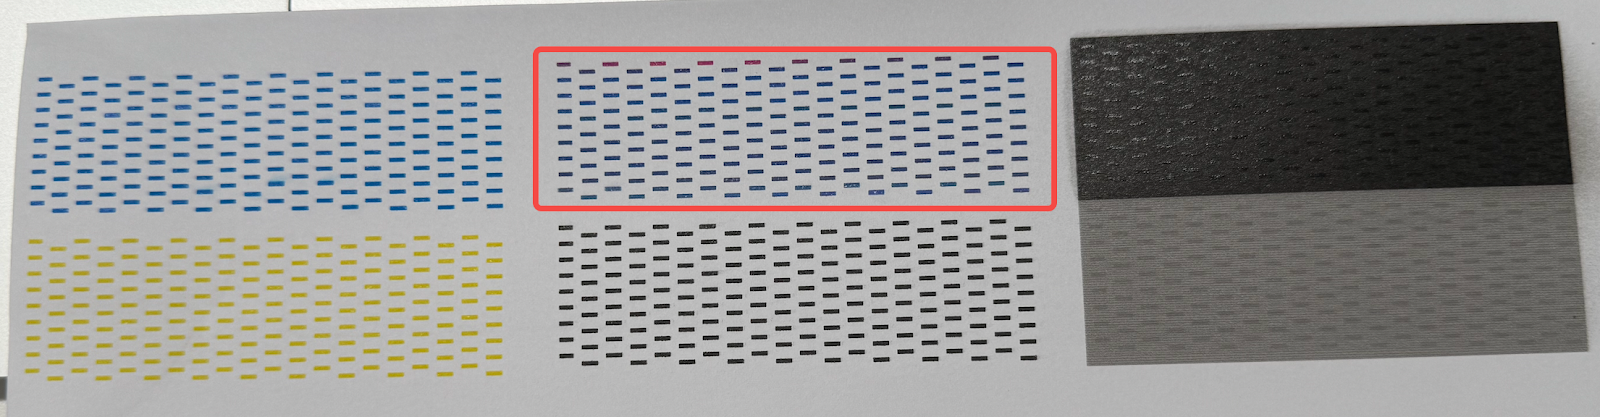
When printing the nozzle status diagram, color mixing appears in monochrome test areas. For example, in the red test line shown below, blue traces are present.
Cause Analysis
Printing mixed ink
-
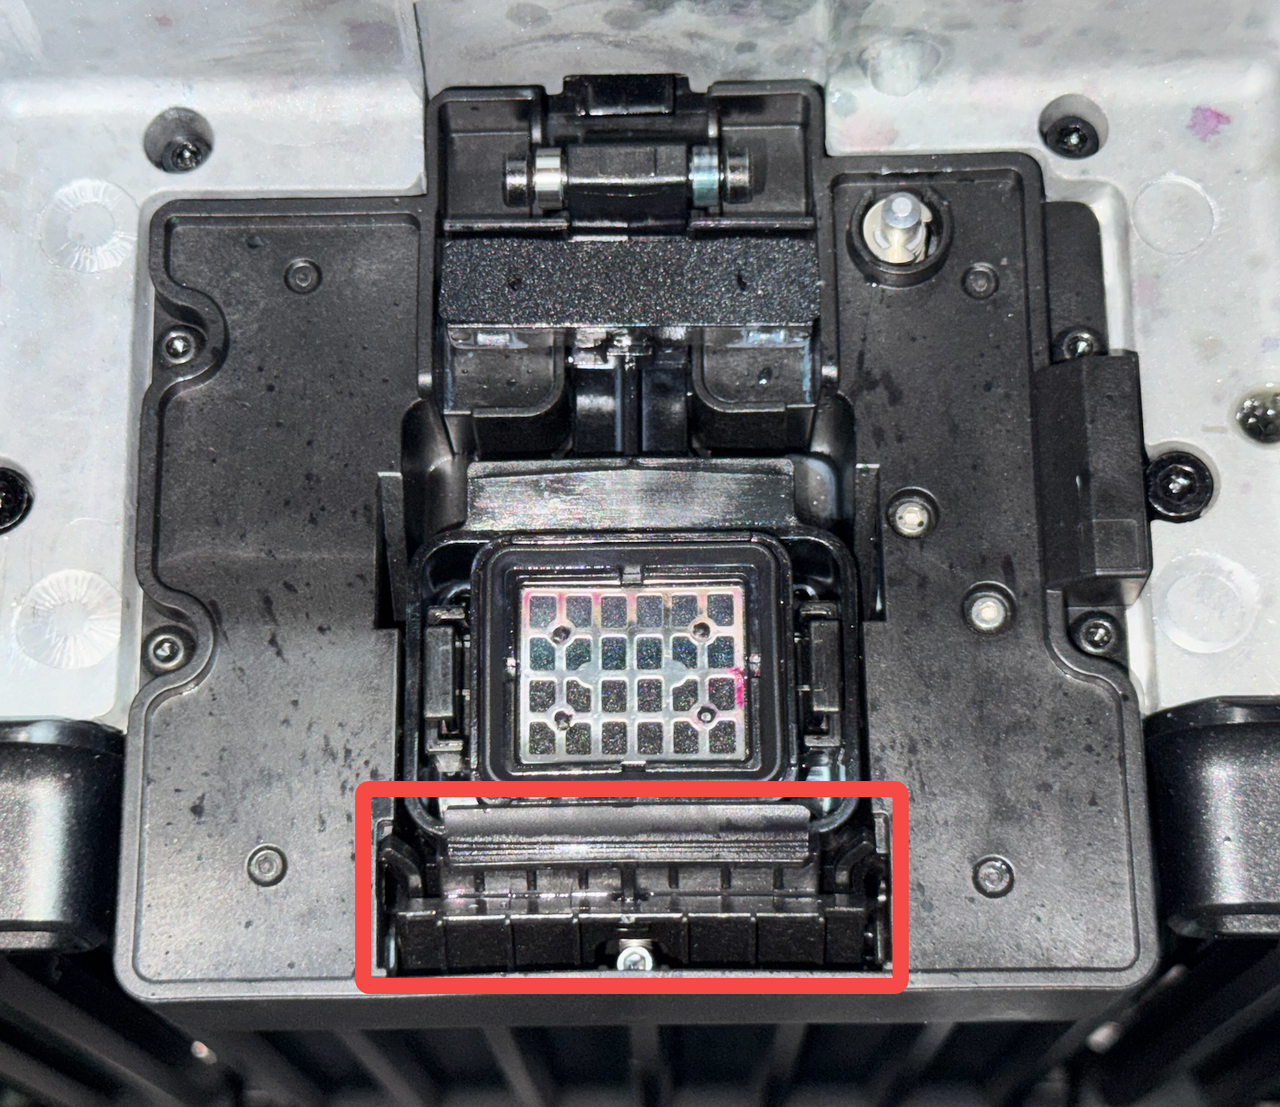
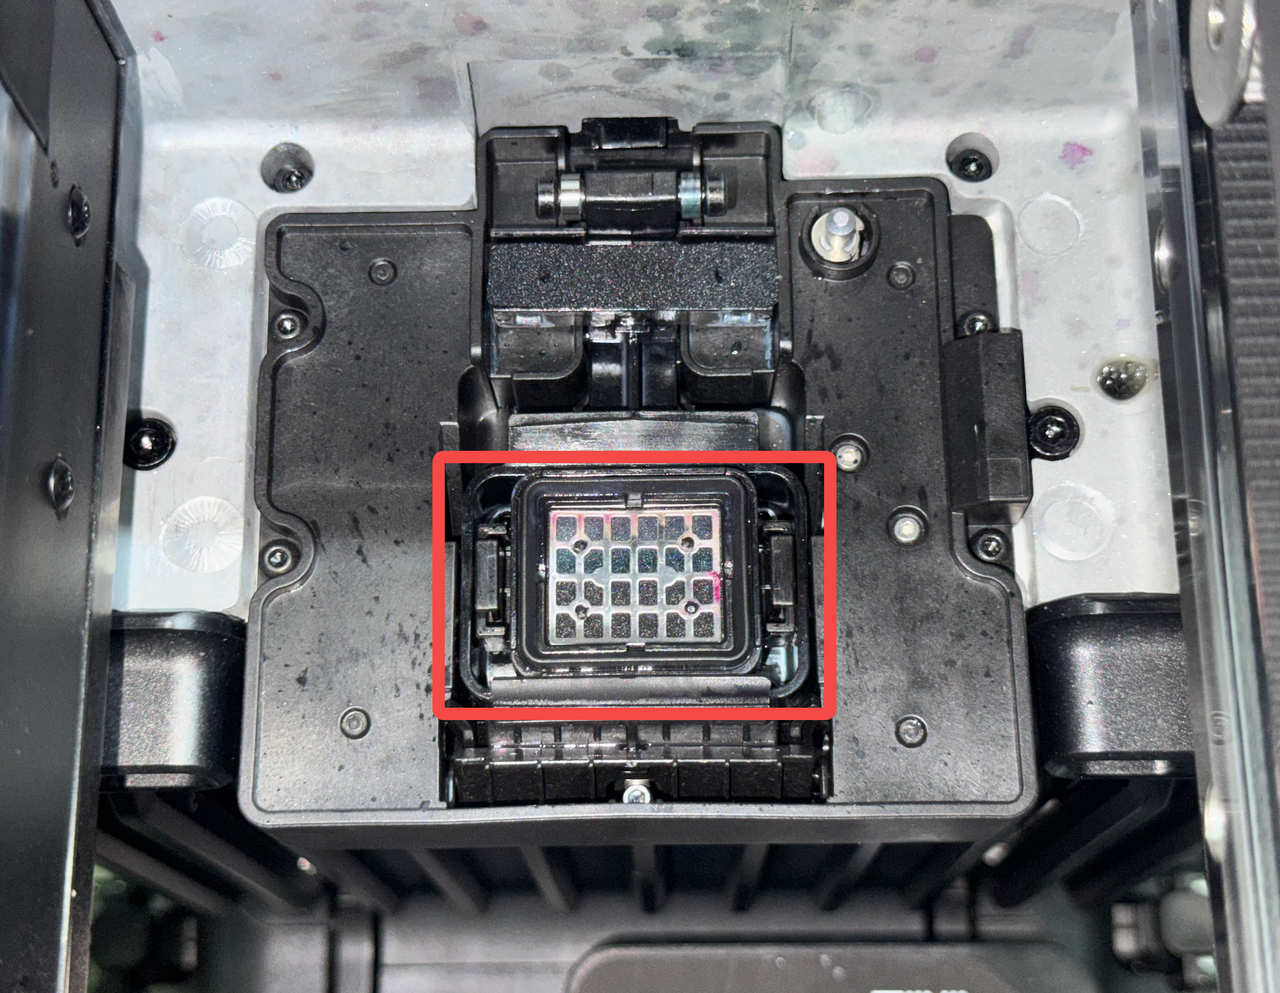
The nozzle wiper is aged, damaged, or detached. When the print head moves out of the ink stack, residual ink on the nozzle surface is not fully wiped off.
-
The ink pad was not installed correctly during replacement, resulting in ink contamination and mixing.
-
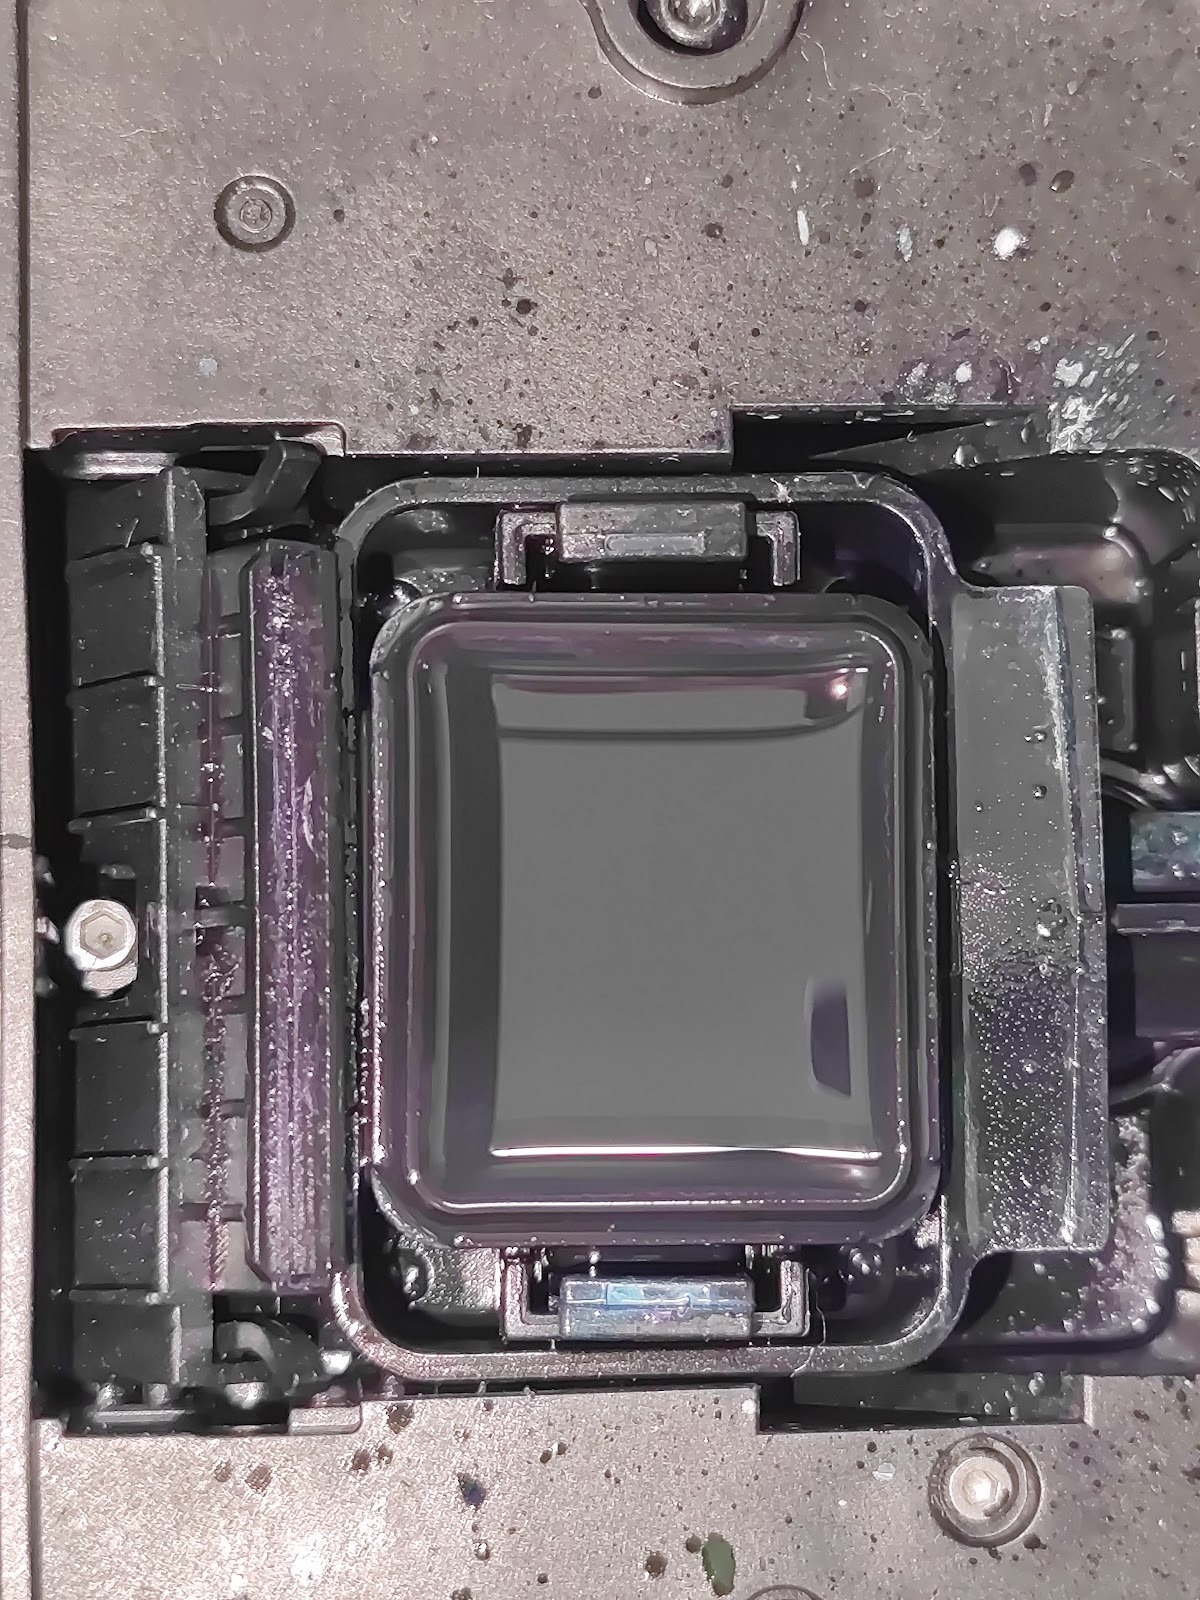
A large amount of waste ink has accumulated in the ink stack.
Troubleshooting
Printing mixed ink
-
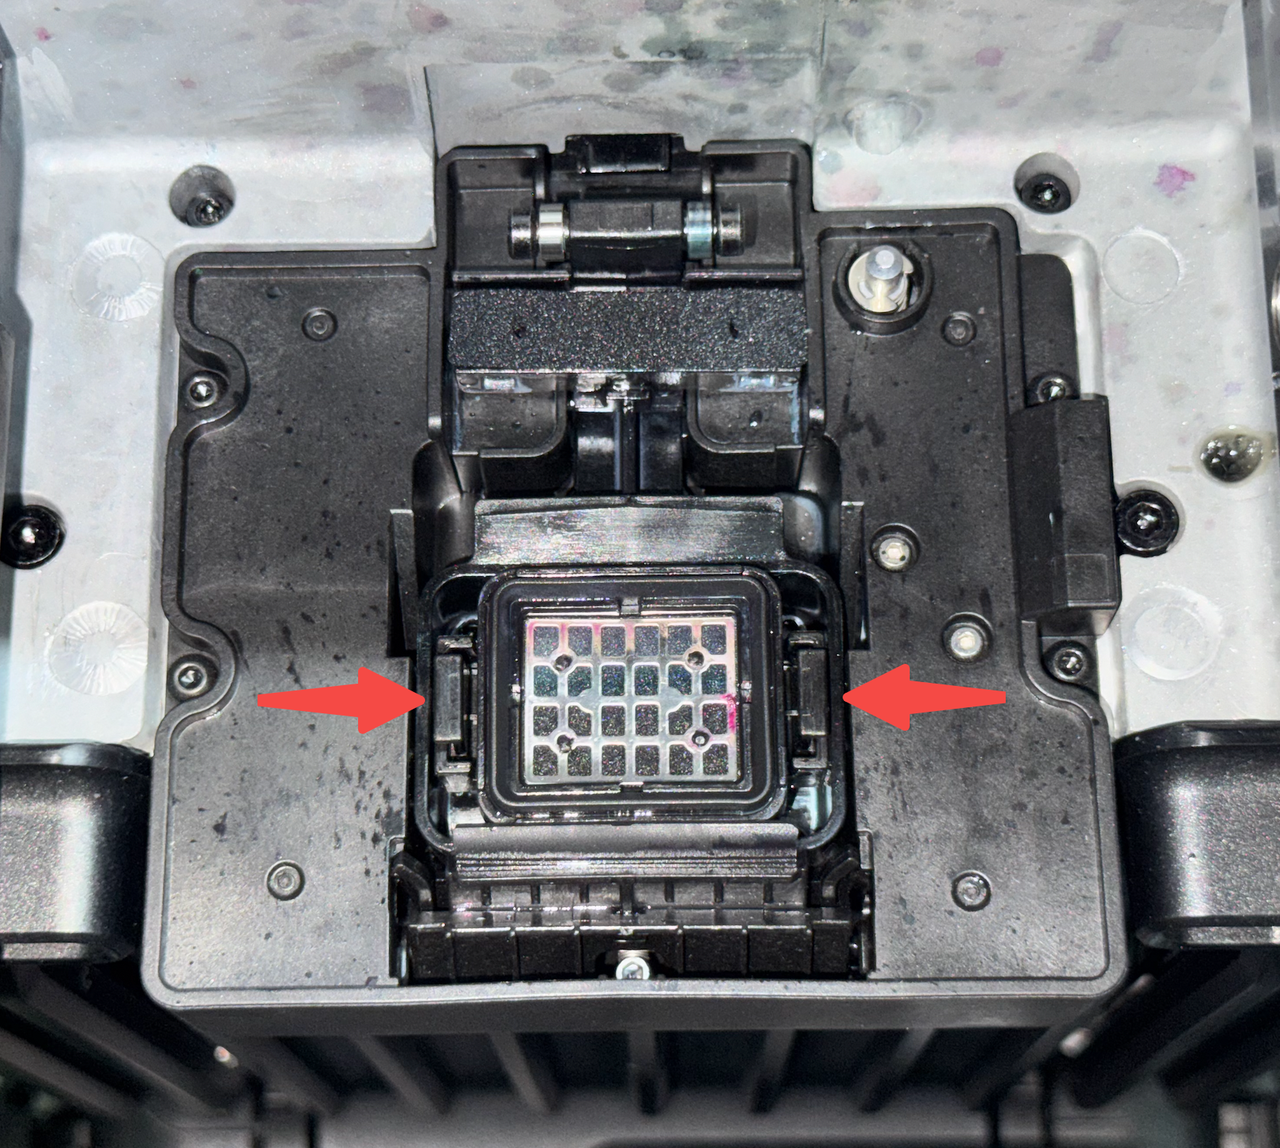
Use the APP to move the print head to the center, check the print head's printing surface for ink, and if there is residual ink, replace the squeegee on the new print head.
-
Confirm whether the ink pad was recently replaced, and verify that it is installed properly. If there are any abnormalities, refer to the how-to video or document to replace the ink pad again.
Please refer to: https://support.eufymake.com/s/article/Introduction-to-Print-Head-Station-Replacement-Kit-and-Replacement-SOP
-
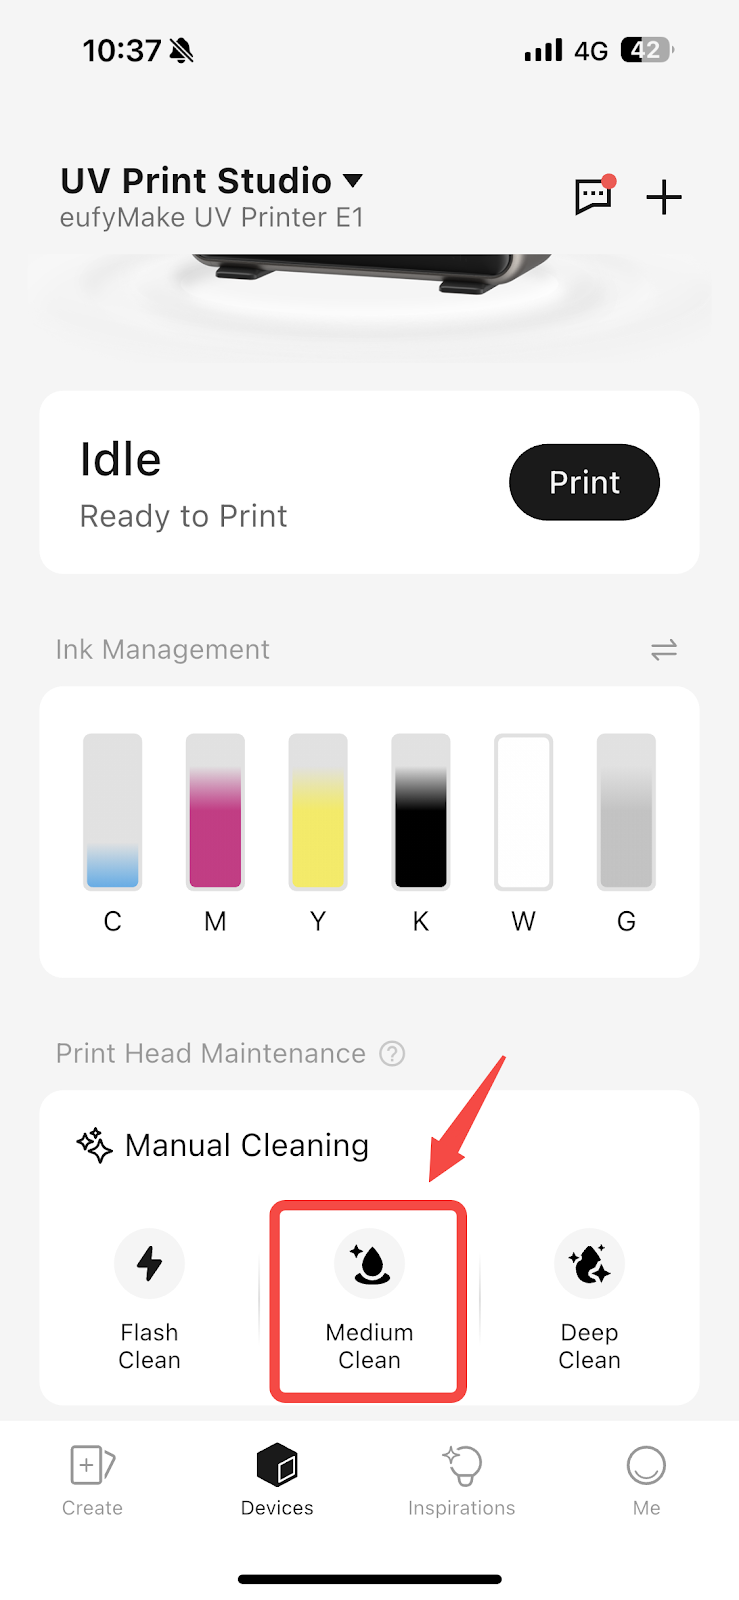
Perform a Medium Clean, and check if there are any changes in the ink stack fluid accumulation after completion. (Note that when checking the ink stack, the printhead needs to be moved away via APP operation).
-
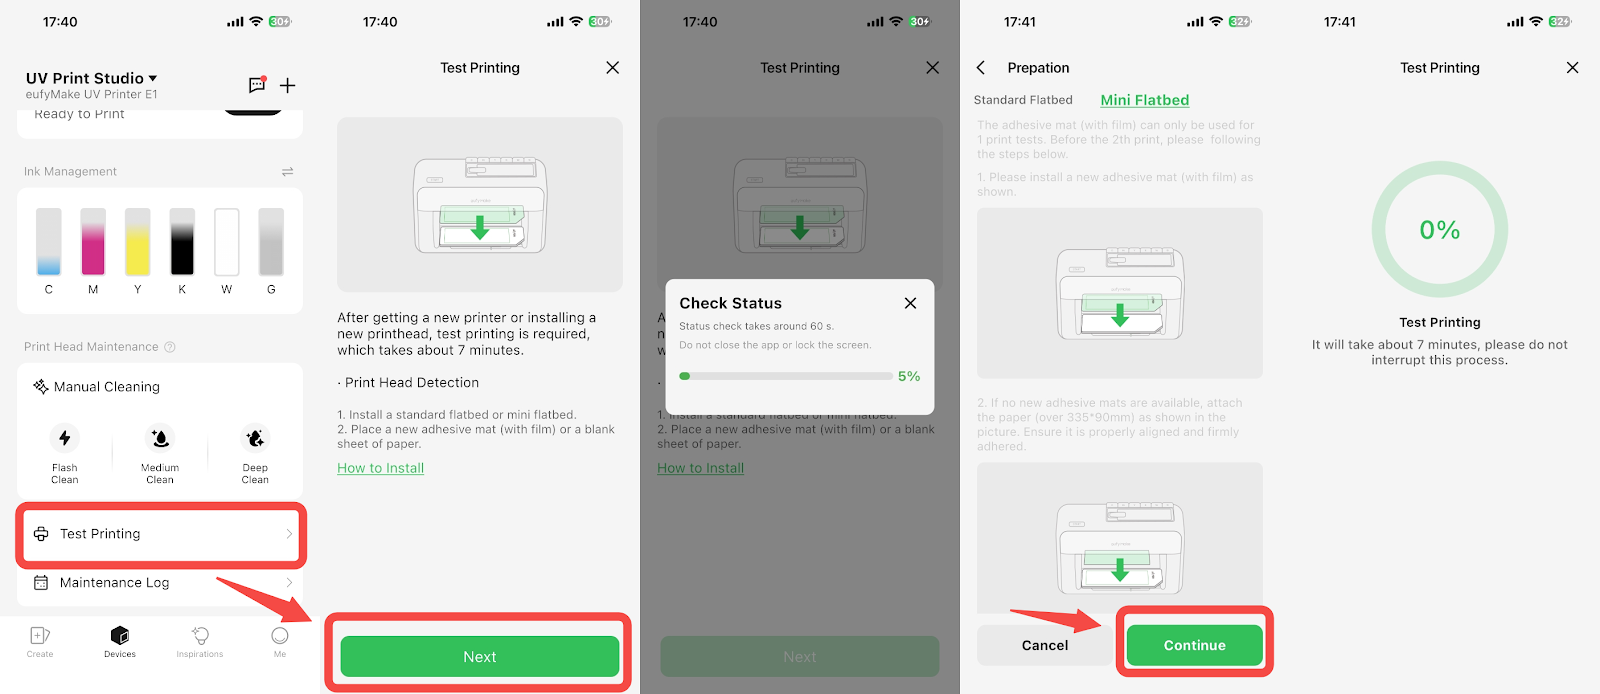
If the liquid accumulation disappears, print a test pattern to check whether the ink mixing has improved.
If the ink mixing is reduced compared to before, you may proceed with normal printing.
After the device has been printing continuously for a period of time, the ink mixing issue will gradually disappear.
-
If the ink stack fluid level has decreased, but it requires 2 - 3 Medium Clean operations to completely drain the ink stack fluid, it indicates that the waste ink pump pressure is low and the waste ink pump needs to be replaced. Please refer to: https://support.eufymake.com/s/article/Cleaning-Fluid-Pump-Moisturizing-Fluid-Pump-Waste-Ink-Pump-Replacement-SOP
-
If there is no change in the ink accumulation in the ink stack after performing ink extraction, first confirm how long the machine's ink pad has been used.
-
If the device has been in use for more than 2-3 months, it may be due to a clogged ink pad, which can be resolved by replacing the ink pad.
-
If it is a new device or a device that has already had its ink pad replaced, take a photo of the ink stack after ink extraction and provide it to eufyMake Service Support.
Support Contact
If the issue persists after completing the above steps, please contact eufyMake Customer Support at support@eufymake.com with the following information:
-
Your Order Information
-
Printer SN. Please refer to: https://support.eufymake.com/s/article/How-to-Check-the-Device-Serial-Number-SN
-
Printer and App Logs. Please refer to: https://support.eufymake.com/s/article/Log-Feedback-Upload-Process-App-PC-Overview
-
Relevant photos and videos.


