Introduction to Relief Texture

Relief Texture Mode Overview


Relief Texture is an advanced stereoscopic printing mode that integrates AI multimodal machine-learning recognition.

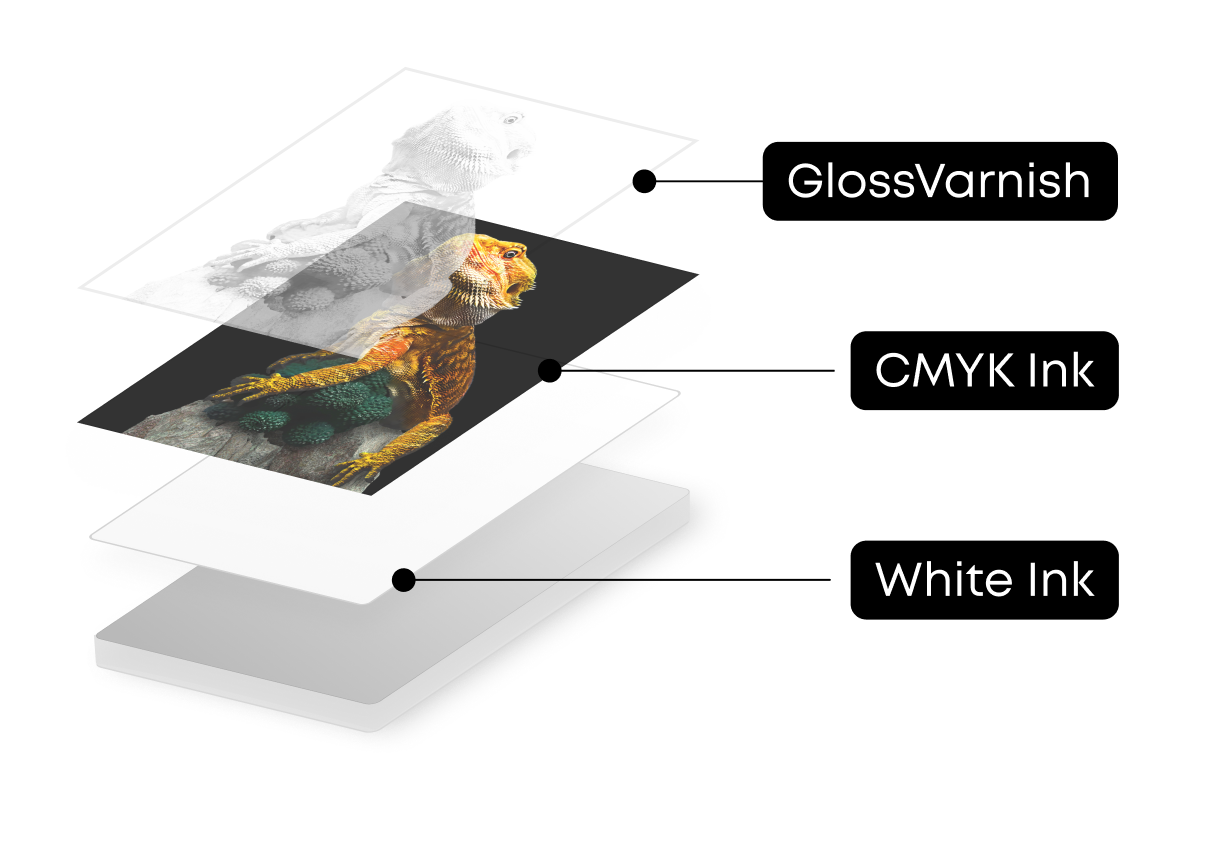
 Using AI-based semantic analysis, the system identifies and separates key subjects within an image from the background. Ink is then selectively stacked on the main subject, while the background height is relatively reduced. This height contrast enhances depth perception and creates a clear, three-dimensional relief effect.

Advanced AI semantic recognition algorithms accurately detect subject boundaries, allowing for precise layering and smooth transitions between foreground and background. You can further customize the stacking height and surface smoothness to achieve a personalized relief effect with a well-defined subject and clearly separated layers.

In this mode, Ink-Saving Printing can be enabled to reduce the texture height of background areas, helping to lower overall ink consumption while preserving visual depth.


How to Use Relief Texture Mode


After selecting an element in the editor, a process editing panel will appear on the right side.

  1. Select Relief Texture mode

  2. Spend points to generate the relief texture effect

  3. Preview the result using the 3D preview

  4. Download the generated depth map if needed

  5. Adjust printing thickness and smoothness parameters

Ink-Saving Printing can be enabled within this mode.


Relief texture mode

Introduction

Schematic Diagram

Color Texture

Application Scenarios

  • Seamless patterns

  • Decorative motifs

  • Material-simulated textures

  • Logo designs

  • And more

Features

  • Forms 3D textures through controlled ink-layer accumulation and UV curing

  • Relief height is driven by depth map data

  • Allows fine control over texture thickness and surface smoothness

  • Supports Ink-Saving Printing for reduced background ink usage


Unresolved icon
216 undefined
Download icon
UL Exposure Assessment Report for the eufyMake UV Printer E1
Download icon
Test Diagram Project File
Download icon
eufyMake Rotary Printing Attachment for UV Printer E1 Quick Start Guide
Download icon
eufyMake UV Printer E1 Quick Start Guide
Download icon
eufyMake Laminating Machine for UV Printer E1 Quick Start Guide
Download icon
eufyMake UV Printer E1 Brugervejledning (V8260)
View More
Play videoeufyMake E1 Tutorial | Part 13: Door Panel Replacement
eufyMake E1 Tutorial | Part 13: Door Panel Replacement
Play videoeufyMake E1 Tutorial | Part 3: Main Printing Workflow
eufyMake E1 Tutorial | Part 3: Main Printing Workflow
Play videoeufyMake E1 Tutorial Part 15: Printer Deep Maintenance
eufyMake E1 Tutorial Part 15: Printer Deep Maintenance
Play videoeufyMake E1 Tutorial Part 10: Ink Cartridge and Cleaning Cartridge Replacement
eufyMake E1 Tutorial Part 10: Ink Cartridge and Cleaning Cartridge Replacement
Play videoeufyMake E1 Tutorial Part 19: Encoder Strip Replacement
eufyMake E1 Tutorial Part 19: Encoder Strip Replacement
Play videoeufyMake E1 Tutorial Part 18: Printer Outer Shell Disassembly and Assembly
eufyMake E1 Tutorial Part 18: Printer Outer Shell Disassembly and Assembly
View More