Introduction to Pattern Texture

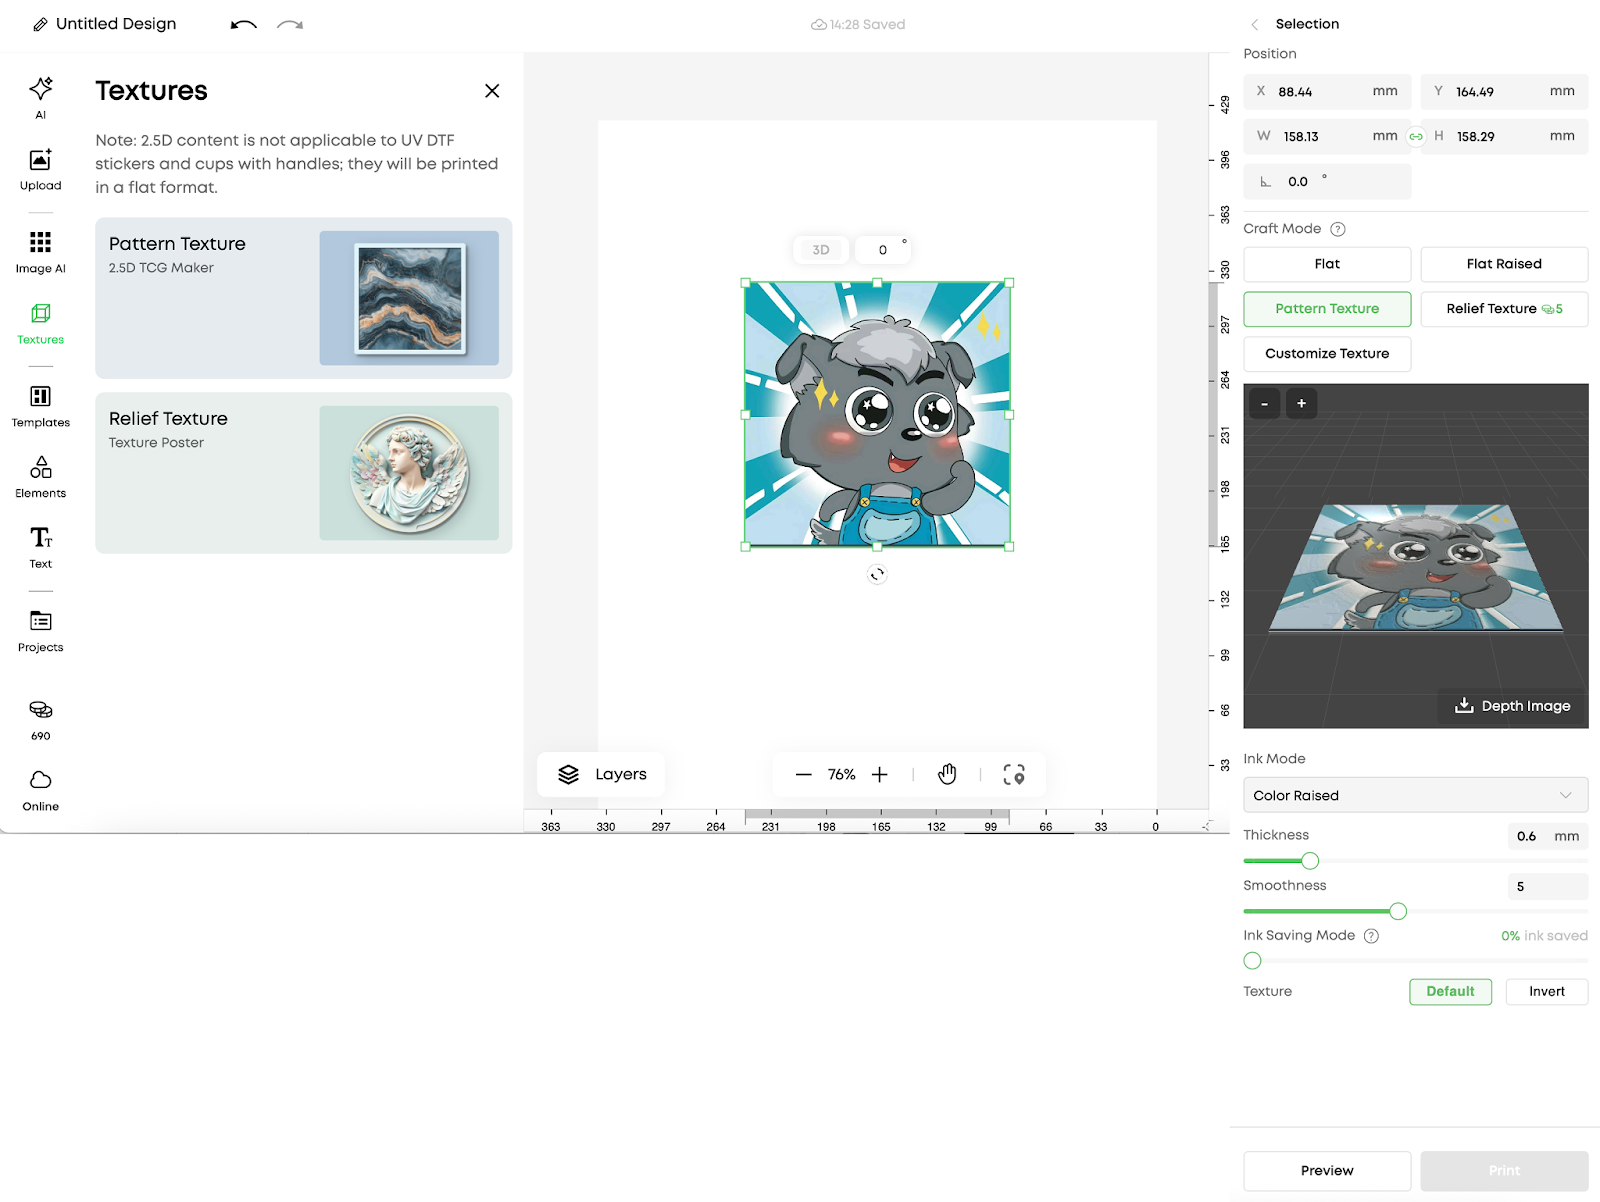
Pattern Texture Mode Overview


Pattern Texture is an intelligent three-dimensional printing mode based on the light and dark information within an image.

By analyzing brightness values, the system stacks ink in brighter areas while relatively reducing height in darker areas, naturally restoring the texture and depth of the original image.

An advanced image analysis algorithm accurately identifies tonal variations and automatically matches them to appropriate stacking heights. The system also supports optimized ink adhesion strategies based on different substrate characteristics.

You can further customize the height amplitude, surface smoothness, and invert the texture direction to create a personalized texture effect with strong tactile and visual impact.

Ink-Saving Printing is supported in this mode, allowing reduced background texture height to lower overall ink consumption.


How to Use Pattern Texture Mode


After selecting an element in the editor, a process editing panel will appear on the right side.

  1. Select Pattern Texture mode

  2. Preview the result using the 3D preview

  3. Download the generated depth map if needed

  4. Set the ink mode:

    1. Pure color

    2. Pure varnish

  5. Adjust printing thickness and surface smoothness

  6. Optionally invert the texture direction

  7. Enable Ink-Saving Printing if required


Pattern texture Mode

Introduction

Schematic Diagram

Color Texture

Application Scenarios

  • Seamless patterns

  • Decorative motifs

  • Material-simulated textures

  • Logo designs

  • And more

Features

  • One-click generation of 3D texture effects

  • Customizable height, smoothness, and relief intensity

  • Multiple layers of white ink build thickness, with a top CMYK layer providing vivid color

Gloss texture

Application Scenarios

  • Geometric patterns

  • Decorative motifs

  • Seamless patterns

  • And more

Features

  • One-click generation of 3D texture effects

  • Customizable height, smoothness, and relief intensity

  • Multiple layers of gloss ink build thickness, creating a transparent, glossy texture effect


Unresolved icon
195 undefined
Download icon
UL Exposure Assessment Report for the eufyMake UV Printer E1
Download icon
Test Diagram Project File
Download icon
eufyMake Rotary Printing Attachment for UV Printer E1 Quick Start Guide
Download icon
eufyMake UV Printer E1 Quick Start Guide
Download icon
eufyMake Laminating Machine for UV Printer E1 Quick Start Guide
Download icon
eufyMake UV Printer E1 Brugervejledning (V8260)
View More
Play videoeufyMake E1 Tutorial | Part 13: Door Panel Replacement
eufyMake E1 Tutorial | Part 13: Door Panel Replacement
Play videoeufyMake E1 Tutorial | Part 3: Main Printing Workflow
eufyMake E1 Tutorial | Part 3: Main Printing Workflow
Play videoeufyMake E1 Tutorial Part 15: Printer Deep Maintenance
eufyMake E1 Tutorial Part 15: Printer Deep Maintenance
Play videoeufyMake E1 Tutorial Part 10: Ink Cartridge and Cleaning Cartridge Replacement
eufyMake E1 Tutorial Part 10: Ink Cartridge and Cleaning Cartridge Replacement
Play videoeufyMake E1 Tutorial Part 19: Encoder Strip Replacement
eufyMake E1 Tutorial Part 19: Encoder Strip Replacement
Play videoeufyMake E1 Tutorial Part 18: Printer Outer Shell Disassembly and Assembly
eufyMake E1 Tutorial Part 18: Printer Outer Shell Disassembly and Assembly
View More