Application Status Explanation
What Should I Do if My Claim Is Rejected?
After Receiving the Replacement Printhead
Frequently Asked Questions (FAQ)
eufyMake Care Claim Guide
💡eufyMake Care is a value-added service plan designed to provide additional peace of mind and help ensure the smooth operation of your printer. In addition to the standard printhead warranty, it includes extended printhead protection and exclusive benefits for a more reliable printing experience.
Service Coverage Explanation
1. eufyMake Care Service Period
- The service period begins when the device is first bound. For printer binding instructions, please refer to Device Binding Operation Guide, Initialization and Calibration Procedures
- If the device has not yet been bound, the service period will begin from the device activation date.
2. One Free Printhead Replacement
- During the validity period of eufyMake Care, if the printhead experiences a malfunction, one free printhead replacement will be provided.
3. 30% Discount on Additional Printheads
- During the validity period of eufyMake Care, additional printheads can be purchased at a 30% discount.
Claim Eligibility
✅ Eligible Situations
- Your device is within the eufyMake Care service period
- The printhead has blockages, print quality issues, or other non-user-induced malfunctions
- The issue is confirmed to be caused by the printhead itself, rather than improper operation or external factors
❌ Ineligible Situations
- The eufyMake Care service period has expired
- Damage caused by improper use, such as dropping, liquid ingress, or unauthorized disassembly
- The claim was not submitted during the service period
How to Submit a Claim
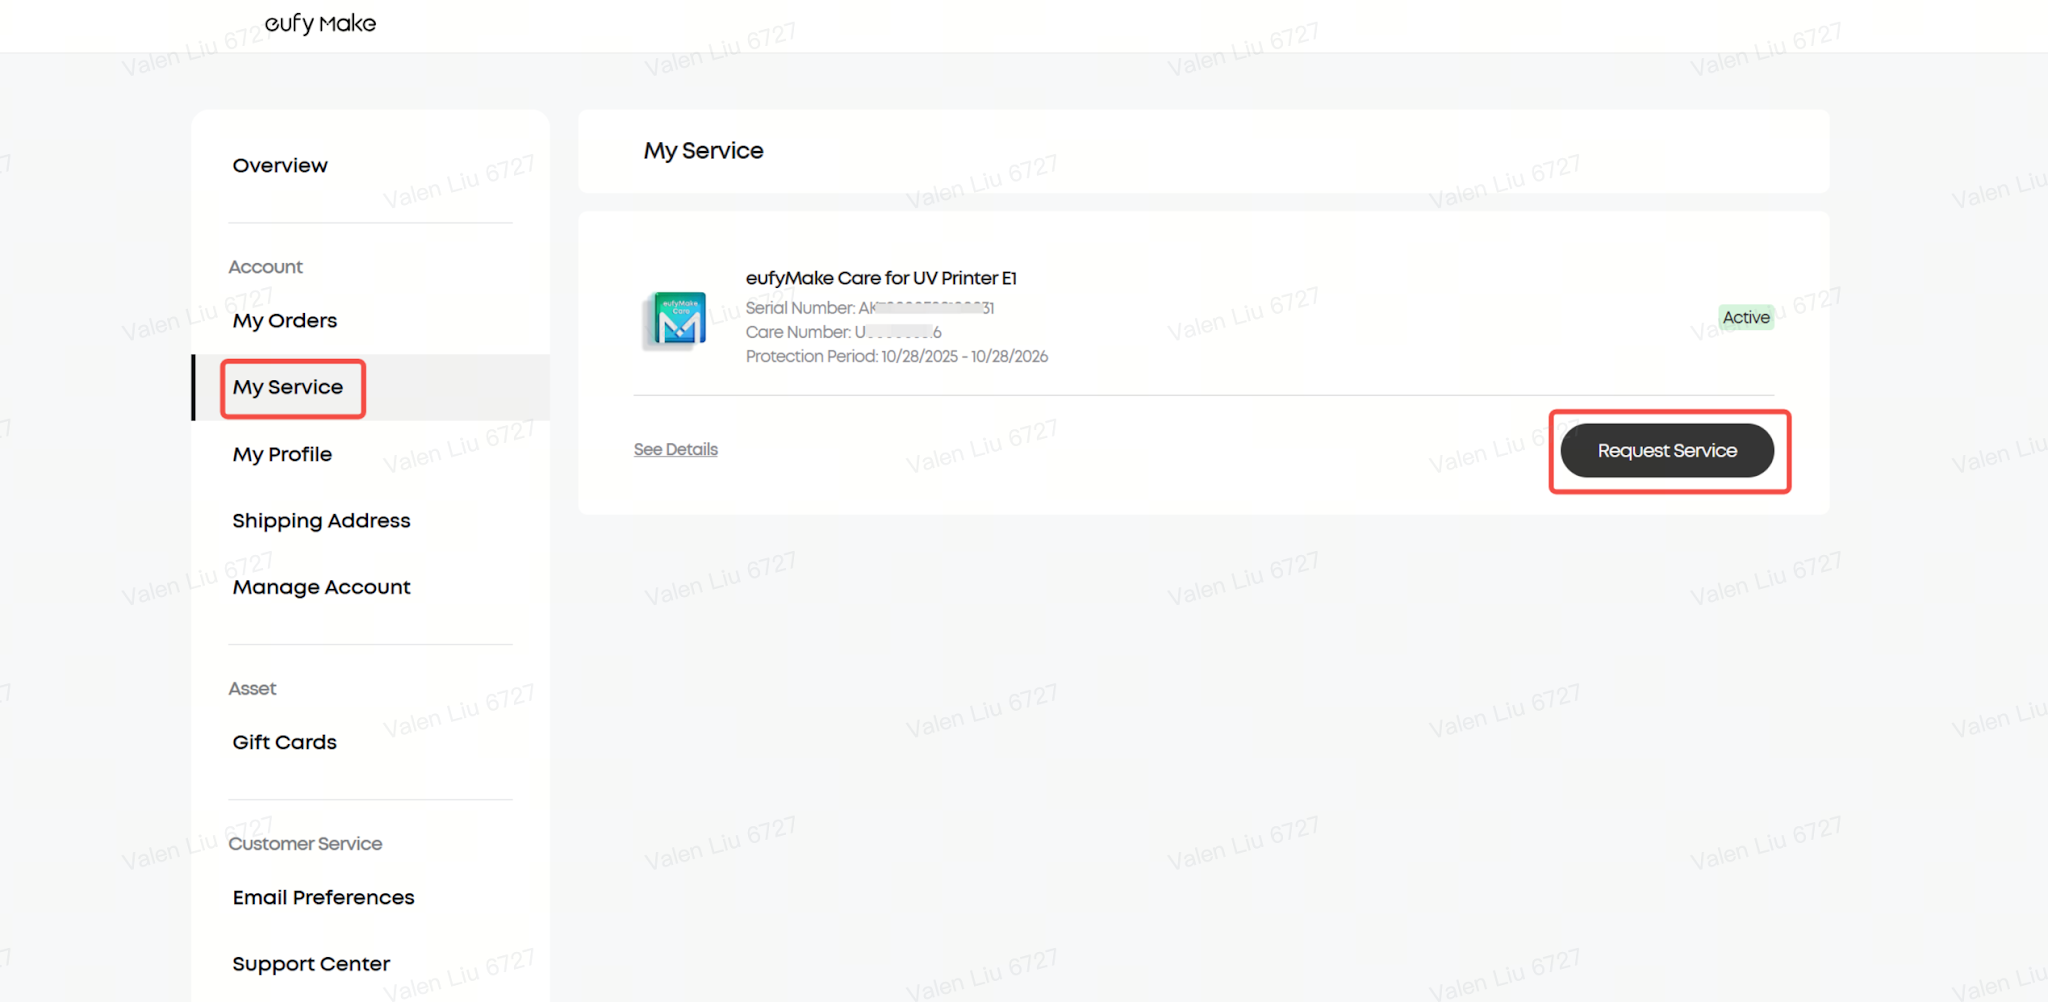
1. Log in to the official website
Go to My Service and log in using the email address associated with your eufyMake Care purchase.
2. Enter the Service Center
Click My Orders → My Service, locate your eufyMake Care plan, and click Request Service to begin the claim process.
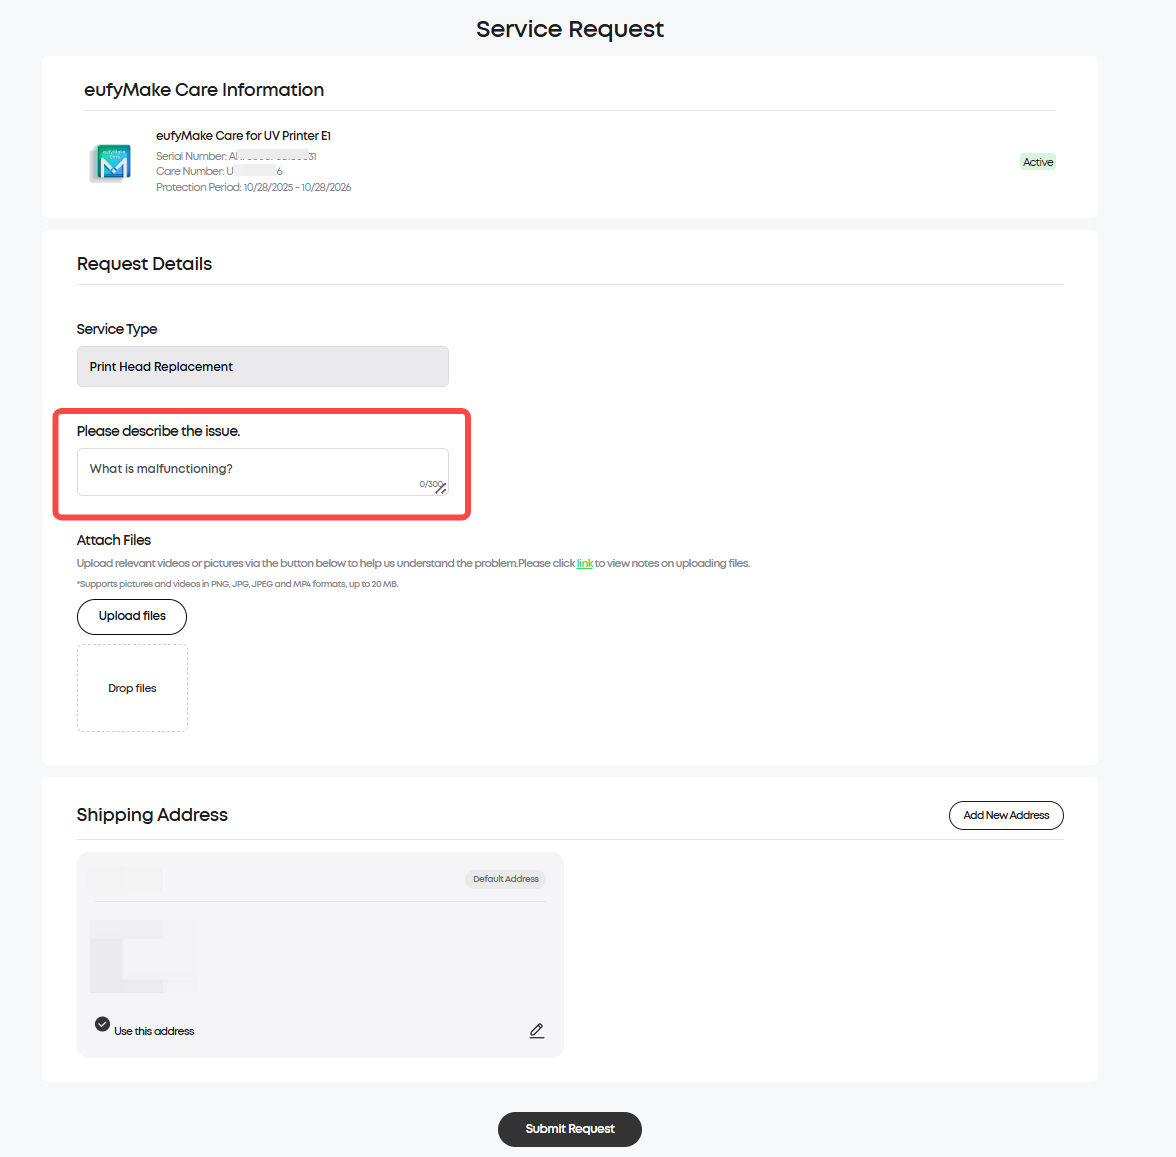
3. Complete the Application Form
Please prepare the following information and ensure all fields are completed accurately:
⚠️ Important: The quality of the uploaded images and videos directly affects the review result. Please ensure they clearly show the print quality issue.
4. Submit the application
After confirming all information is correct, submit the application.
Timeline after Submission
Application Status Explanation
After submission, you can track the application status in your account center.
What Should I Do if My Claim Is Rejected?
Applications are typically rejected for one of the following reasons:
1. Insufficient evidence — uploaded images/videos do not clearly show the printhead issue
2. The issue is not caused by the printhead itself
Recommended Actions
- Reconfirm that the issue is related to the printhead
- Upload clearer nozzle tests and print sample images
- Provide a more detailed fault description
- Include videos if necessary
- Resubmit the application or contact customer support for assistance
After Receiving the Replacement Printhead
1. Replace and Test the New Printhead
After receiving the replacement printhead, follow the guide below to install it and perform a test print:
https://support.eufymake.com/s/article/Introduction-and-Replacement-SOP-of-Printhead
2. Return the Old Printhead (US/CA/EU/UK/DE)
- Use the packaging from the replacement printhead
- Use the prepaid shipping label provided on the approval page
- The shipping label is valid for 20 days
⚠️ Failure to return the old printhead may affect the warranty coverage of the replacement printhead and printer.
Frequently Asked Questions (FAQ)
Q1: When can I submit a claim?
A: Claims can be submitted during the validity period of eufyMake Care if the printhead experiences a non-user-induced malfunction.
Q2: Is there a fee for submitting a claim?
A: No. The free replacement covers the replacement printhead and round-trip shipping costs (US/CA/EU/UK/DE only). No additional fees are required.
Q3: Can I reapply if my claim is rejected?
A: Yes. You can upload additional materials or provide a more detailed explanation before resubmitting.
Q4: How long do I have to return the old printhead?
A: The prepaid label is valid for 20 days. Please return the old printhead as soon as possible after receiving and installing the replacement.
Q5: Can I still receive the discount after using the free replacement?
A: Yes. During the Care service period, additional printheads can still be purchased at a 30% discount.
Q6: Can I renew eufyMake Care after it expires?
A: Yes. Renewal support is available. Please check the official website for future renewal details.
Support Contact
If the steps above do not resolve the issue, please contact eufyMake Customer Support at support@eufymake.com and include:
1. Purchase Order Information
2. Relative screenshots and videos


