How to Replace the Metal Hotend Component for the M5 Printer
Metal Hotend Introduction
The M5 printer’s hotend includes a heating block (built-in heating tube and thermistor resistor), metal throat, nozzle, and heat dissipation block. The main function of the hotend is to control the temperature and heat the filament when the printer is printing.

When Should I Replace the Metal Hotend?
- The metal hotend is experiencing blockage.
- Heating function failure.
- Abnormal temperature display.
How Do I Replace the Metal Hotend?
- Turn on the M5 printer’s power switch and preheat the nozzle to 180°C.

- On the screen, click Control > Extrude > Unload and pull the filament out from the left shoulder. If there is resistance when removing the filament, simply press and hold the extrusion clip (as shown in the image below) on the nozzle assembly while pulling out the filament.


- On the screen, click Control > Move to lift the Z-axis of the nozzle assembly by 200mm and move it to the middle of the X-axis (for the convenience of the replacement process) and turn off the printer’s power. Please make sure to wait for the hotend to completely cool down first.

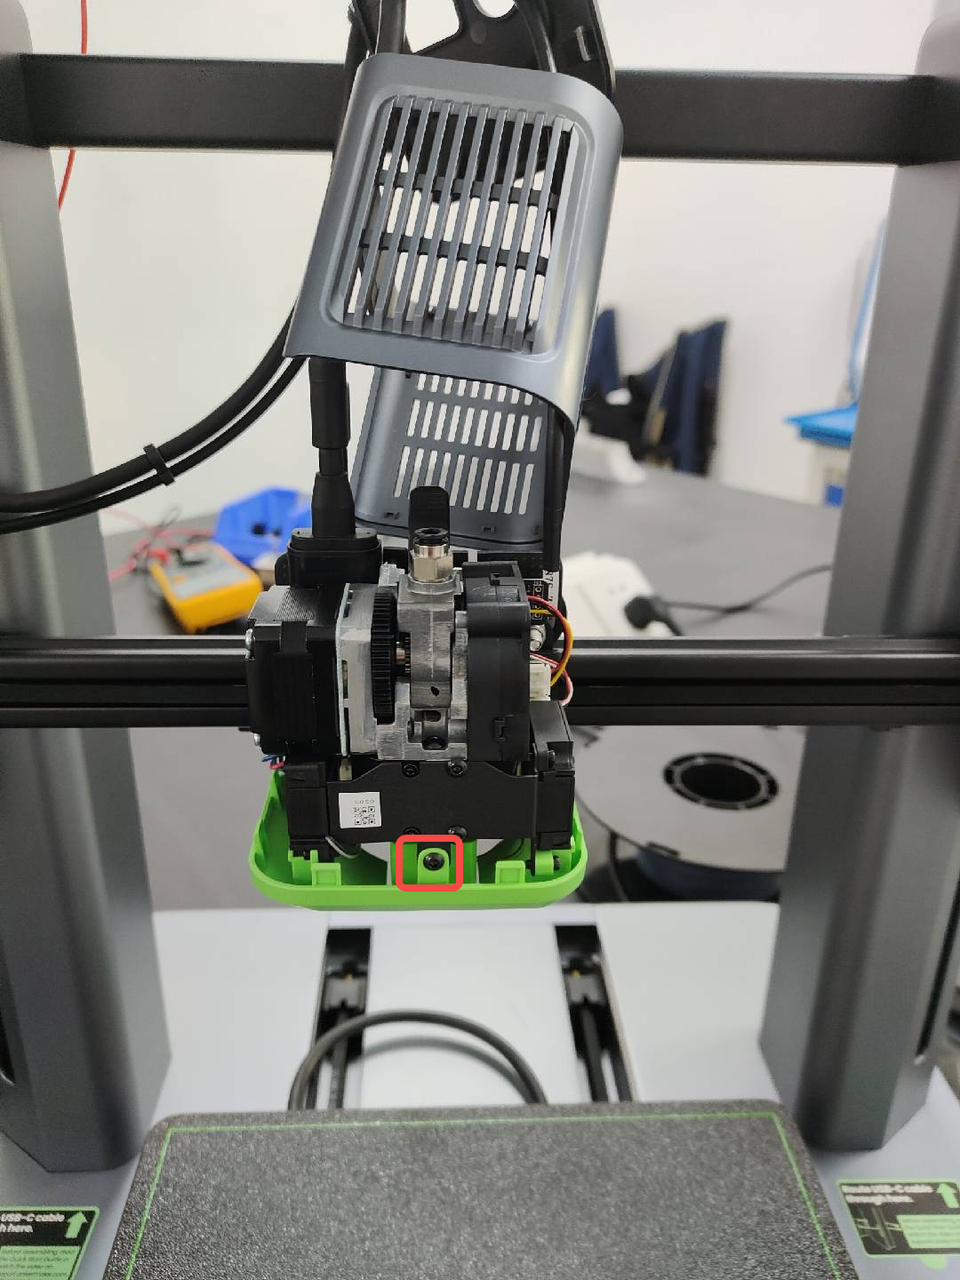
- Use an H2.0 wrench to loosen the four bolts on the back of the nozzle assembly.

- Lift the top cover and nozzle cover of the nozzle assembly up.

- Use an H2.0 wrench to loosen the front bottom cover bolts and remove the bottom cover.

- Use an H2.0 wrench to loosen the two screws on the front cooling fan section, pull off the left and right cooling fan wires, and then remove the cooling fan section.


- Observe whether there is an isolation column at the connection between the hotend and the heat dissipation block.
1. No isolation column.
2. There is an isolation column (starting from serial number 10).


- If there is no isolation column, the entire hotend assembly with the heat dissipation block needs to be replaced. (Note: Please note that if there is an isolation column, the heat dissipation block may also need to be replaced if it is damaged.)
- A. Remove the silicone sleeve from the new hotend component , tighten the two hotend and heat dissipation block bolts with an H1.5 wrench. (Note: The heat dissipation block and hotend bolts are not tightened when the product is first shipped.)


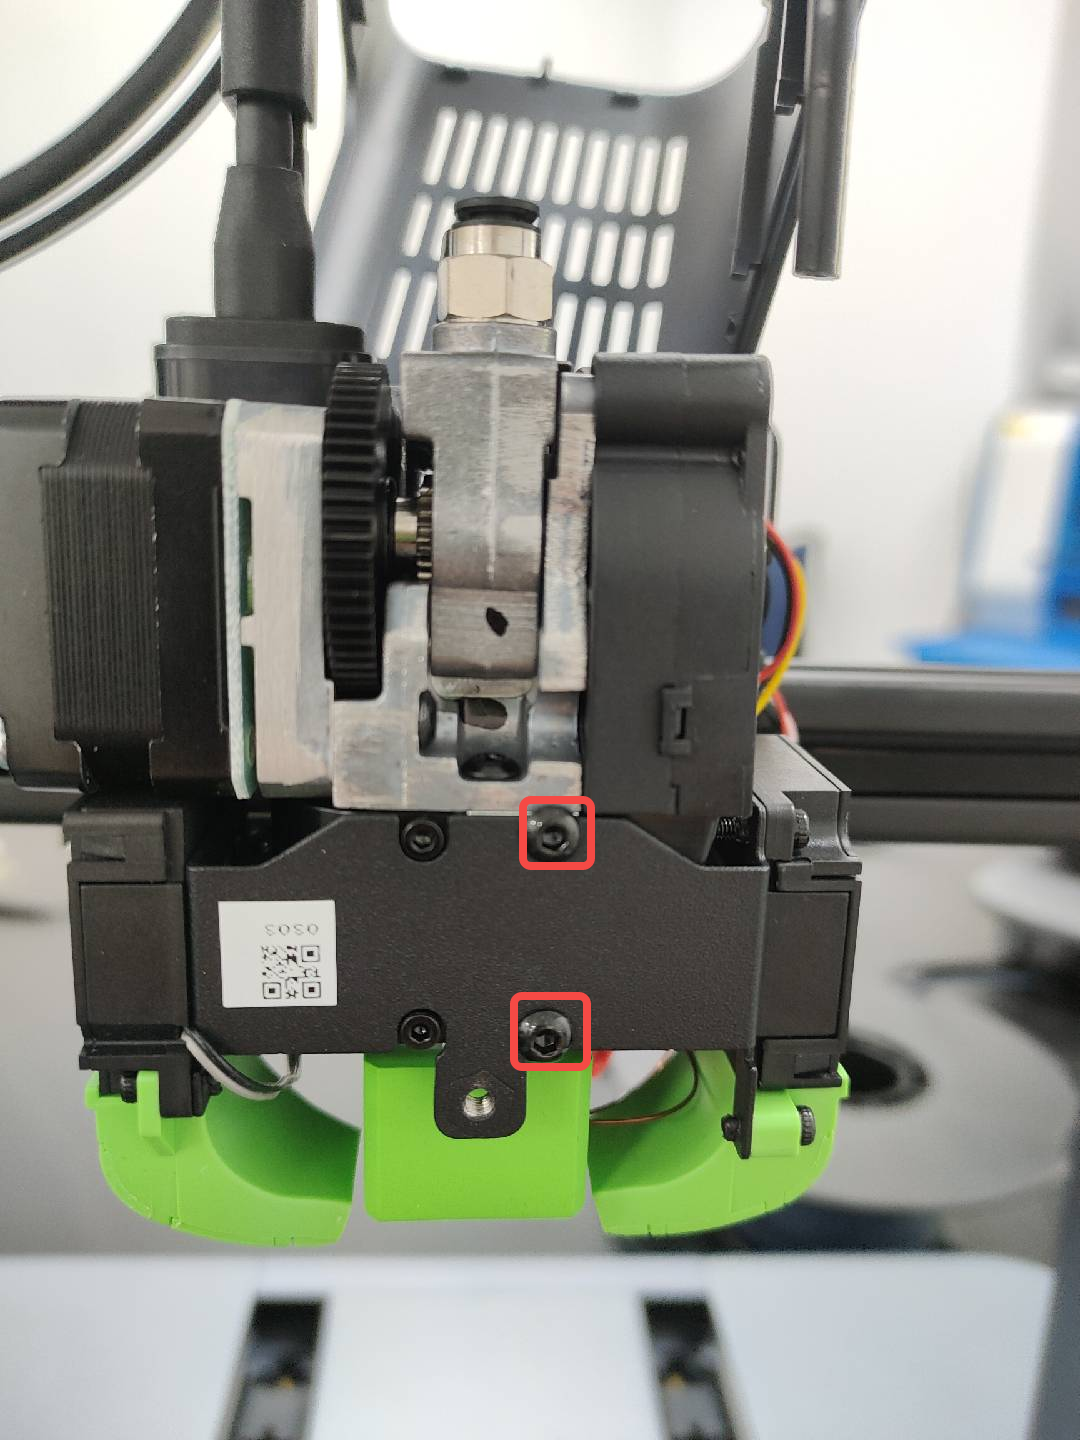
- B. Use an H2.0 wrench to remove the heat dissipation block and extruder screws.


- C. Use an H2.0 wrench to loosen the three screws on the extruder back plate, then remove the extruder and hotend assembly.


- D. Remove the five bolts on the air guide with an H1.5 wrench.


- E. Install the removed air guide to the new hotend and tighten the five bolts with an H1.5 wrench.


F. Connect the extruder to the hotend, then tighten the bolt with an H2.0 wrench.

- G. After installing the extruder in place, make sure to tighten the three bolts on the extruder.

- H. Tighten the two bolts on the heat dissipation block with an H2.0 wrench (M3*8 bolts).


- I. Install the insulation silicone sleeve and plug in the thermal sensor and heating tube terminal.

- J. Insert the fan power cord and secure the cooling fan block with an H2.0 wrench.


- K. Secure the bottom cover with an H2.0 wrench.
- L. Remove the nozzle cover and upper cover to splice, then use an H2.0 wrench to tighten the four screws on the back of the nozzle housing.

- M. Insert the wire from the left shoulder of the M5 printer until it reaches the extruder. Press and hold the extrusion clip marked below and insert the wire again until it encounters resistance.

- N. Turn on the M5 printer’s power switch and click Control > Extrude > Load. After waiting for the extruder to reach its target temperature, check the extrusion of the filament to verify whether the extrusion process is continuous and uniform.

- If only the hotend needs to be replaced, please follow the steps below:
- A. Turn on the M5 printer’s power switch and preheat the nozzle to 180°C. Remove the insulation sleeve at the heating block, use an H1.5 wrench to remove the two screws on the heating block. (Note: Please be very careful. The hotend’s temperature may be extremely high.)

- B. Turn off the M5 printer’s power switch and wait for the hotend to cool down to room temperature, unplug the thermistor resistance wire, heating pipeline, and then remove the hotend (exclude the heat dissipation block) to replace the hotend.


- C. Remove the silicone sleeve from the new hotend component , tighten the two hotend and heat dissipation block bolts with an H1.5 wrench. (Note: The heat dissipation block and hotend bolts are not tightened when the product is first shipped.)

- D. Insert the hotend that needs to be replaced vertically into the heat dissipation block, then use an H1.5 wrench to tighten the two bolts. Make sure to pay attention to the hotend installation direction, please note that the heating tube and thermistor are on the right side of the device.

- E. Install the insulation silicone sleeve and plug in the thermistor and heating tube terminal.

- F. Insert the fan power cord and secure the cooling fan block with an H2.0 wrench.

- G. Secure the bottom cover with an H2.0 wrench.

- H. Remove the nozzle cover and upper cover to splice, then use an H2.0 wrench to tighten the four screws on the back of the nozzle housing.

- I. Insert the wire from the left shoulder of the M5 printer until it reaches the extruder. Press and hold the extrusion clip marked below and insert the wire again until it encounters resistance.

- J. Turn on the M5 printer’s power switch and click Control > Extrude > Load. After waiting for the extruder to reach its target temperature, check the extrusion of the filament to verify whether the extrusion process is continuous and uniform.

If you have any further questions, please contact us for assistance.
119 undefined

M5C X Axis Belt Adjuster.gcode
Ankermake Studio Guide(V1.5.21)
M5C Y axis belt adjuster.gcode
V8110 AnkerMake M5C EU Declaration of Conformity
V8110_UK Declaration of Conformity
M5C Y Axis Belt Adjuster.gcode
View More


How to Replace the Air Guide of the Print Model Fan

How to Replace the Print Model Fan

Auto Leveling

V Wheel Adjustment

How to Transfer Files and Start Printing

Loading Filament
View More