How to Assemble M5
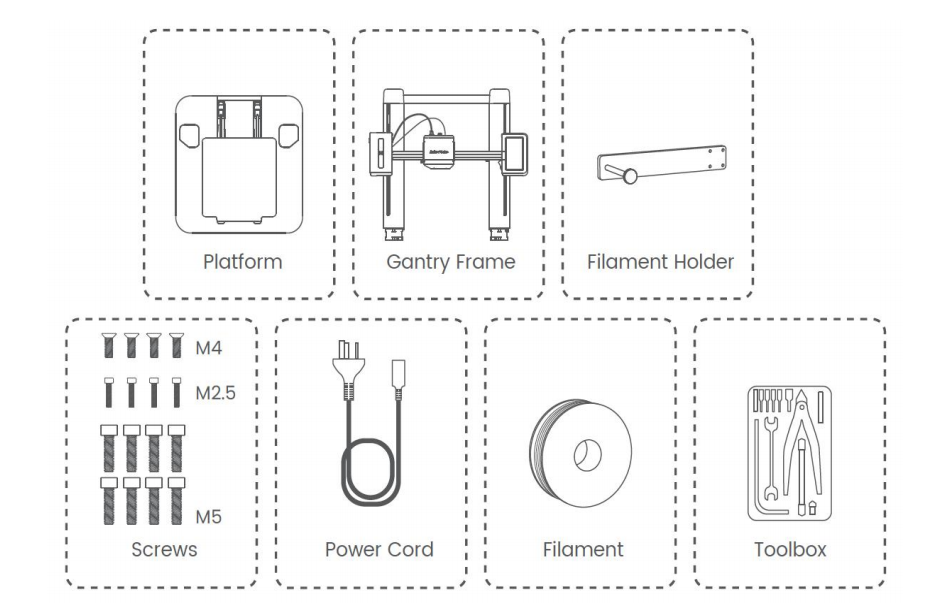
Step 1: Unbox and Check Parts
- Open the box and remove all product parts and accessories.
- Verify that all parts and accessories are complete.
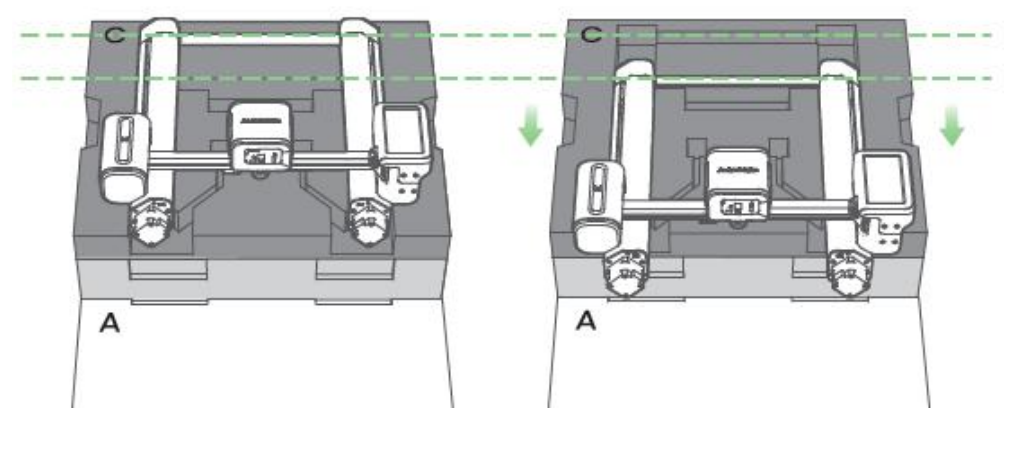
Step 2: Position the Gantry Frame
- Place the protective foam on the ground to provide support.
- Move and fix the gantry frame in the direction shown in the image below.
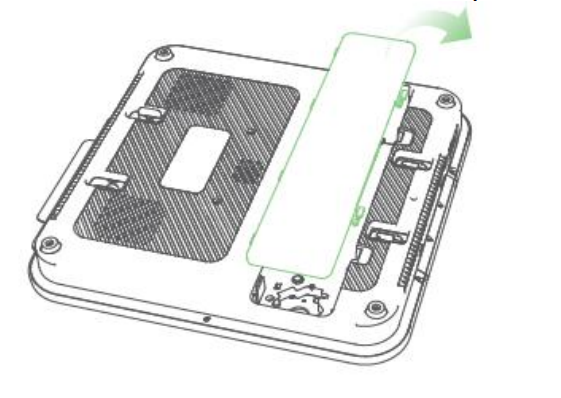
Step 3: Remove the Base and Open the Cover
- Remove the base.
- Open the back marking cover.
Step 4: Assemble the Gantry and Base
- Place the first layer of foam pad on the bottom.
- Place the base on the foam pad perpendicular to the gantry.
- Move the base so that the gantry passes through the base hole until it is fully inserted. Ensure the white part is fully embedded.
- Make sure two USB-C wires pass through the holes during insertion.


Step 5: Tighten Z Axes Bolts
- Use Hex wrench 4.0 to tighten the eight M5 bolts for the two Z pillars, as marked in yellow below.

Step 6: Insert and Secure USB-C Cable
- Insert the marked USB-C cables into ports highlighted in red. Ensure the Type-C cables are properly inserted.
- Use Hex wrench H 2.0 to fix the four M2.5 bolts at the interface, as marked in red above.
Step 7: Connect Terminal Wires
- Insert the left and right terminal wires into the left and right Z-axis motors, as shown in the blue mark in the image.
- Replace the base cover.
Step 8: Secure the Equipment
- Return the printer to the upright position.
- Use Hexagon batch-head H 2.5 to tighten the four M4 screws to fix the filament holder. There are three fixing methods:


- Two horizontal fixing methods (upper & lower)
- Top vertical fixing
Step 9: Check Voltage
- Ensure the voltage matches the required setting. If not, adjust it to the correct voltage.


Step 10: Power On and Start Printing
- Plug in the power.
- Turn on the switch.
- Wait for the screen to light up before starting to print.

If you have any further questions, please contact us for assistance.
119 undefined

M5C X Axis Belt Adjuster.gcode
Ankermake Studio Guide(V1.5.21)
M5C Y axis belt adjuster.gcode
V8110 AnkerMake M5C EU Declaration of Conformity
V8110_UK Declaration of Conformity
M5C Y Axis Belt Adjuster.gcode
View More


How to Replace the Air Guide of the Print Model Fan

How to Replace the Print Model Fan

Auto Leveling

V Wheel Adjustment

How to Transfer Files and Start Printing

Loading Filament
View More