Introduction to Flatbed Accessories
Introduction to Flatbed Accessories
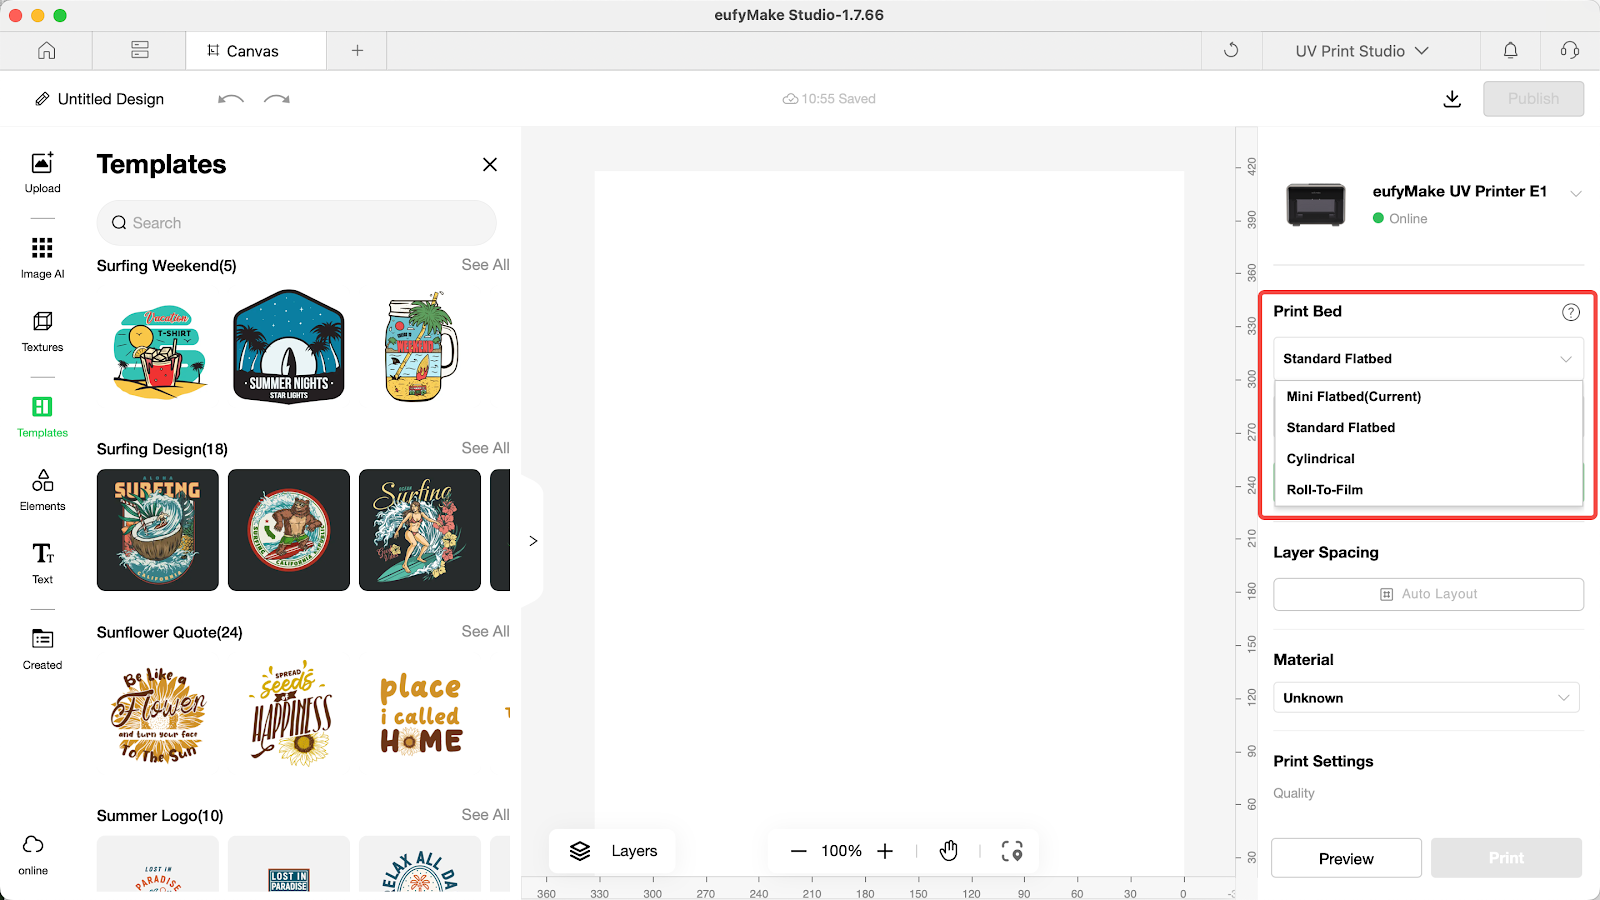
The platform plate is used to place substrates of different sizes for printing and is installed on the Y-axis base.
-
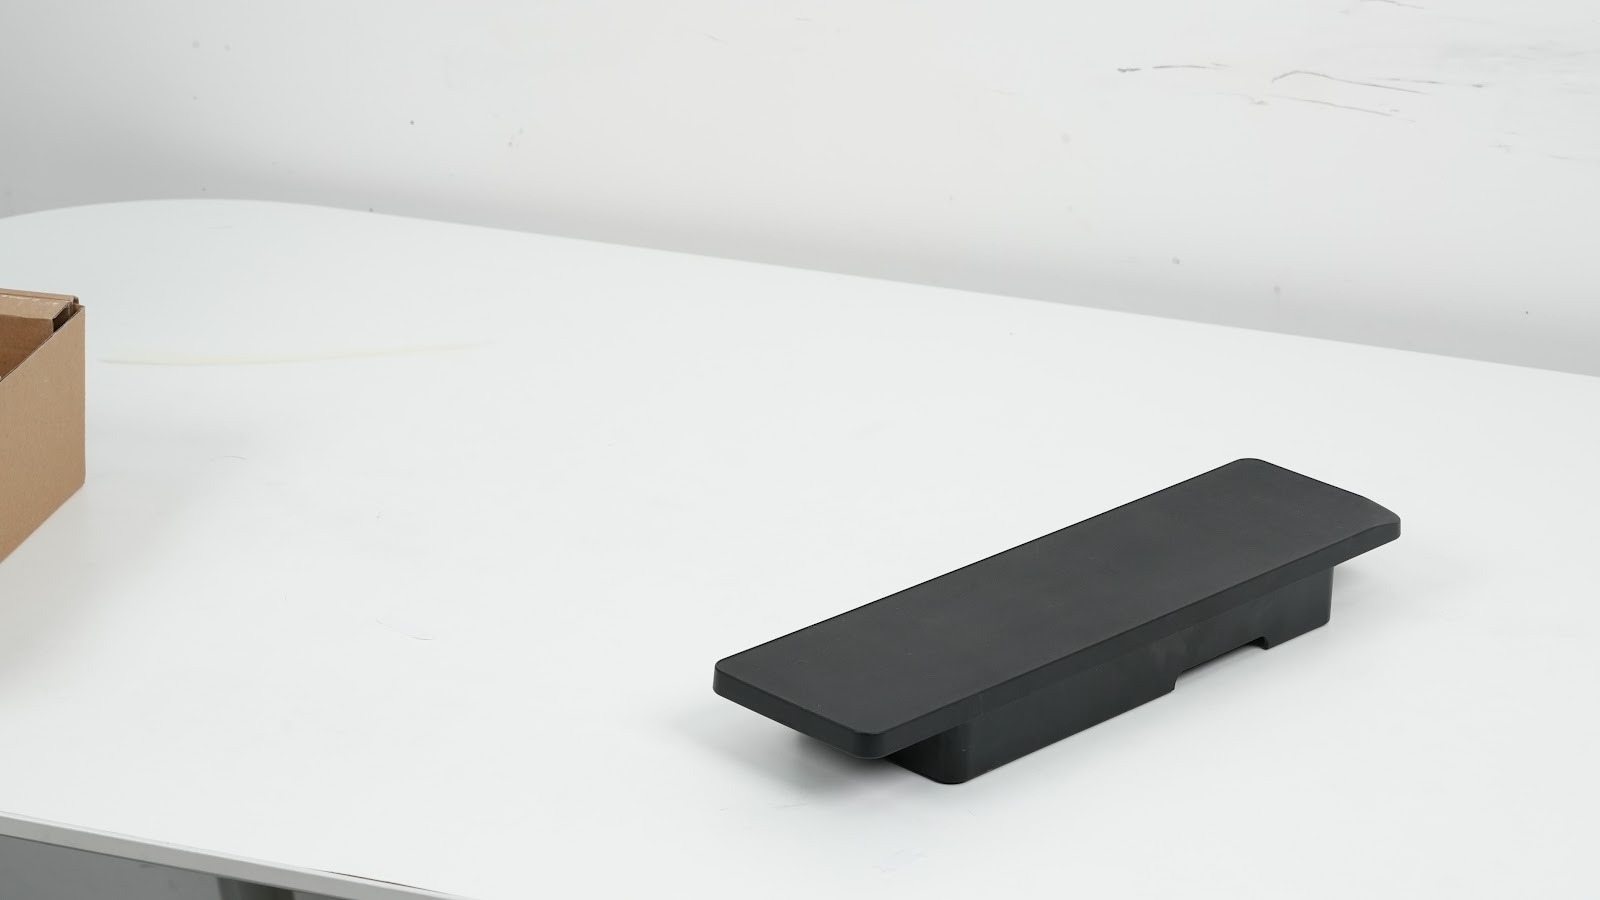
Mini Flatbed
Application Scenarios: Suitable for small-sized substrates such as mini prints and refrigerator magnets, using mini adhesive mat.
Appearance & Printing Range: Black, with a matte surface finish.
-
Dimensions: 373.84 × 101.34 × 42 mm
-
Printable area: 335 × 90 mm
-
Maximum load capacity: 1.5 kg
-
Standard Flatbed
Application Scenarios: Suitable for printing large flat objects such as photo frames and decorative panels. It supports large-format substrate printing in flatbed mode.
Structure: Equipped with a motion module composed of a motor, timing belt, motion seat, and A3 flat panel. Built-in control contacts enable independent motion control. Installed on the Y-axis base, it supports Y-axis movement.
Appearance & Printing Range: Black, with a matte surface finish.
-
Dimensions: 446 × 373.9 × 31.5 mm
-
Printable area: 335 × 420 mm
-
Maximum load capacity: 1.5 kg

Steps for Flatbed Replacement
Step 1 - Ensure the machine is idle and remove printed objects
The flatbed can only be replaced when the machine is in an idle state. If a printed object is present, remove it first.
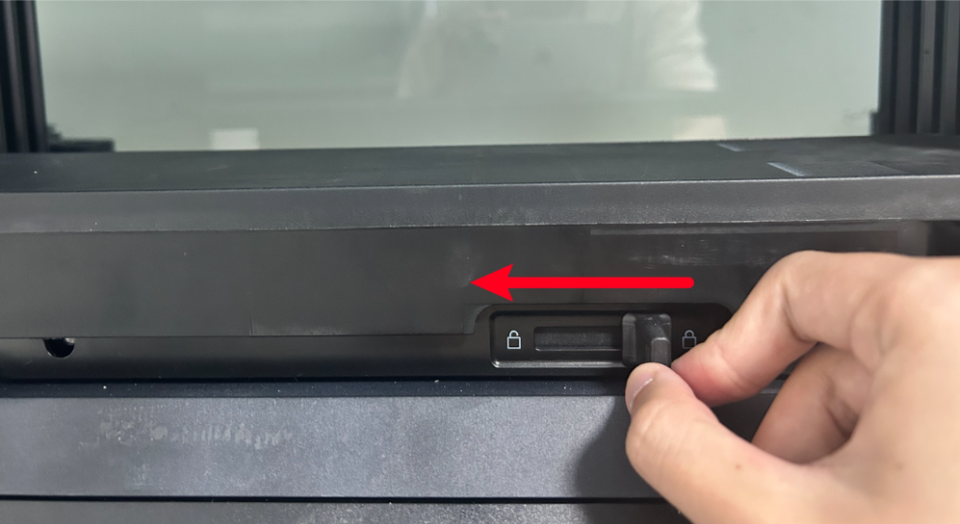
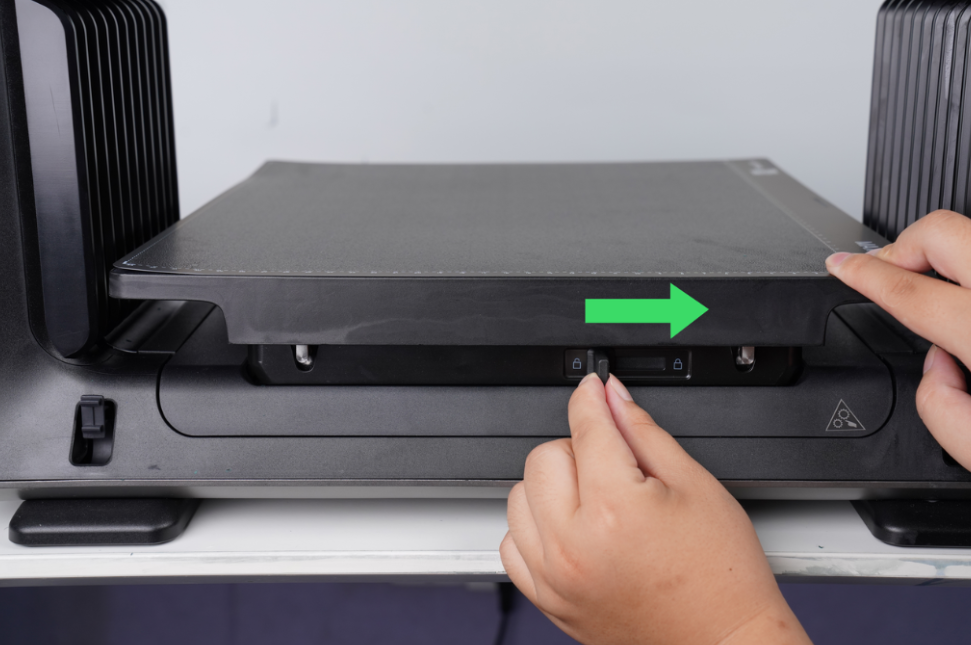
Step 2 - Locate the bottom lever and slide it to unlock the existing flatbed
Open the front door of the machine. Locate the lever at the bottom of the platform and slide it to the unlock icon position to release the existing flatbed.
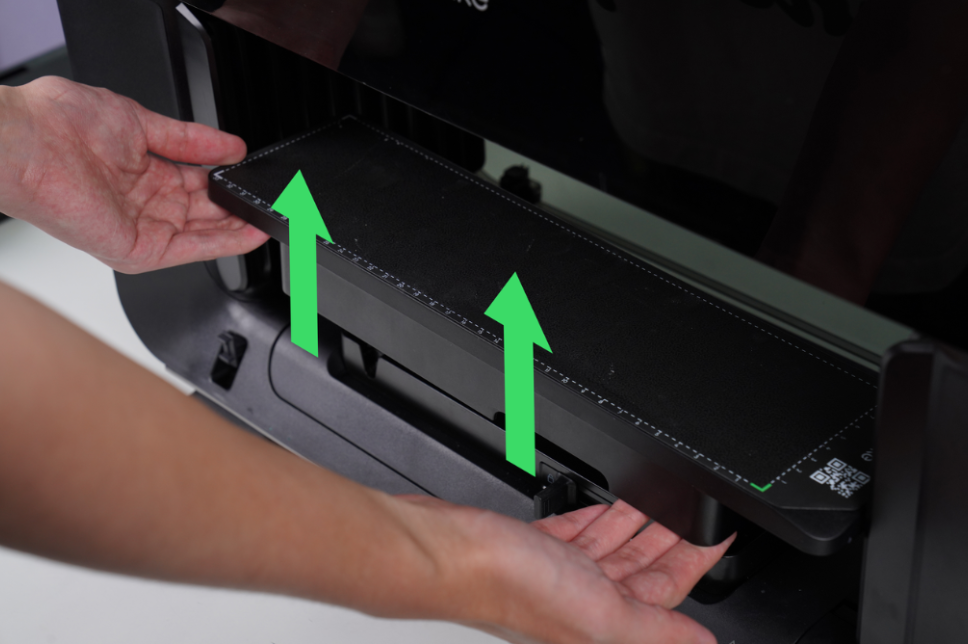
Step 3 - Remove the existing flatbed
After unlocking, hold the flatbed firmly and lift it vertically upward to remove it.
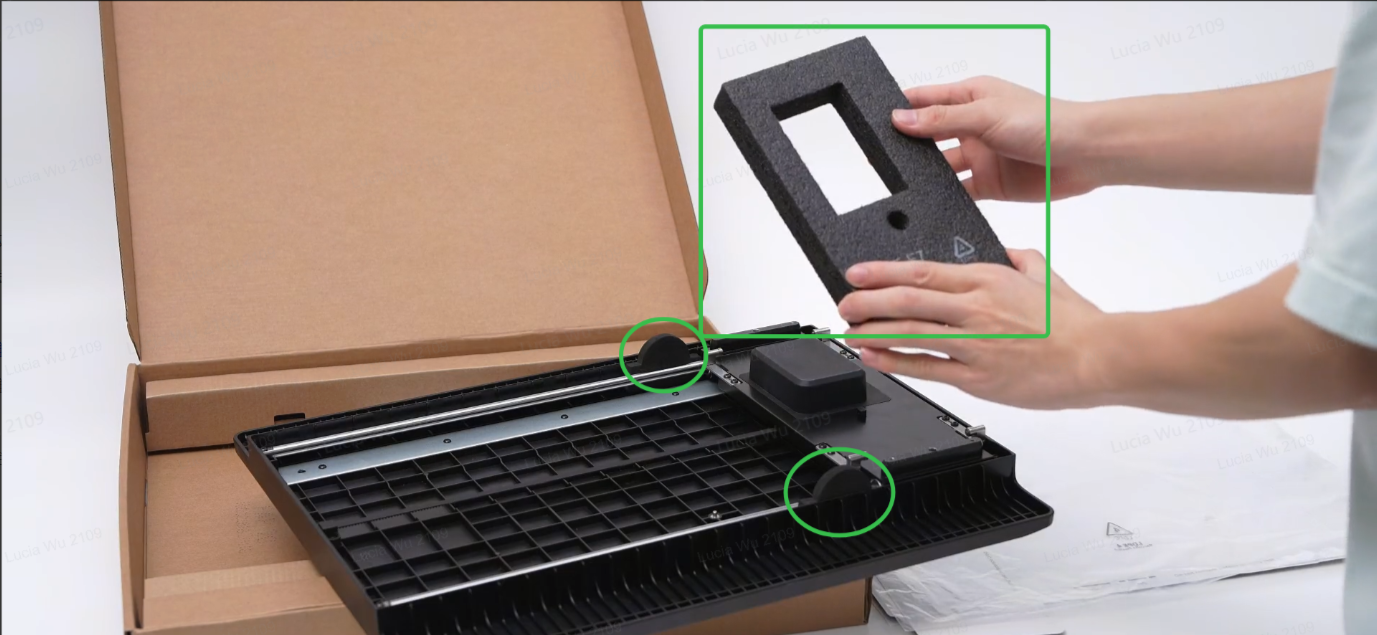
Step 4 - Remove the three sponge pads as shown in the figure to ensure the normal use of the platform board
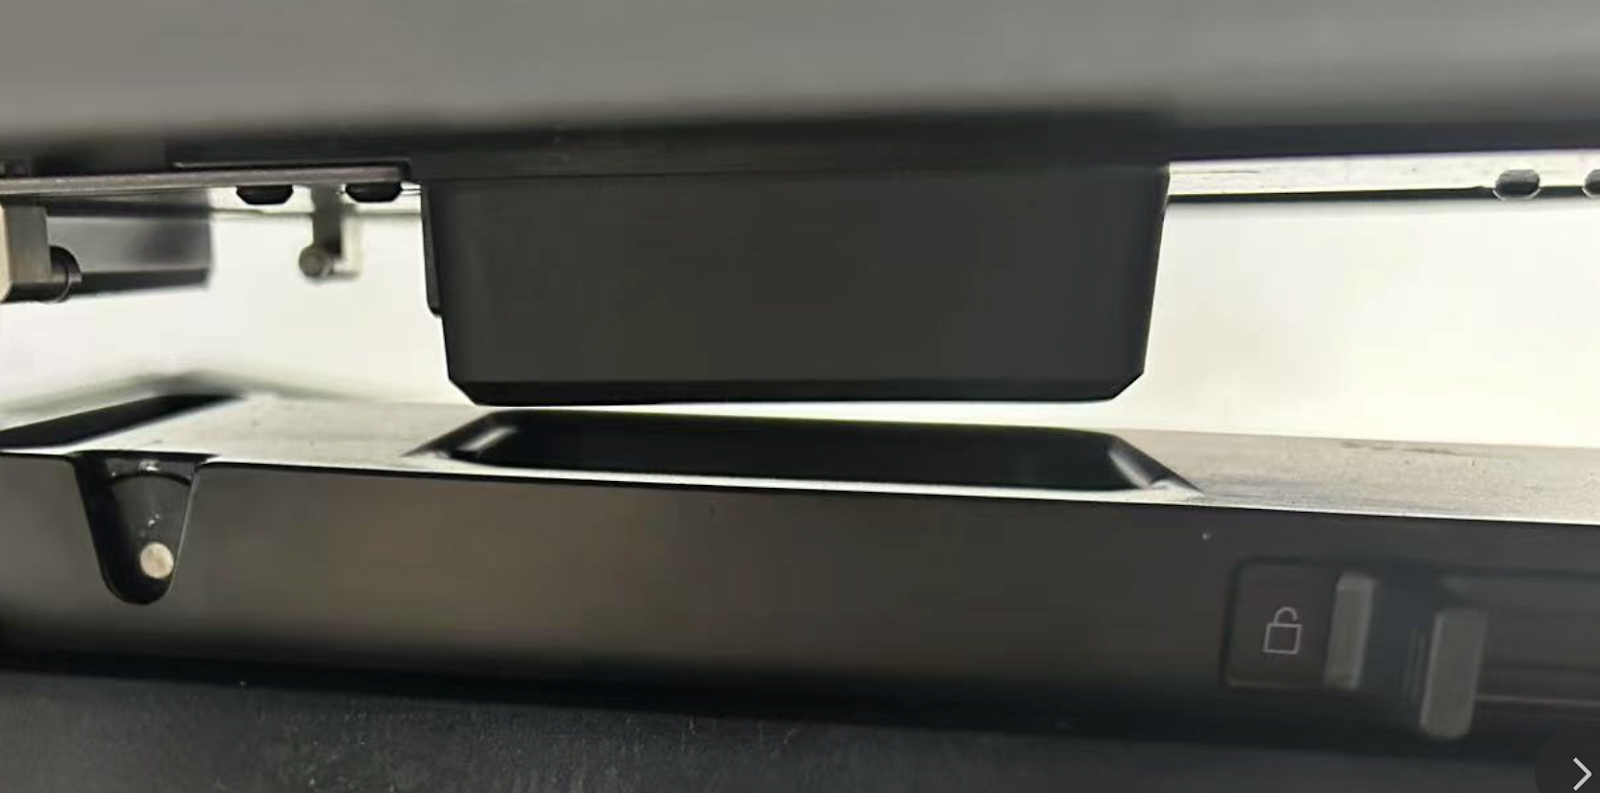
Step 5 - Align the standard flatbed base with the equipment base, align the mounting interface, and install
Locate the bottom positioning slot. Align the flatbed with the installation interface and place it into the slot.
Step 6 - Lock the lever on the device
⚠️Caution: If the standard flatbed is locked without being placed horizontally, it may damage the flatbed! Please ensure that the standard flatbed is placed correctly before locking.
Slide the lever to the lock icon position to secure the flatbed, then gently shake it to confirm it is firmly fixed without looseness or displacement.

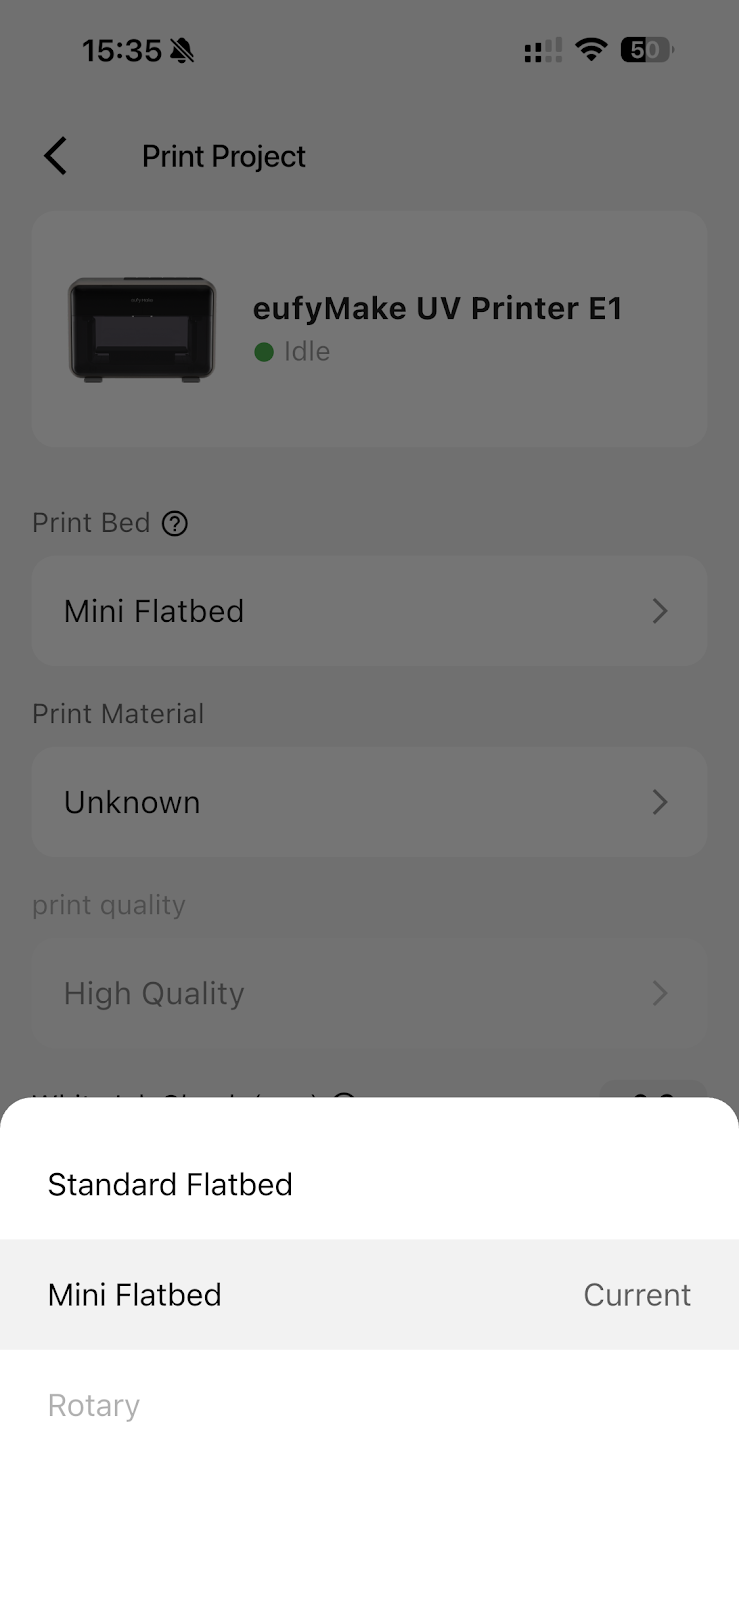
Step 7 - Select the corresponding flatbed when printing
When printing, select the appropriate flatbed option on the interface.