Cleaning Fluid Pump, Moisturizing Fluid Pump, Waste Ink Pump Replacement SOP
Keyword: eufyMake UV Printer E1, pump module replacement, cleaning fluid pump replacement, moisturizing pump replacement, waste ink pump replacement, pump replacement SOP, UV printer pump maintenance, ink pump replacement guide, waste ink handling precautions, UV printer repair guide
Categories: website > Troubleshooting
Accessory Introduction
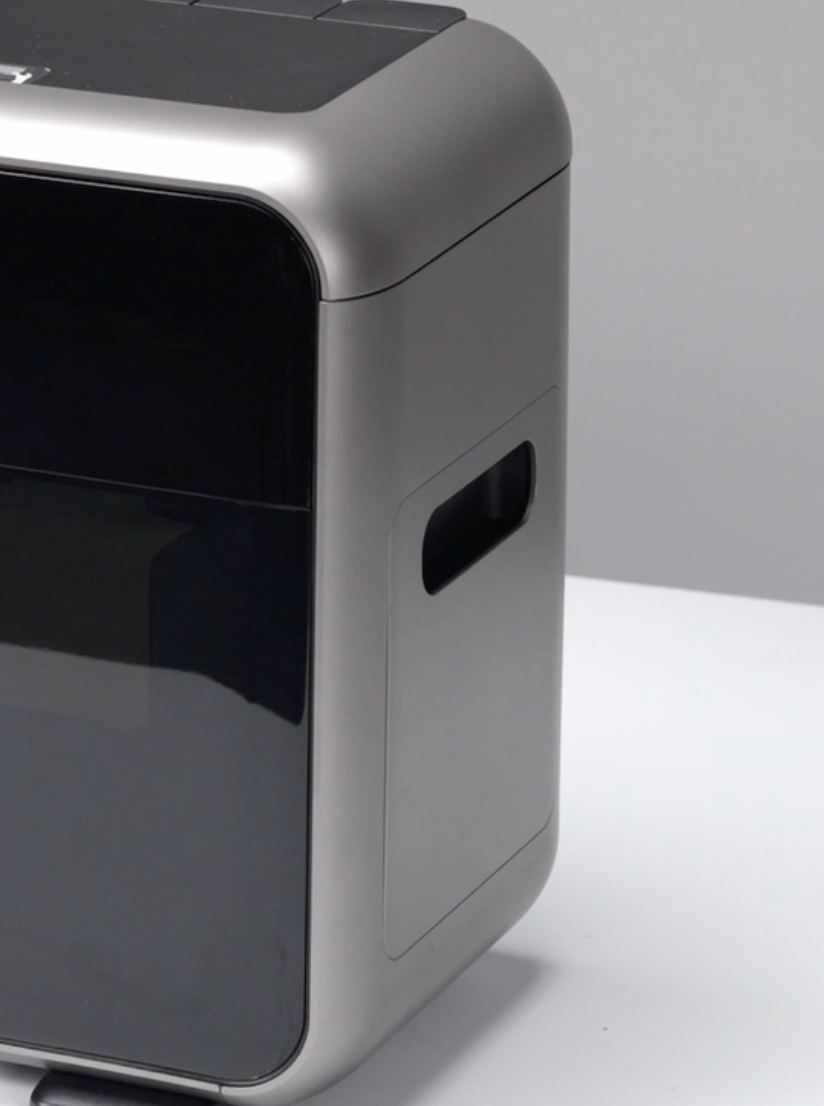
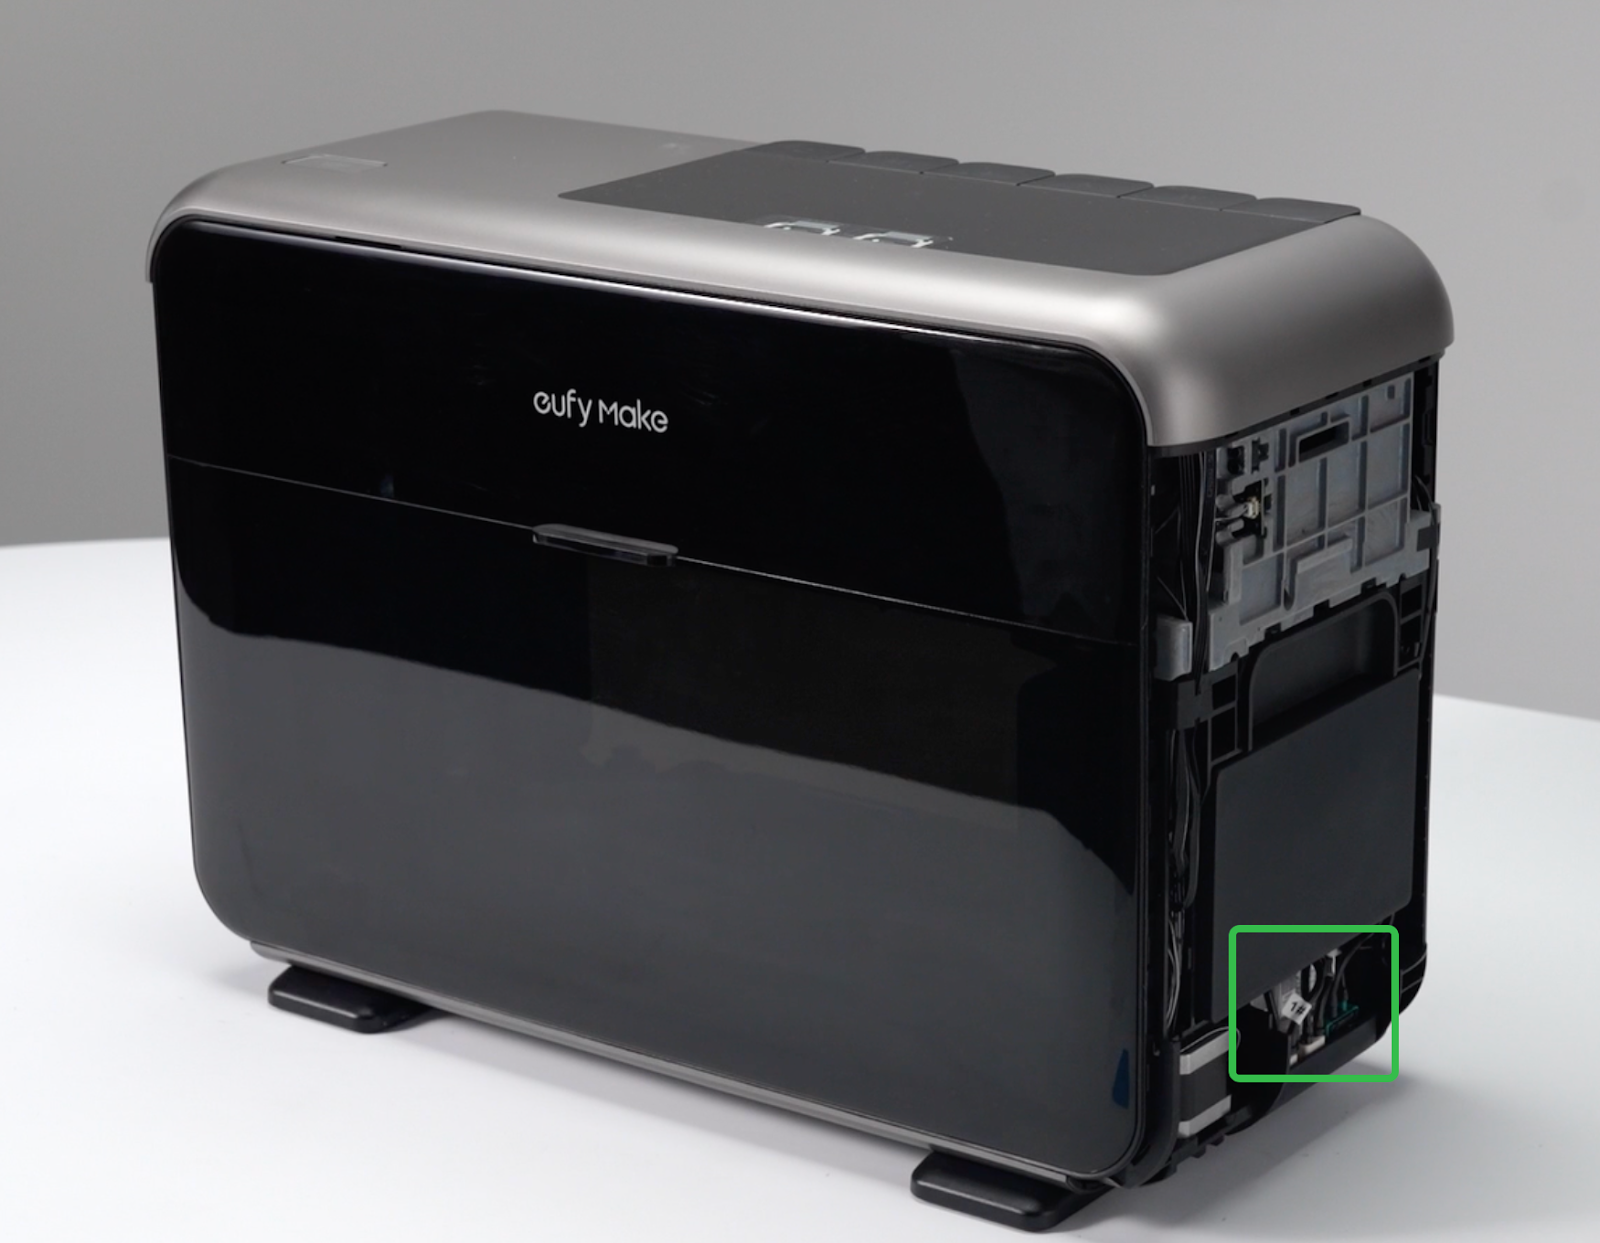
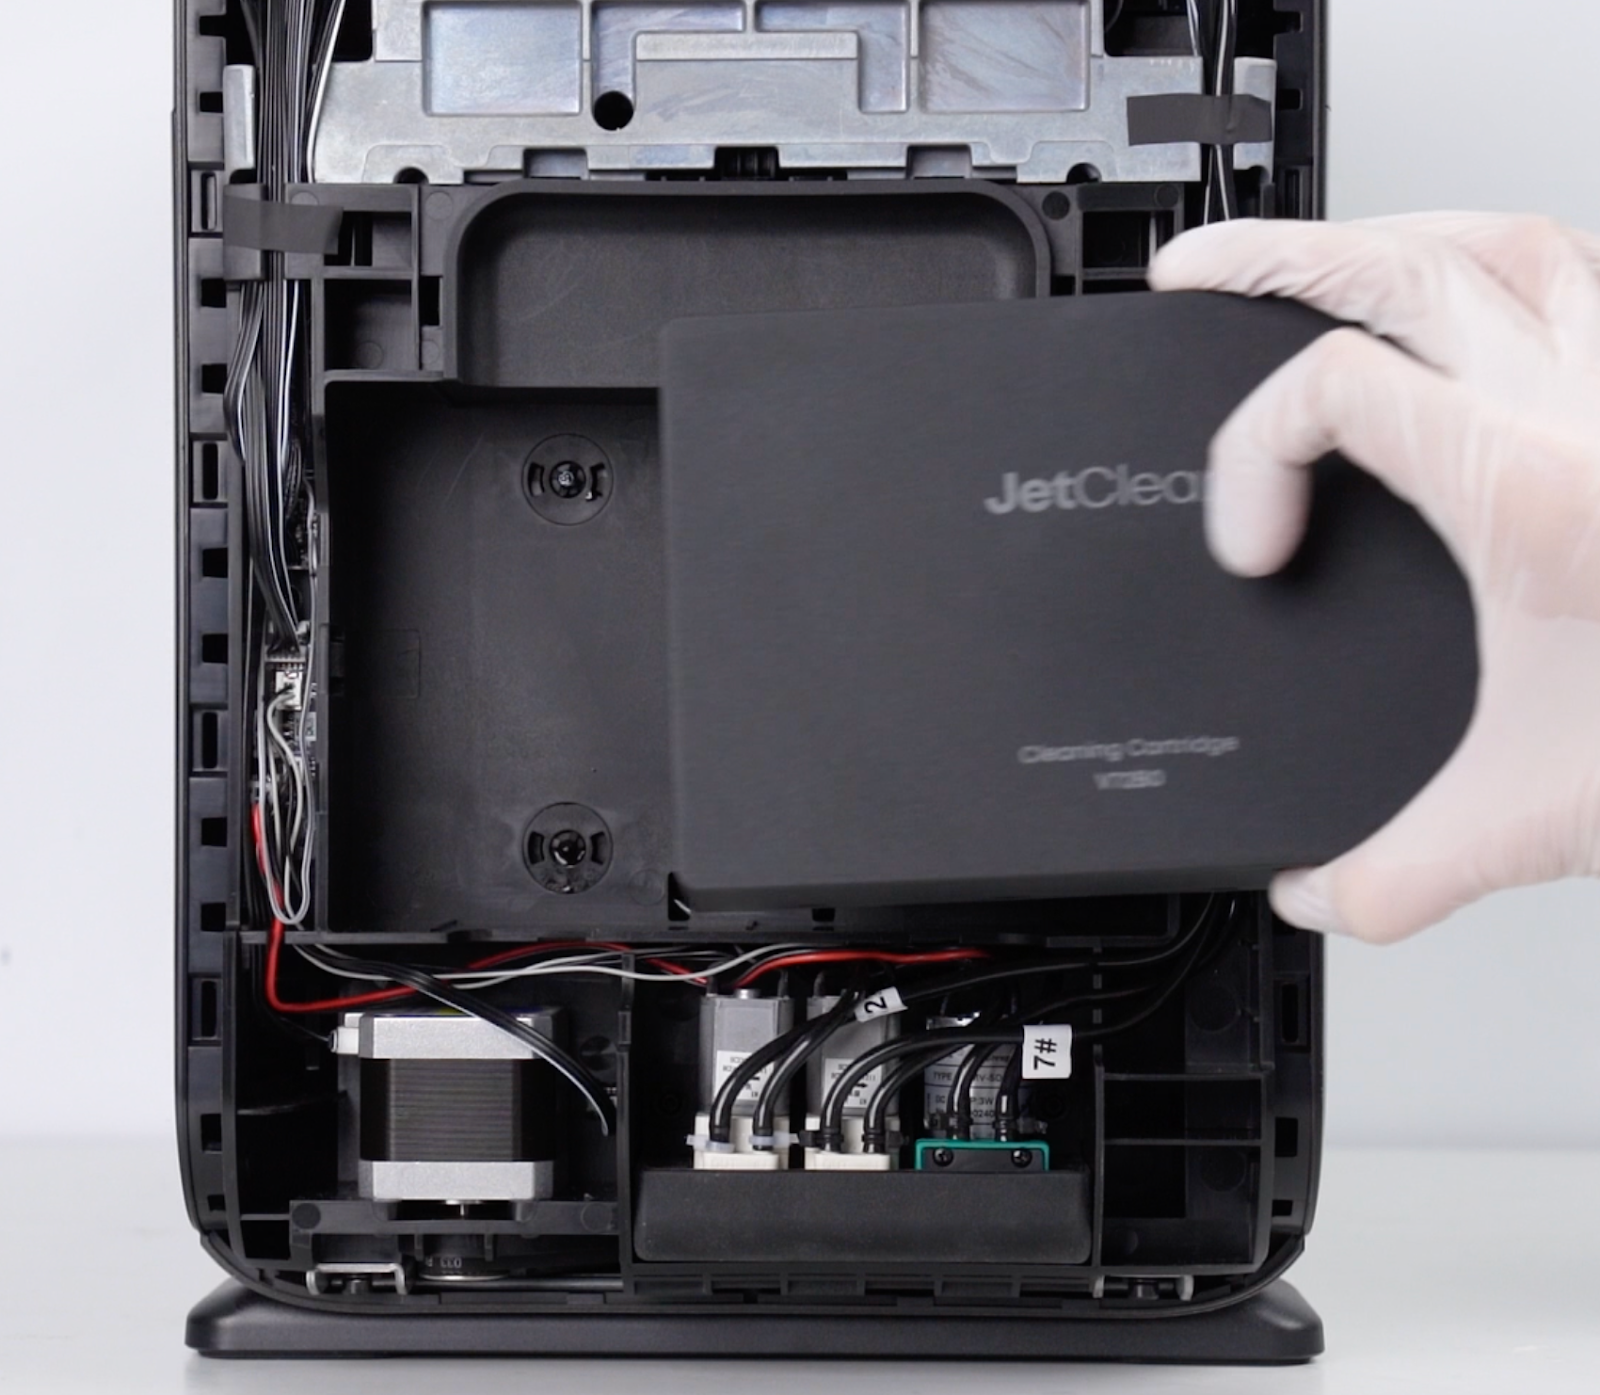
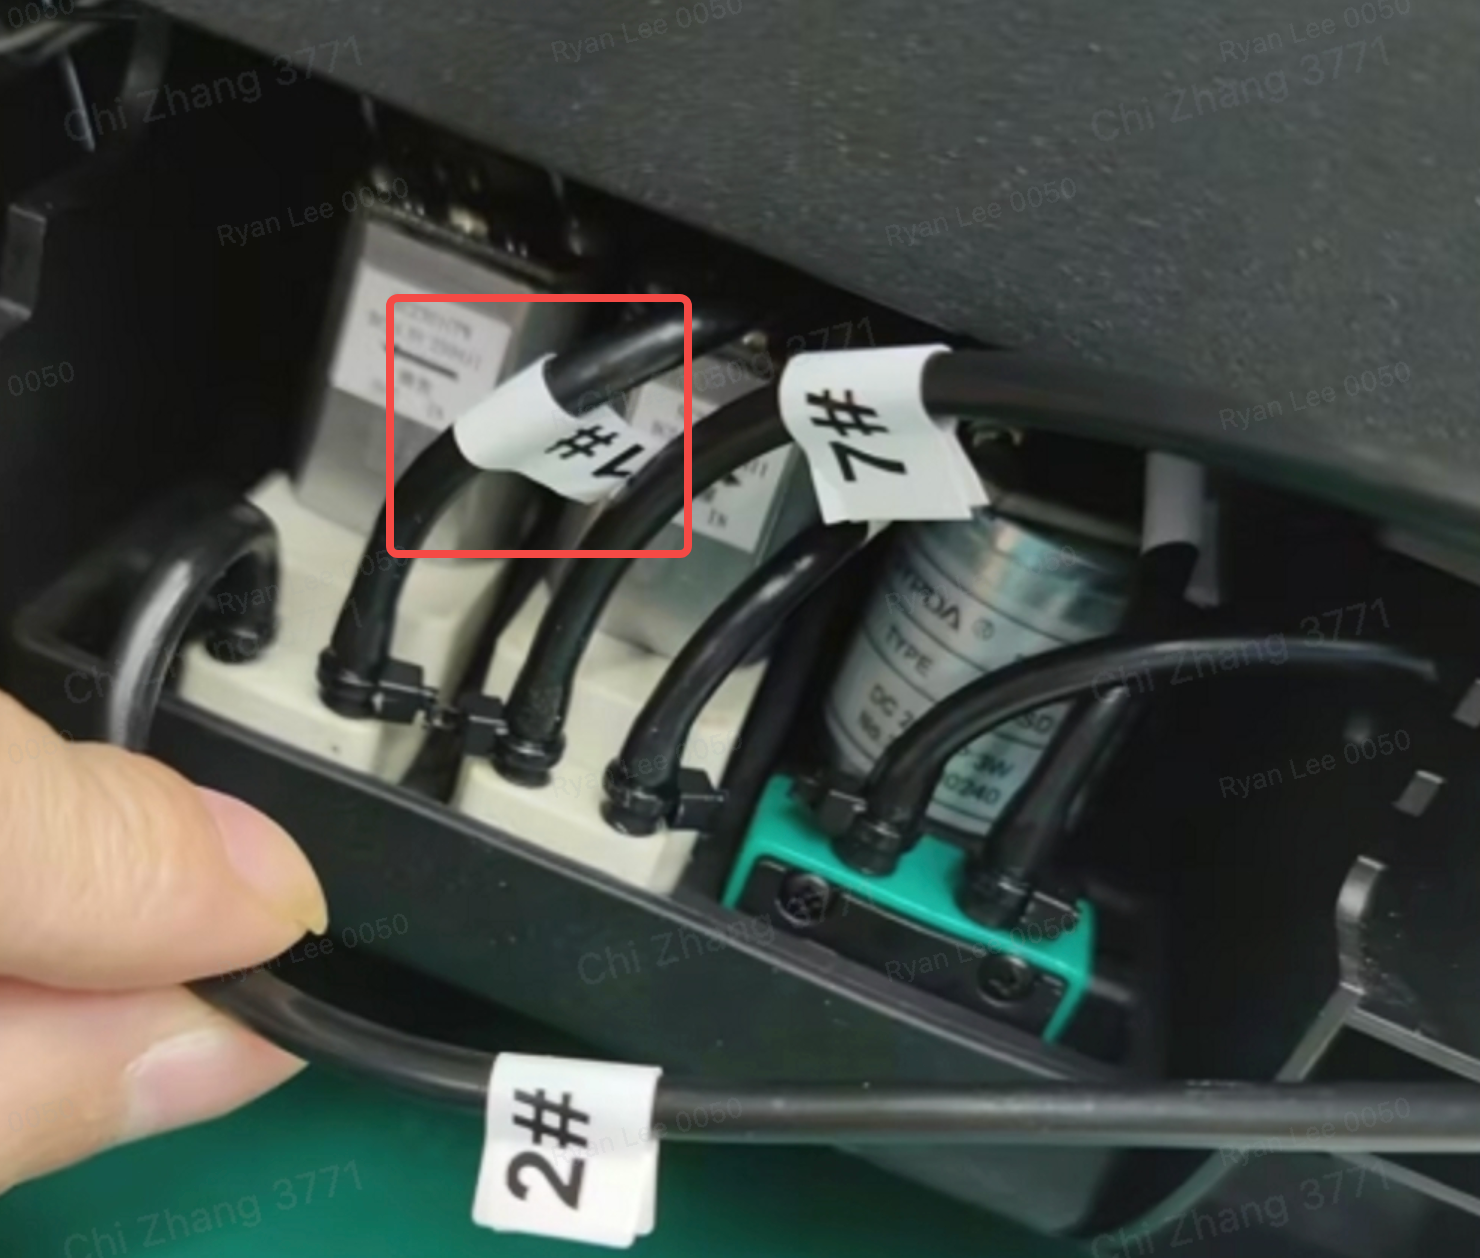
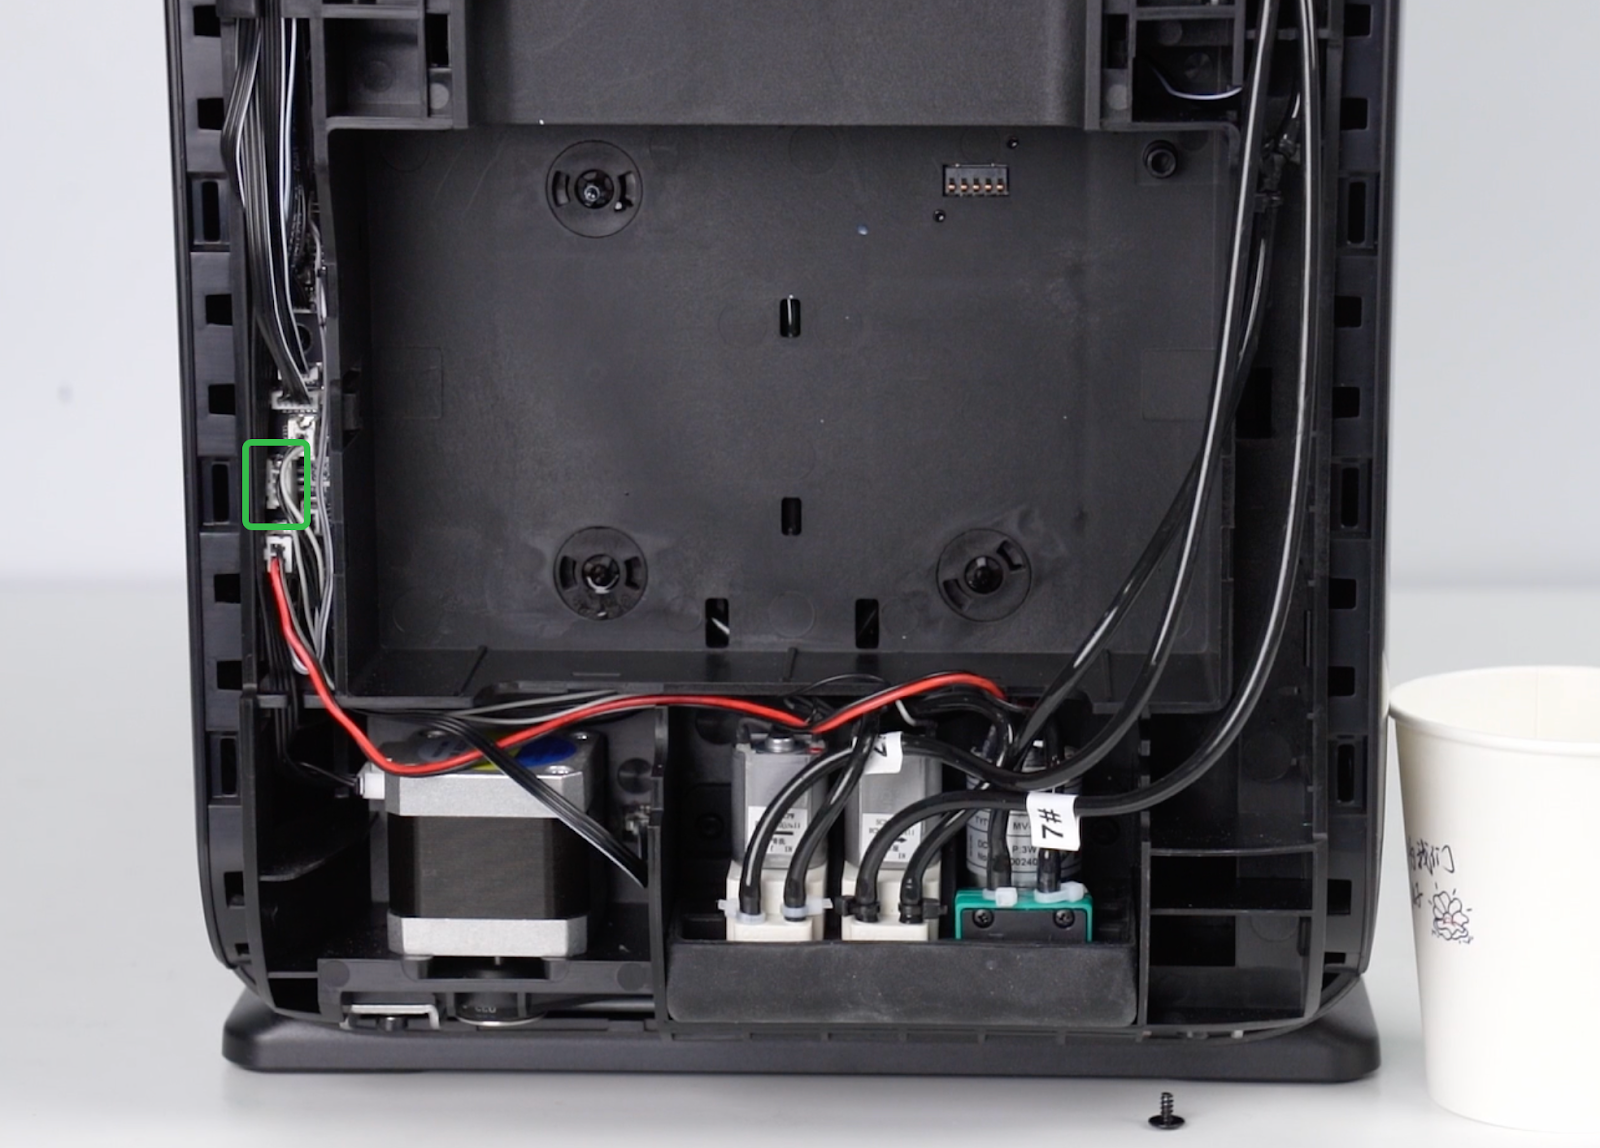
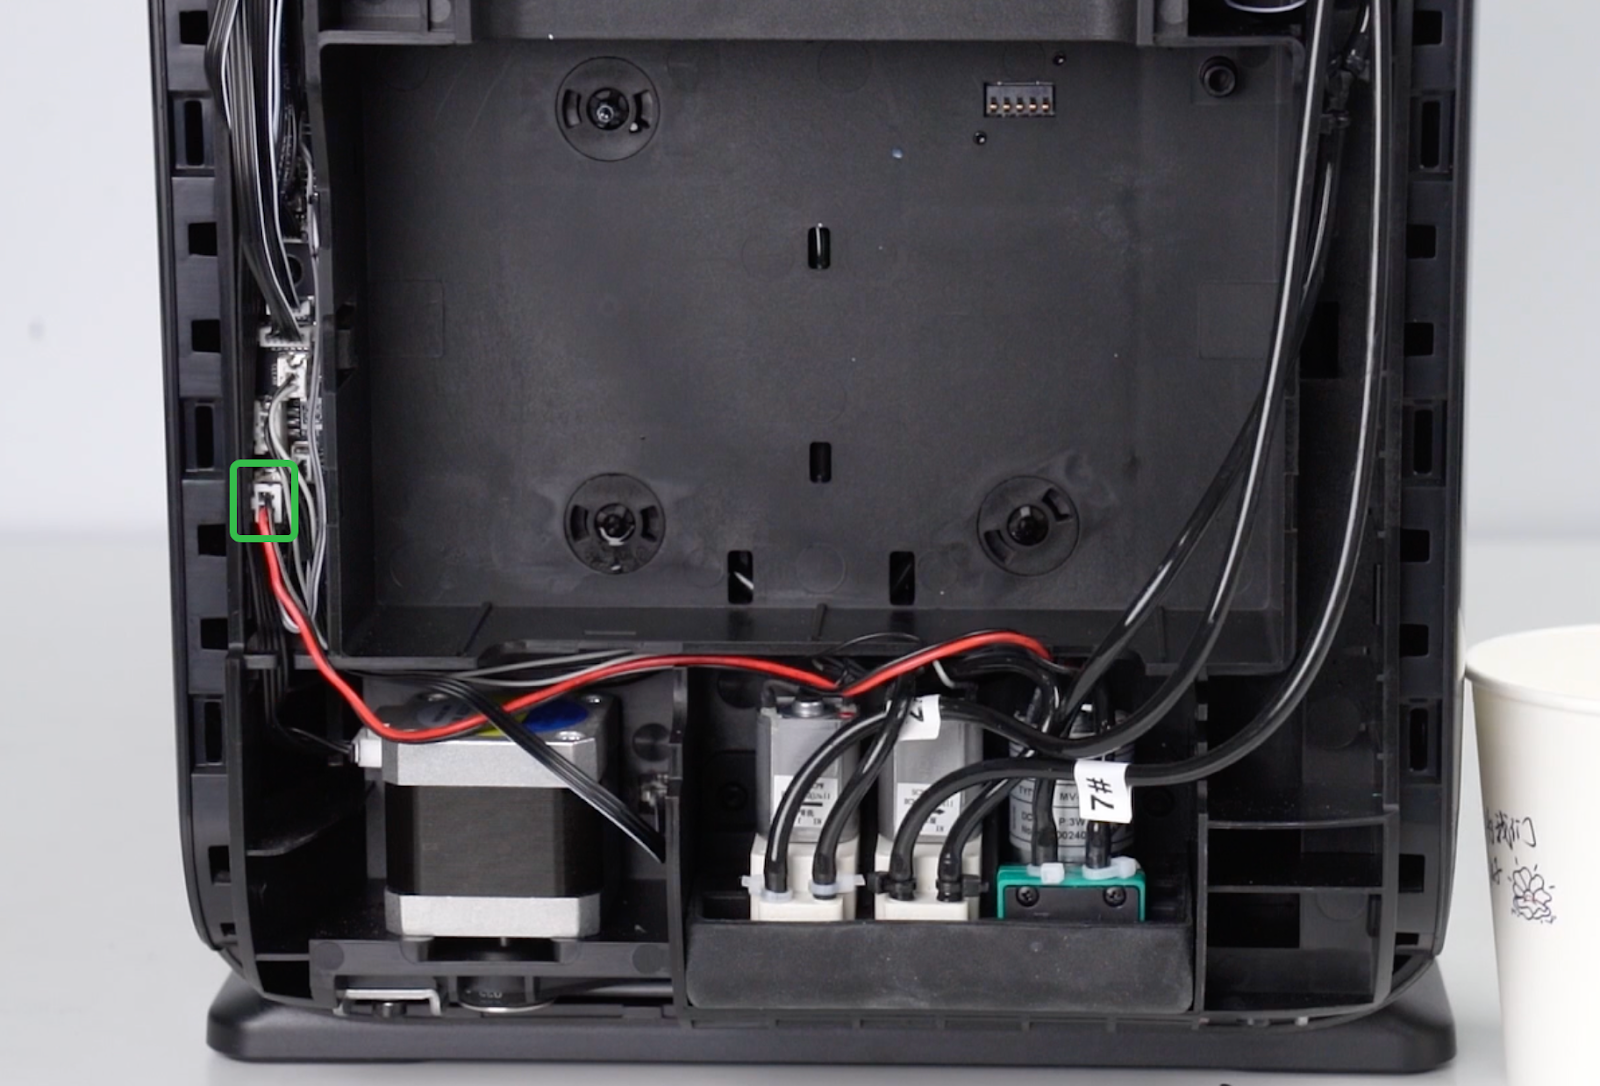
The pump module is located below the cleaning box on the right side of the machine.
Required Tools (User-provided)
-
Disposable Nitrile Gloves
-
Waterproof bag or Paper cup
-
Tissue or absorbent wipes
-
2.0mm Hex Screwdriver
-
Side Cutter/Scissors
-
Cable Ties
Safety Precautions
Please read all precautions carefully before starting.
-
Power off the device before operation.
-
Ensure ink tubes are reconnected correctly during reinstallation.
-
Remove the cleaning fluid cartridge first. If the cartridge is not removed, cleaning fluid will leak when the tube is disconnected.
-
Waste ink is corrosive. Always wear gloves when handling.
-
Before cutting any ink tube, take protective measures to prevent liquid from contacting skin, equipment, or the work surface.
-
During reassembly, check that all exposed cables and ink tubes are properly routed and seated.
-
If replacing multiple pumps, replace them one at a time to avoid mixing up ink tube connections.
Replacement Steps
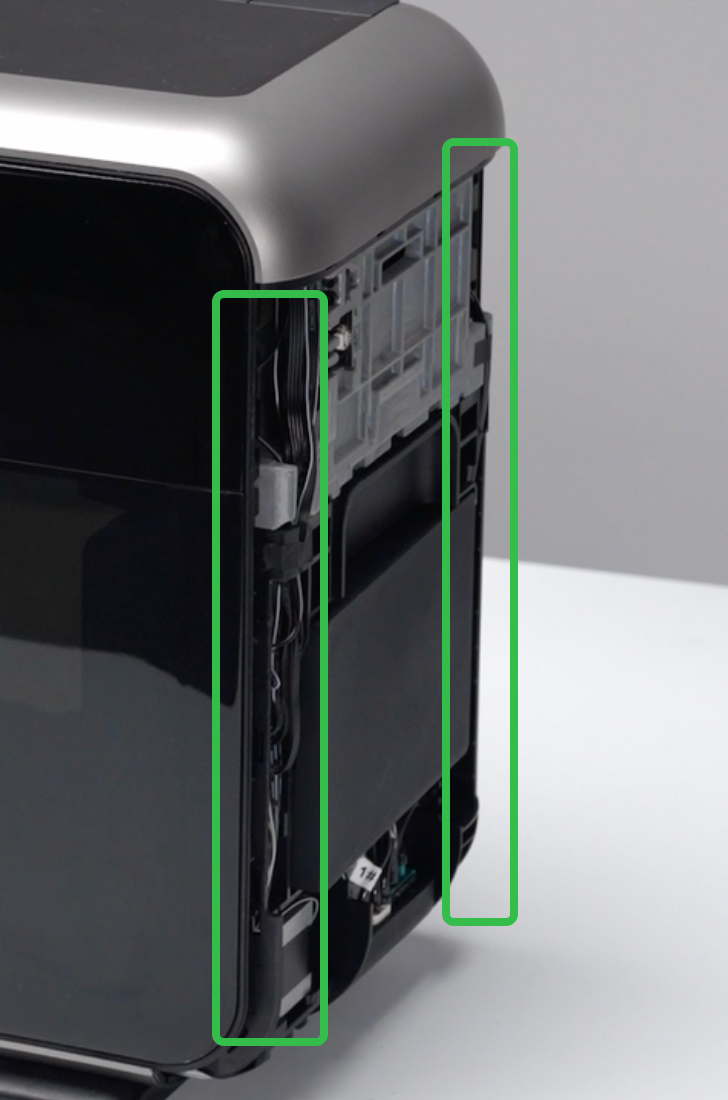
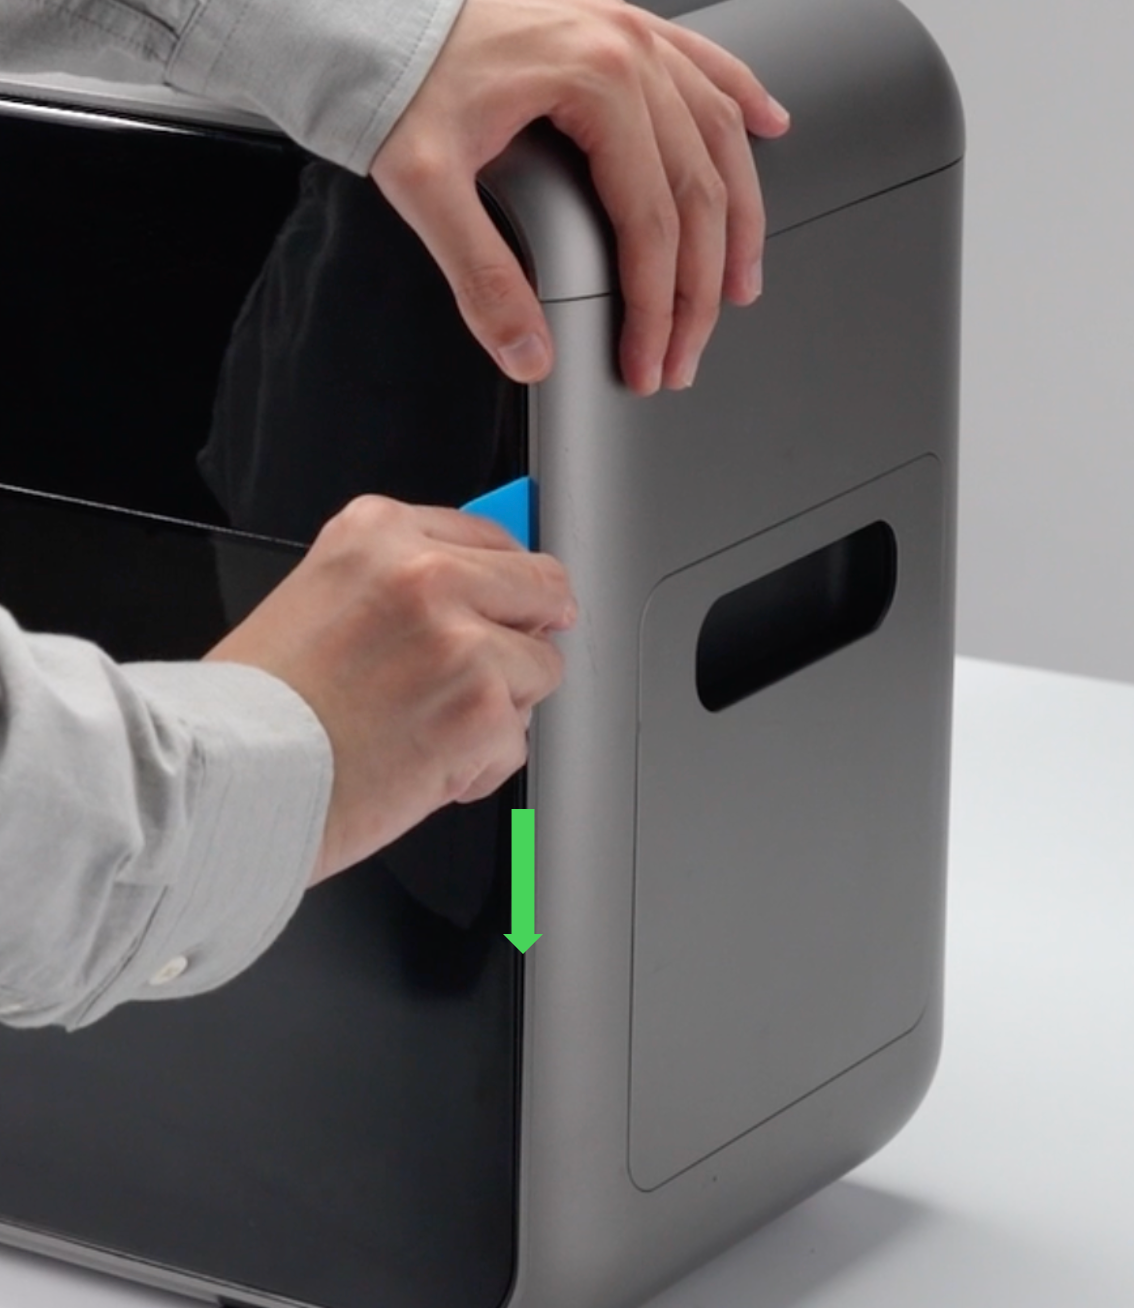
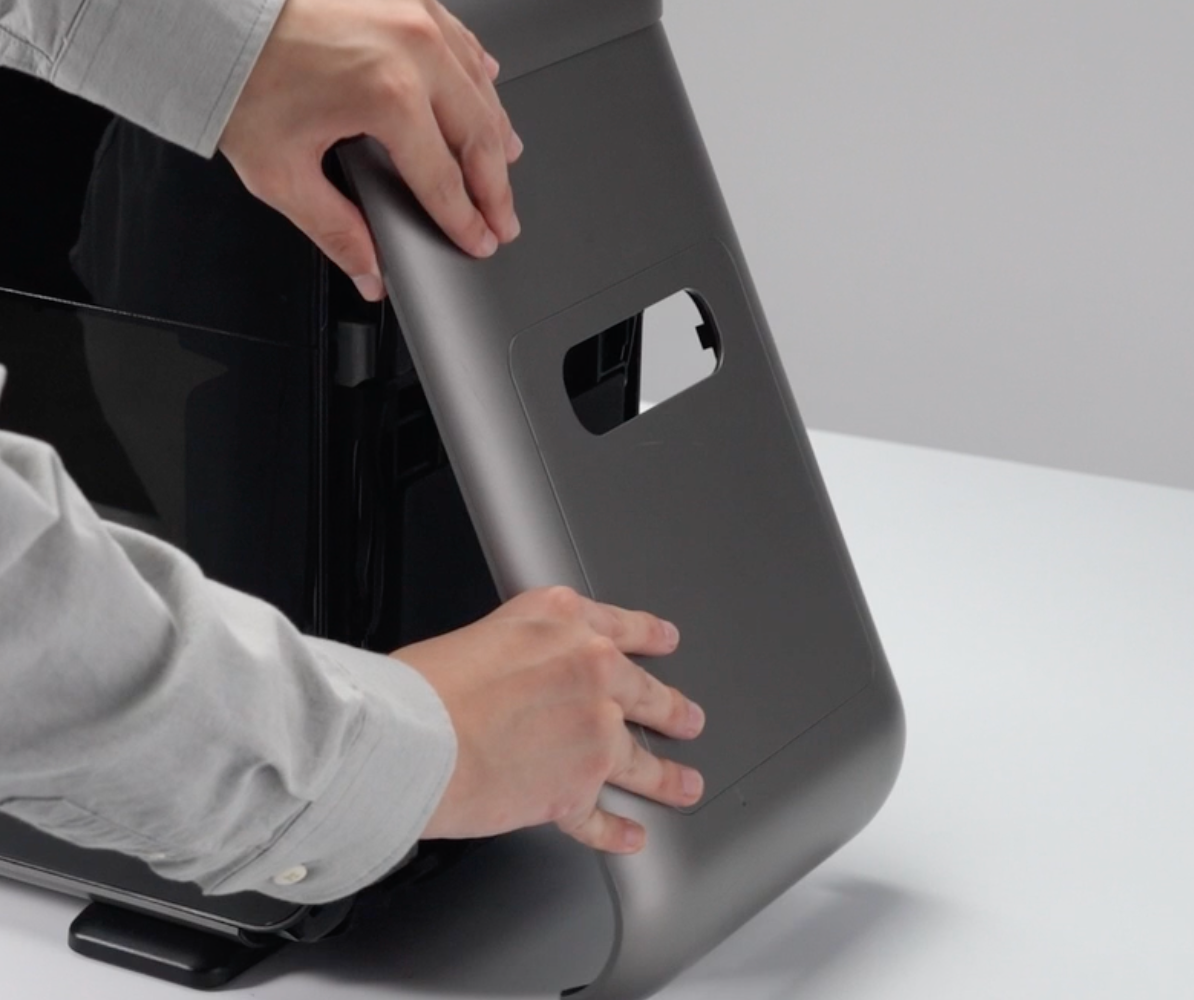
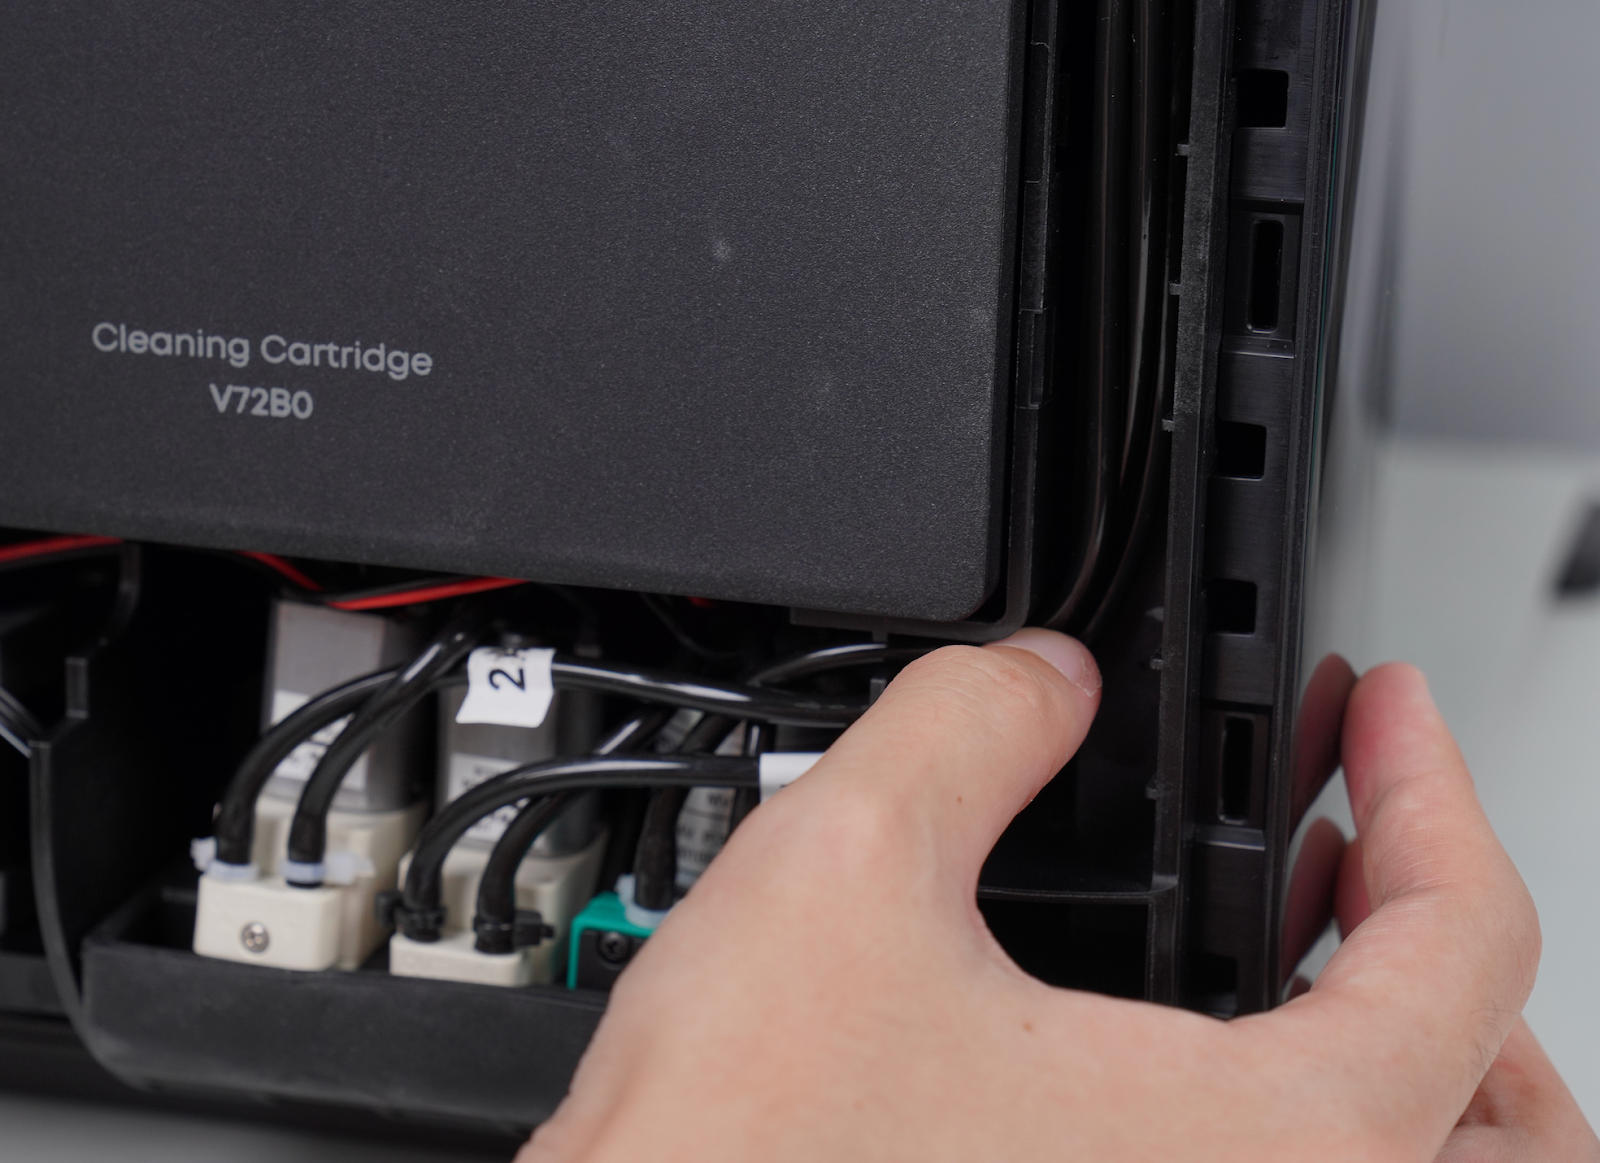
Step 1 - Power off and remove the right-side cover
-
Turn off the power, and unplug the power cord
-
Using a pry tool to gently pry open a gap along the left and right edges of the housing. Pull outward from the bottom to remove the right-side cover.
Step 2 - Remove the cleaning fluid cartridge
⚠️ Important:
The cleaning fluid cartridge must be removed before any pump operation.
Failure to do so will cause cleaning fluid to leak when the tube is disconnected.
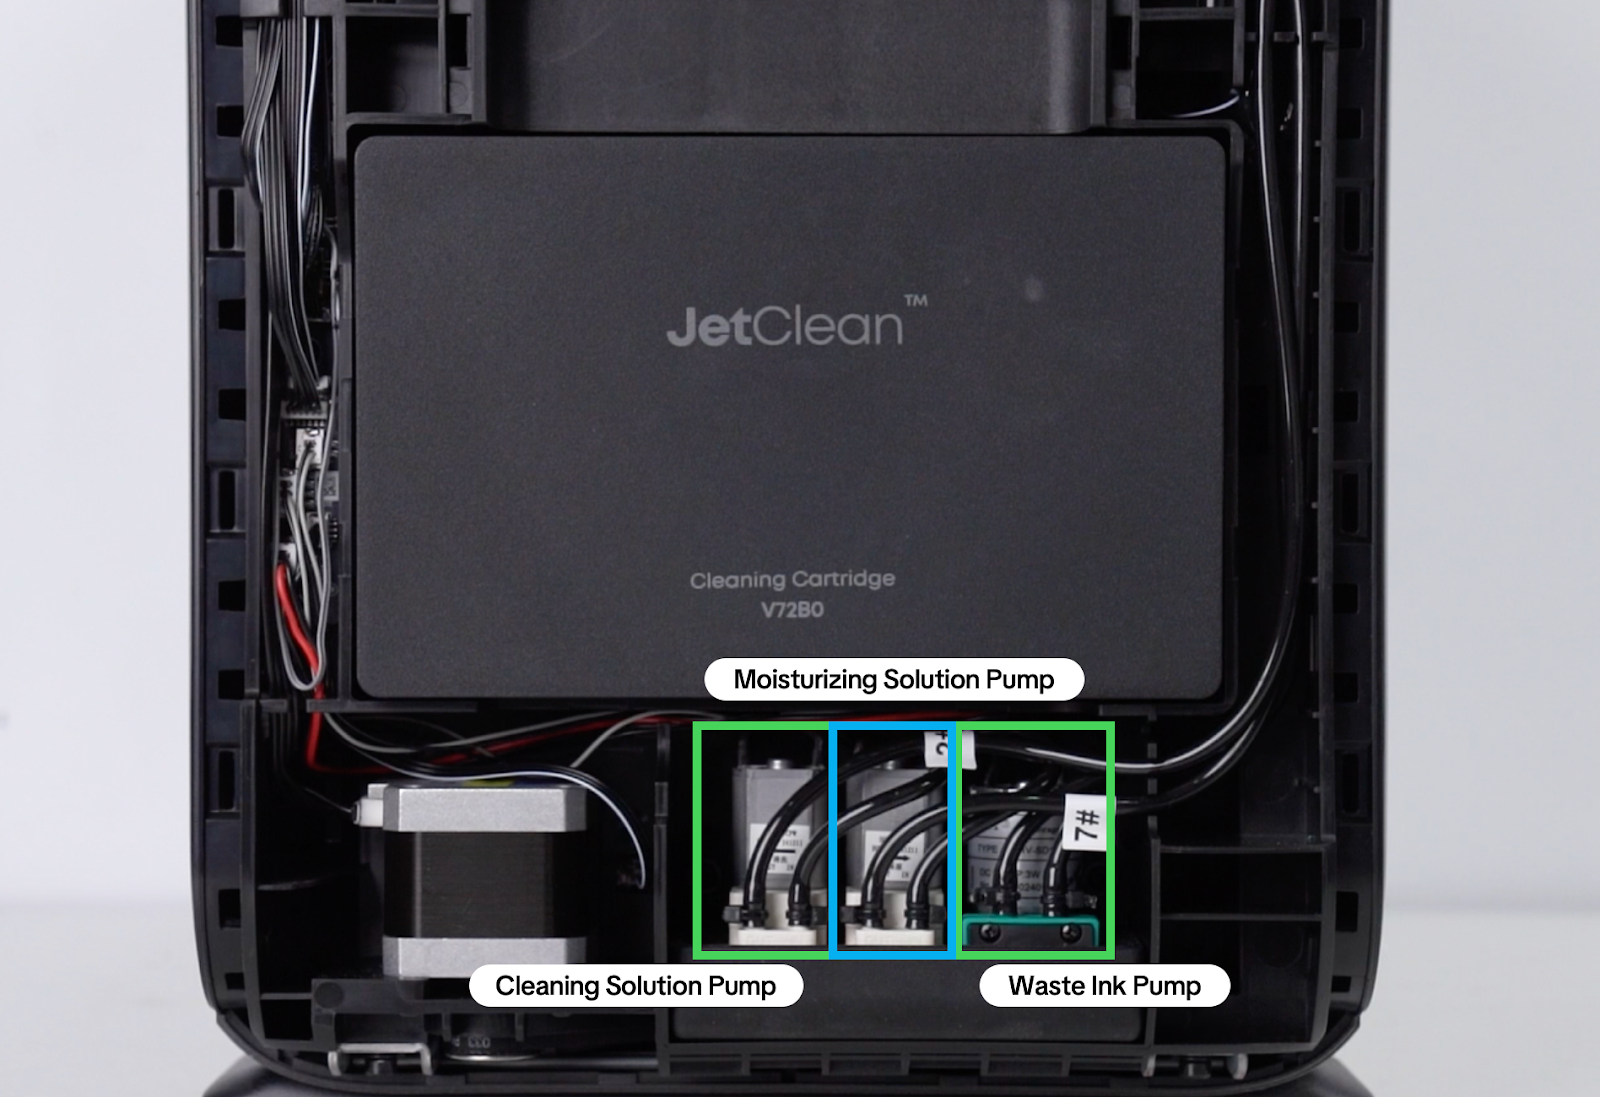
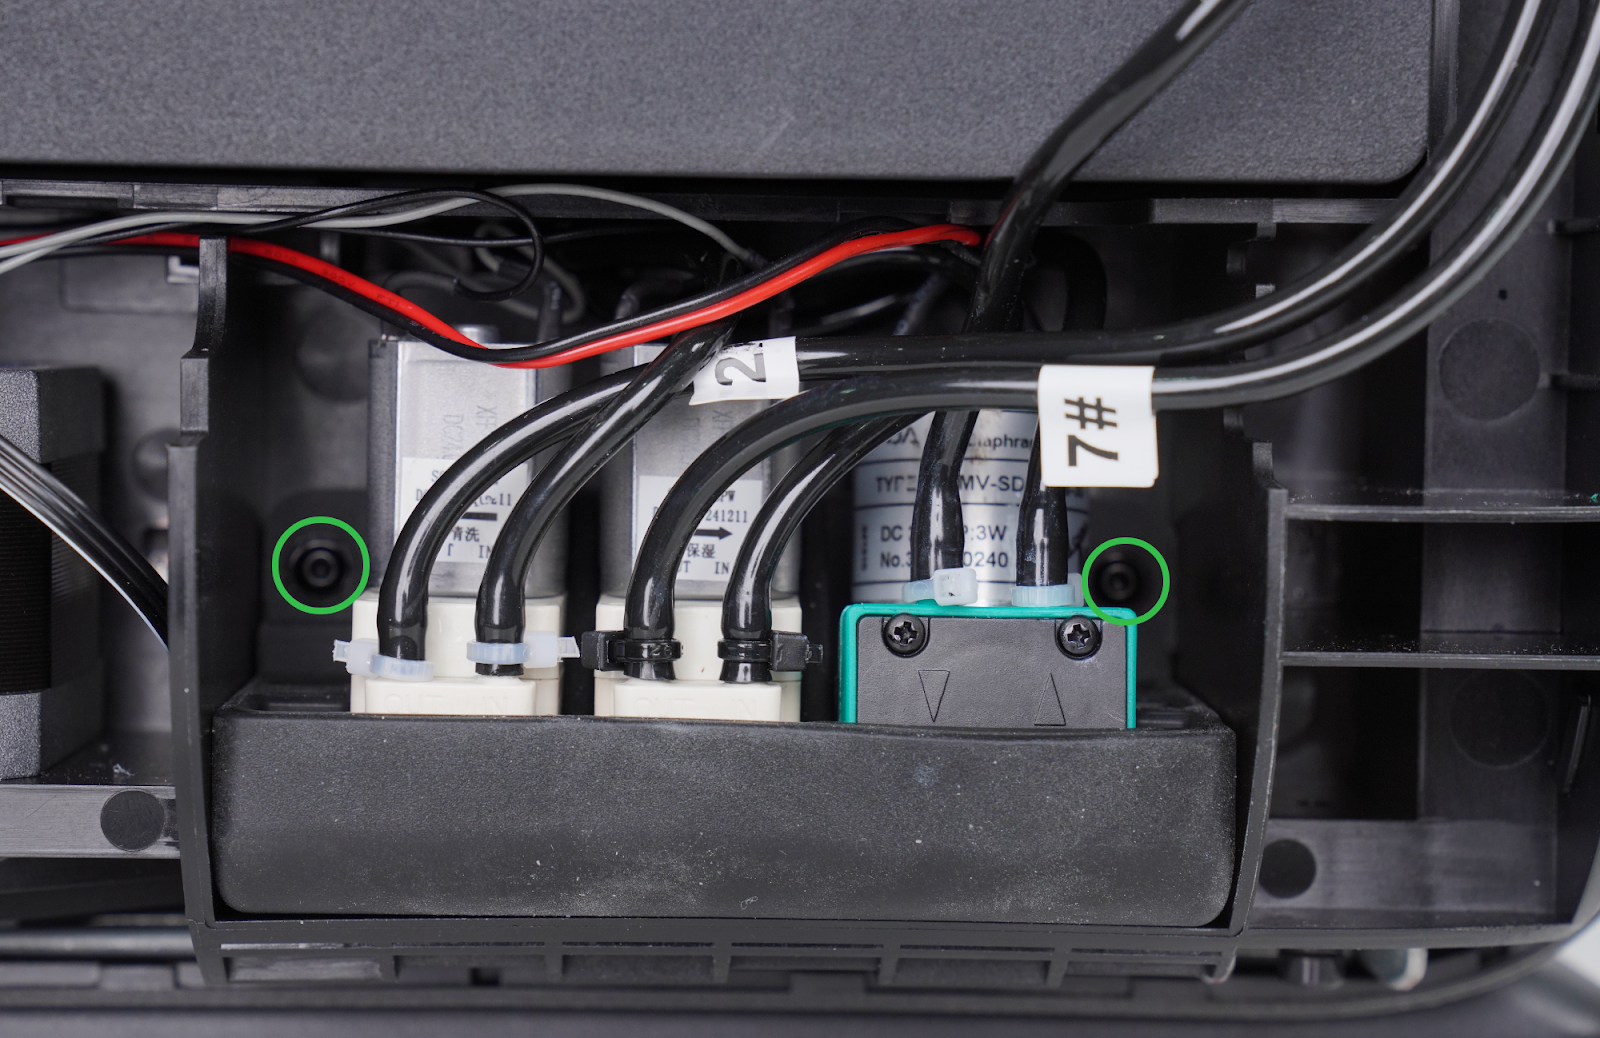
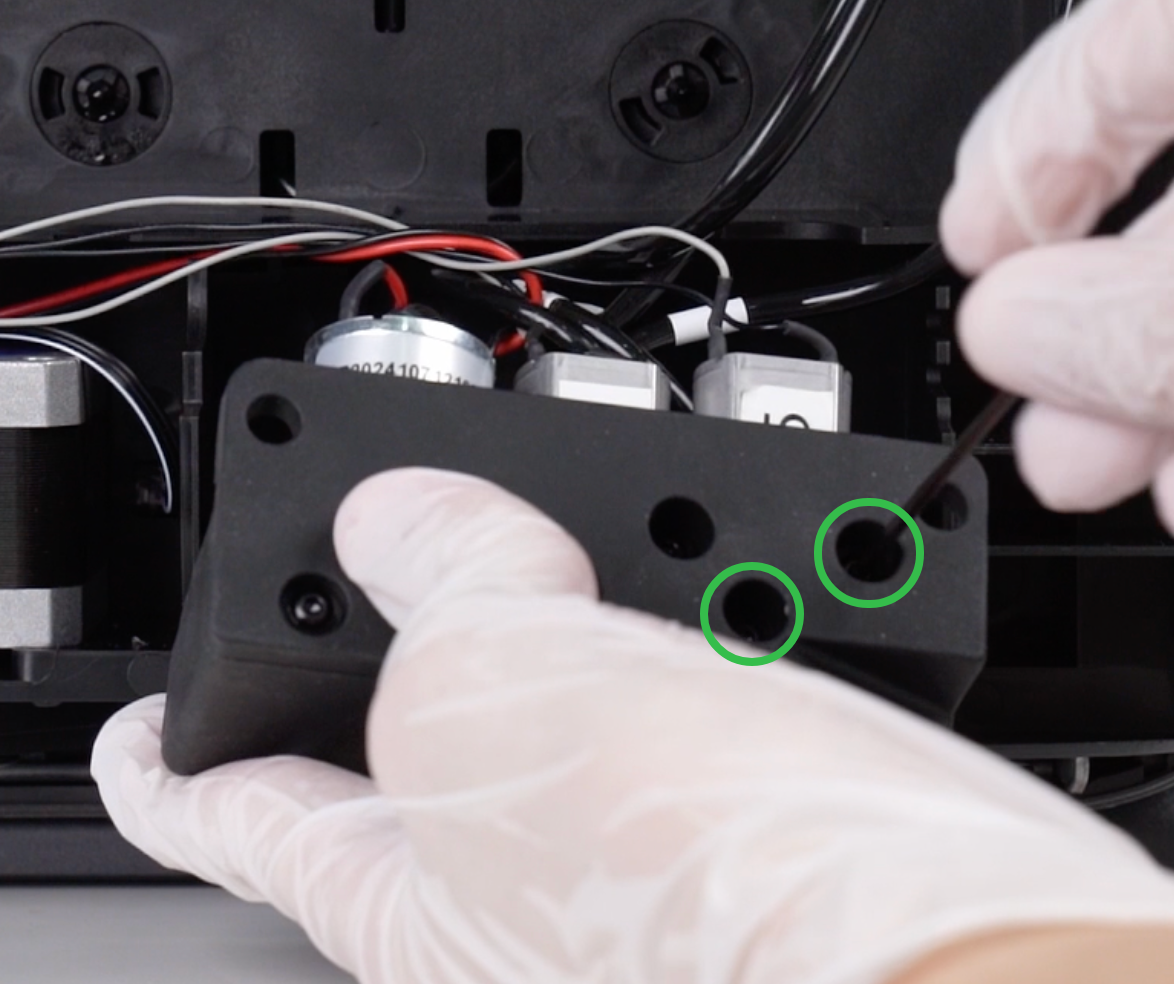
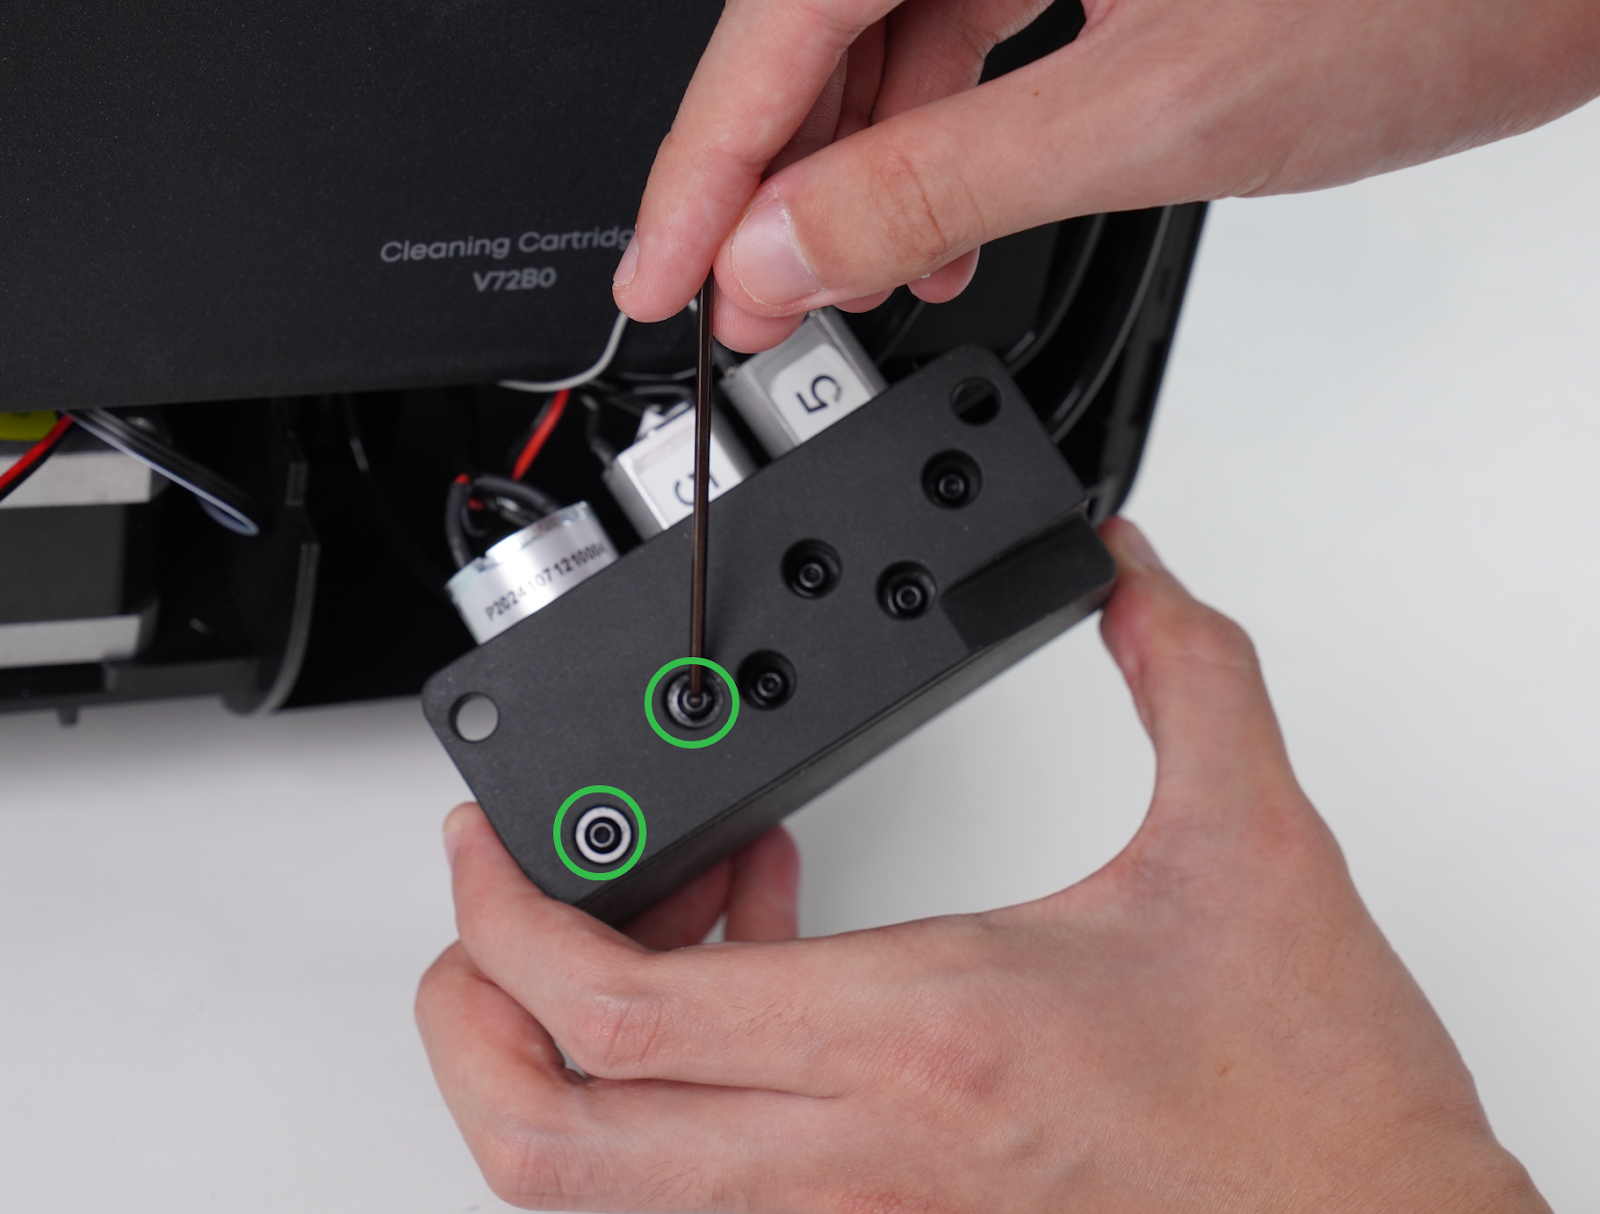
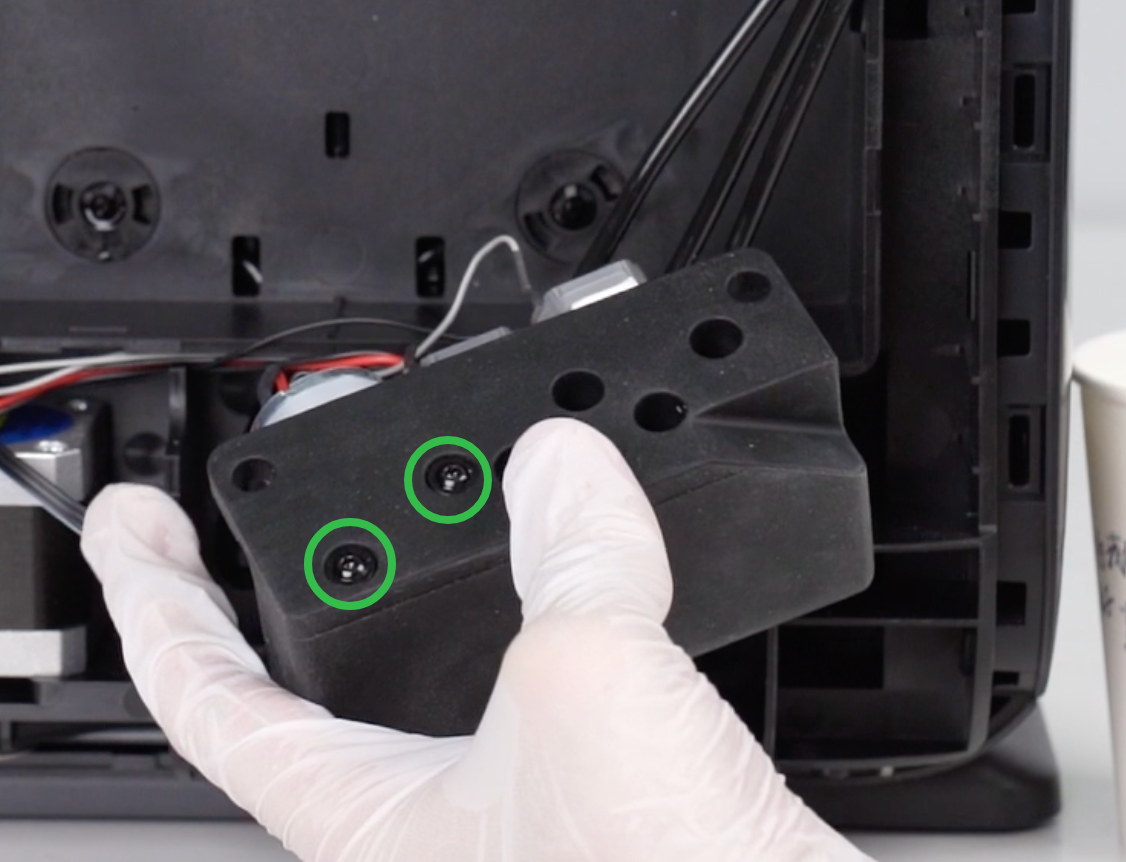
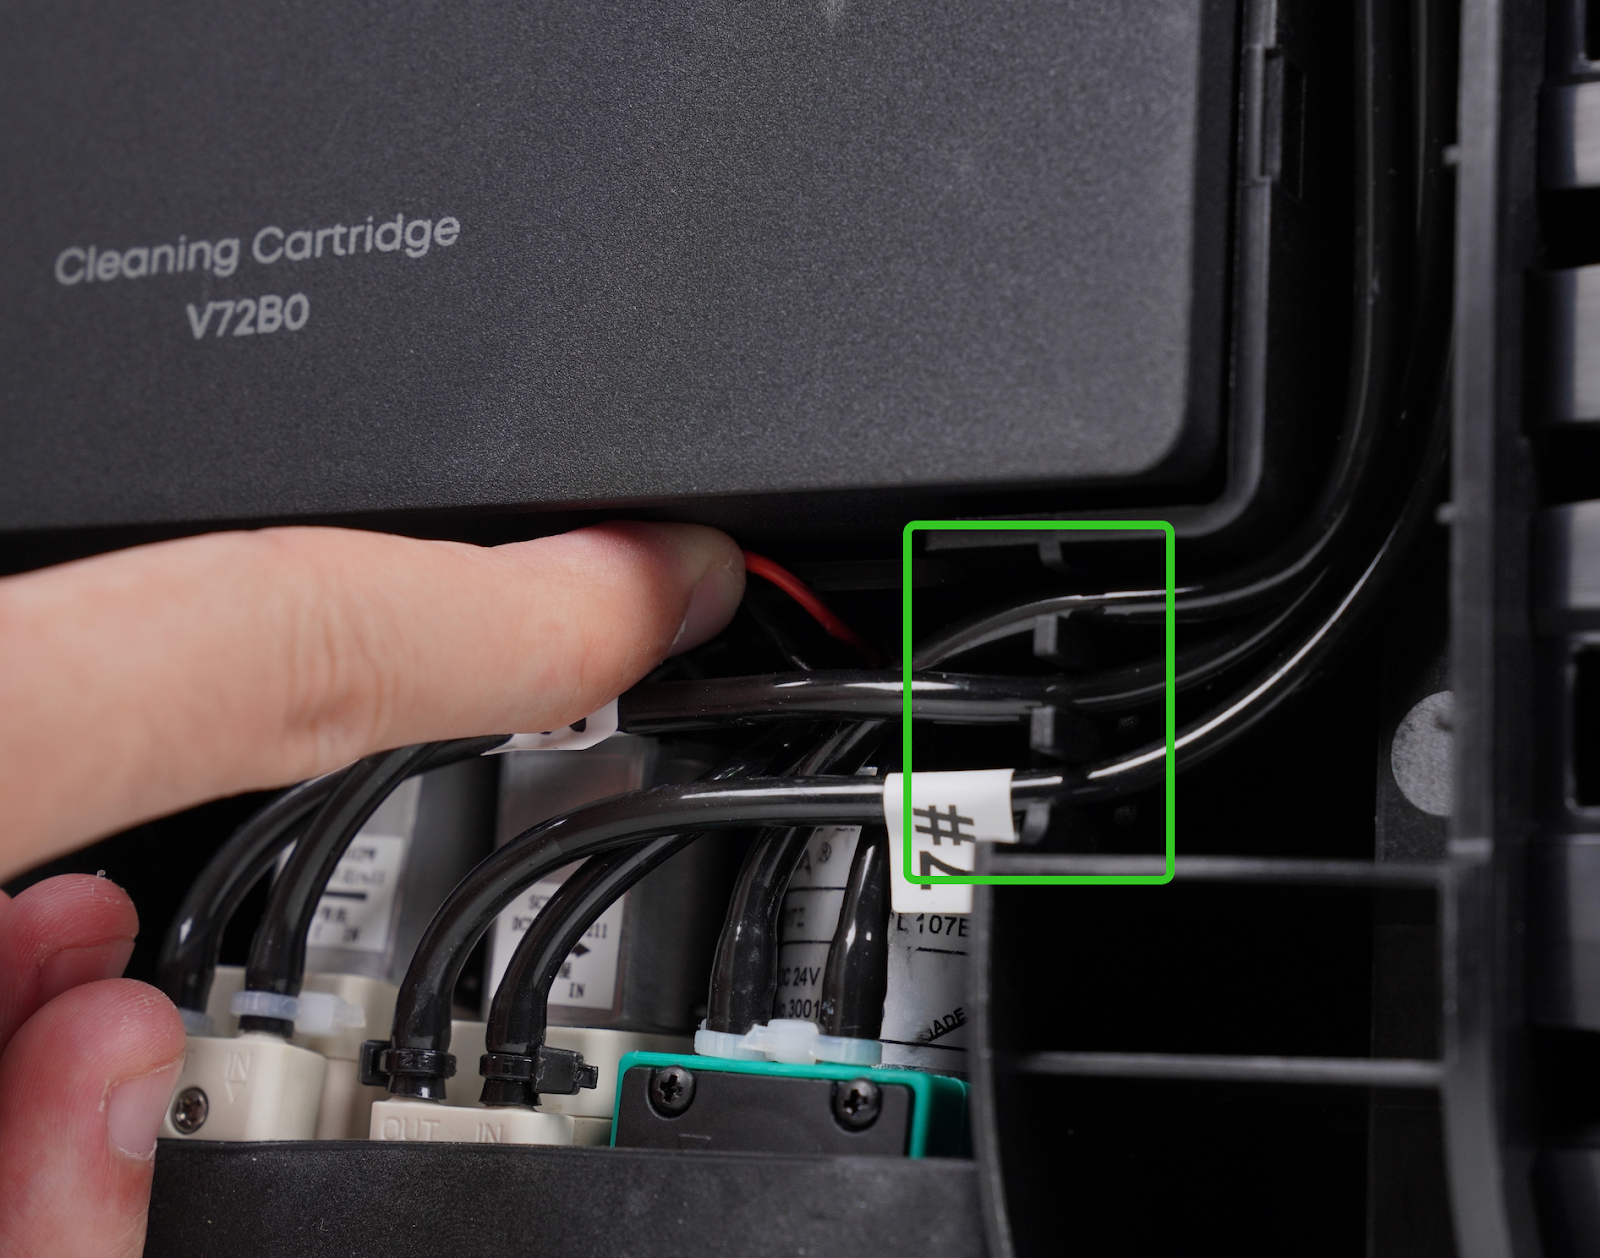
Step 3 - Remove the pump mounting base assembly
-
Push aside the plastic baffle.
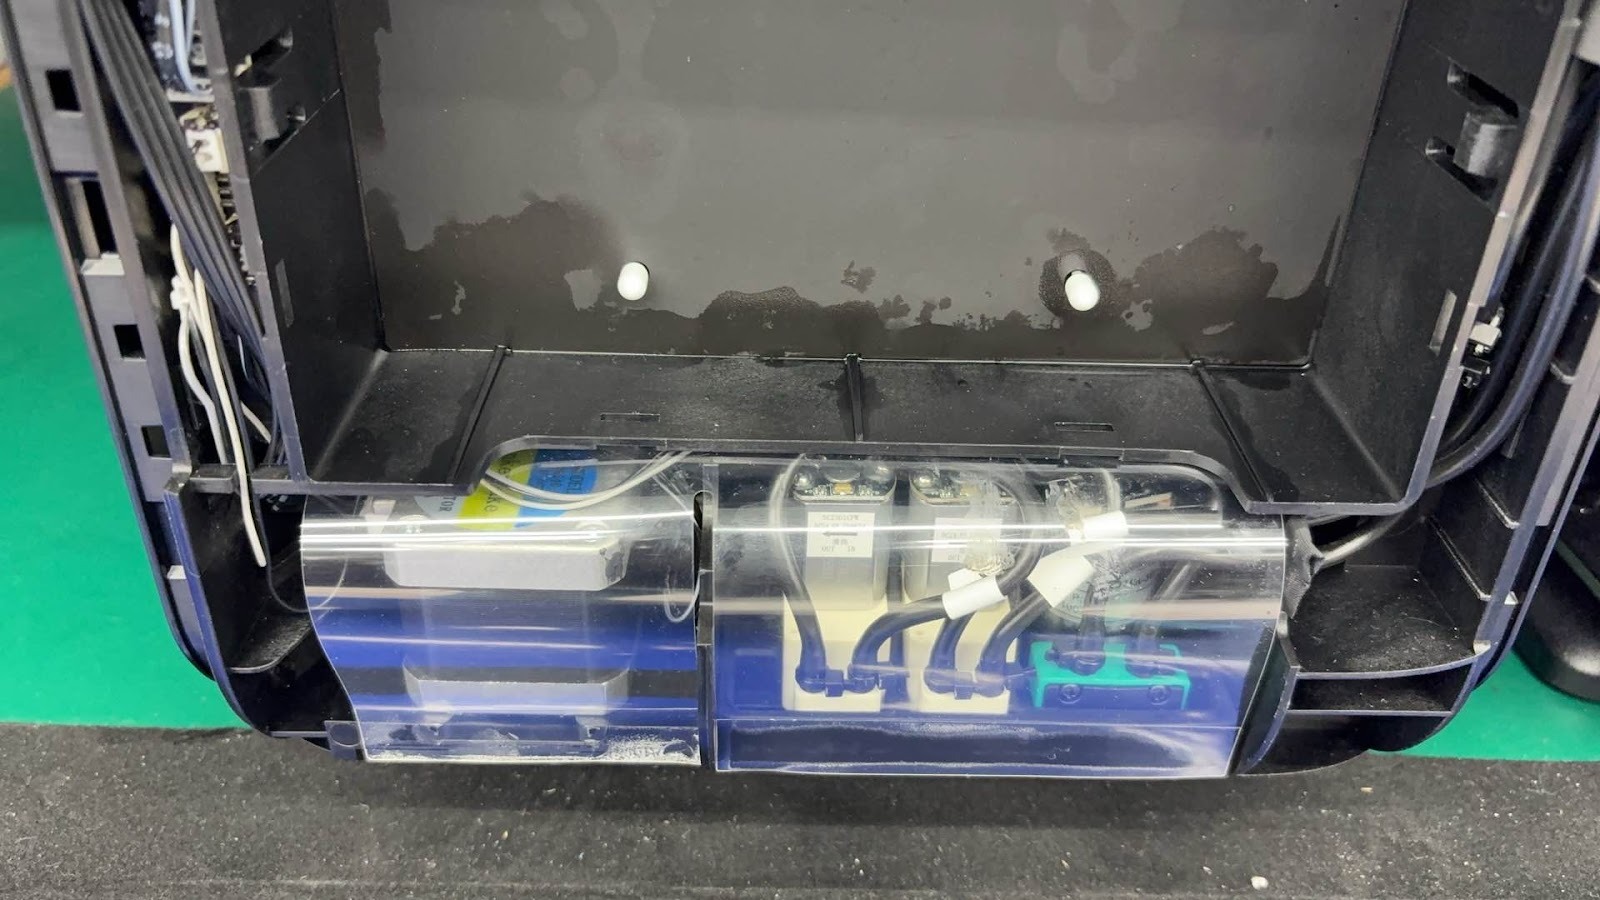

-
Remove the two 2.0 mm hex screws, then pull the pump mounting base assembly downward to remove it.
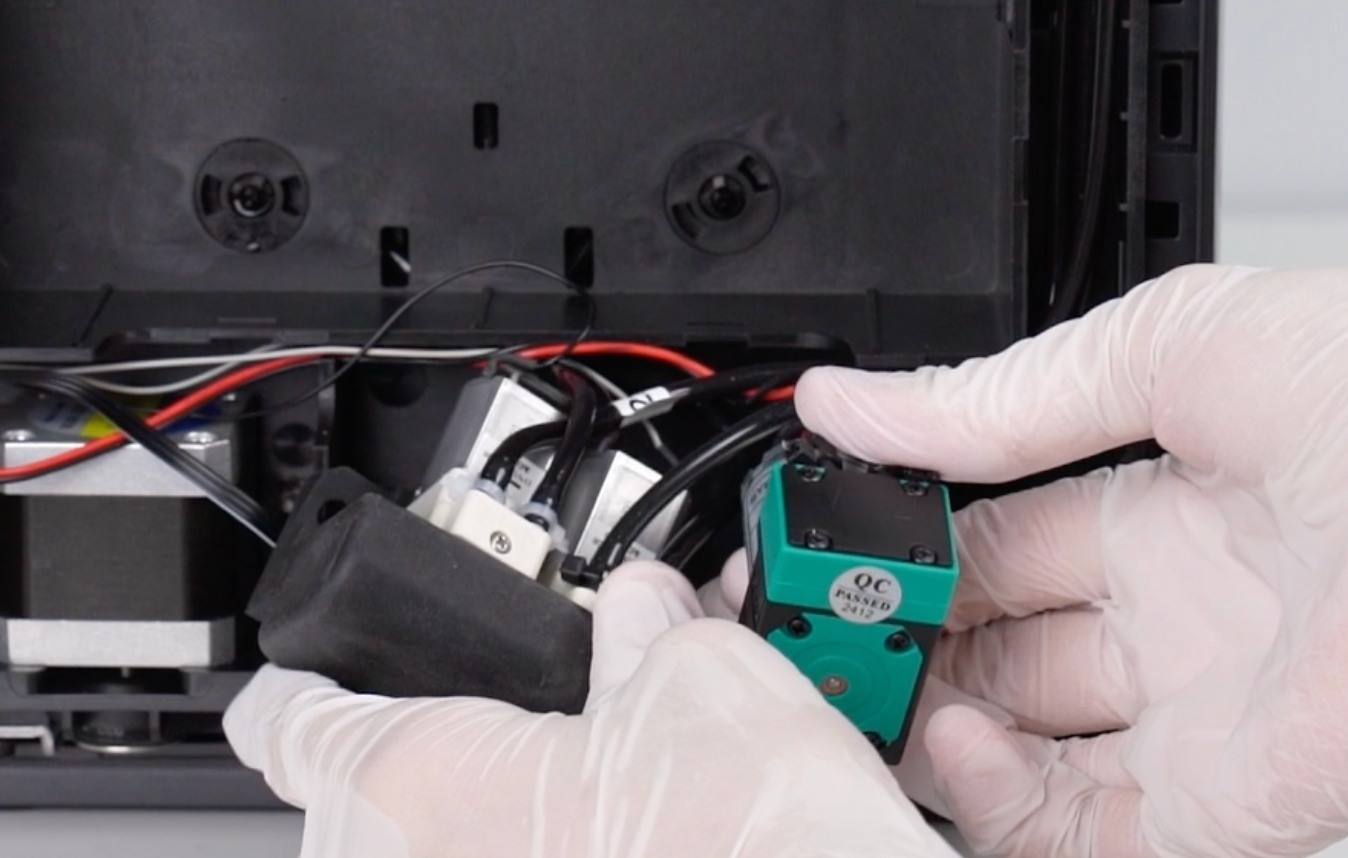
Step 4 - Replace the cleaning fluid pump
Remove the cleaning fluid pump
-
Use a 2.0mm hex screwdriver to remove the two screws behind the cleaning fluid pump, and then take out the cleaning fluid pump
-
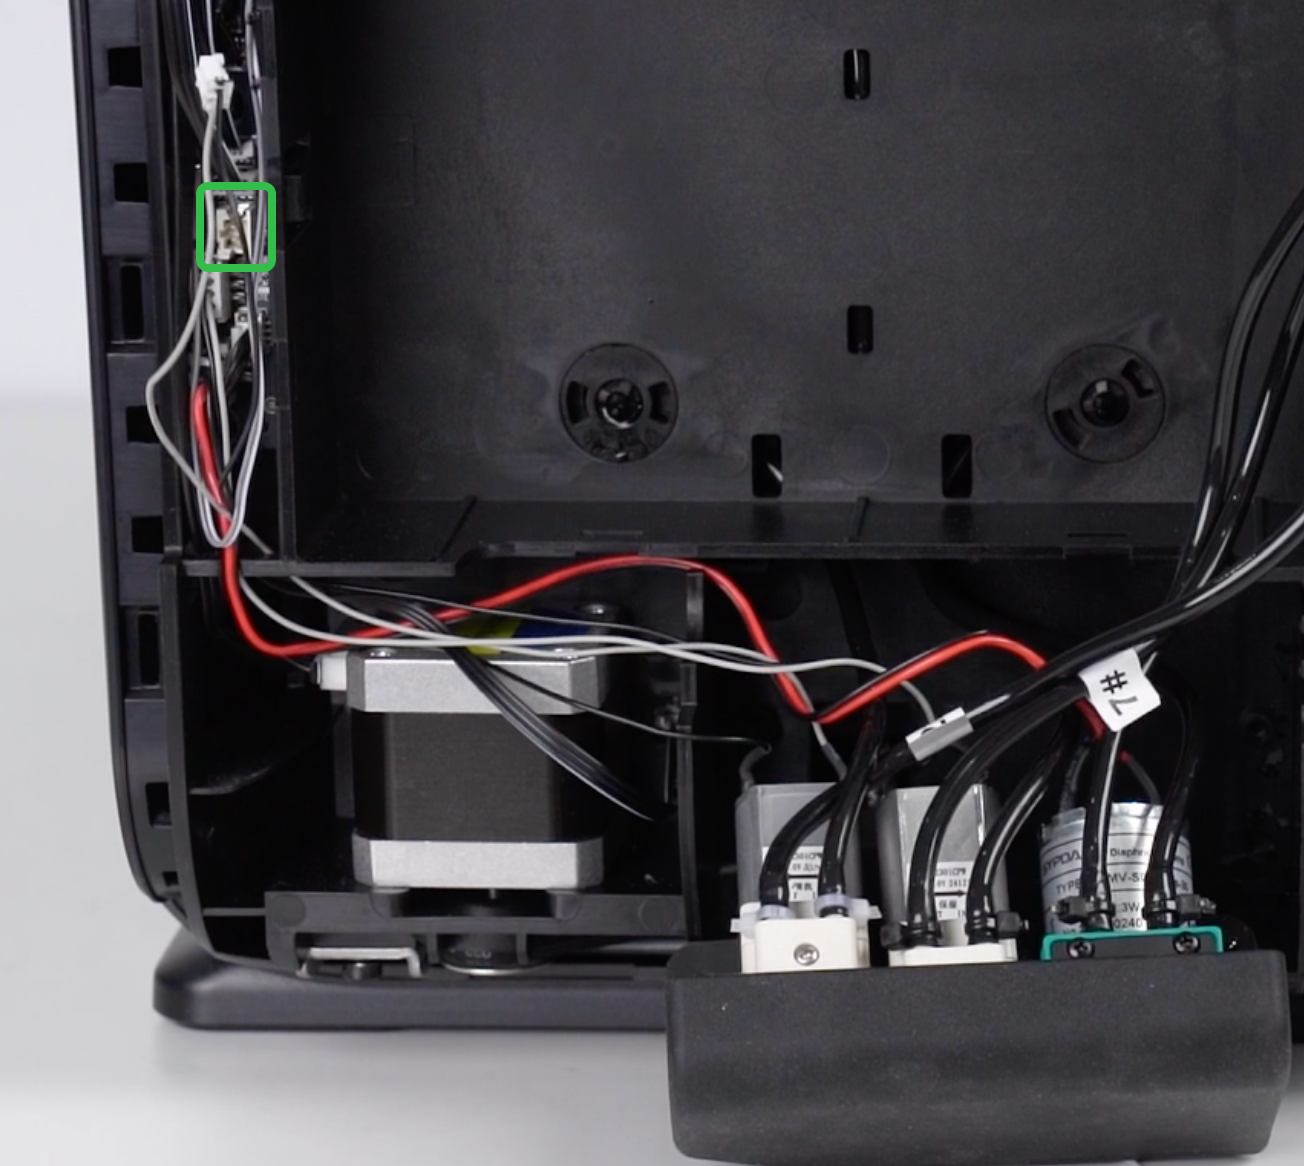
Disconnect the cleaning fluid pump cable from the ink stack adapter board and arrange the cable neatly.
-
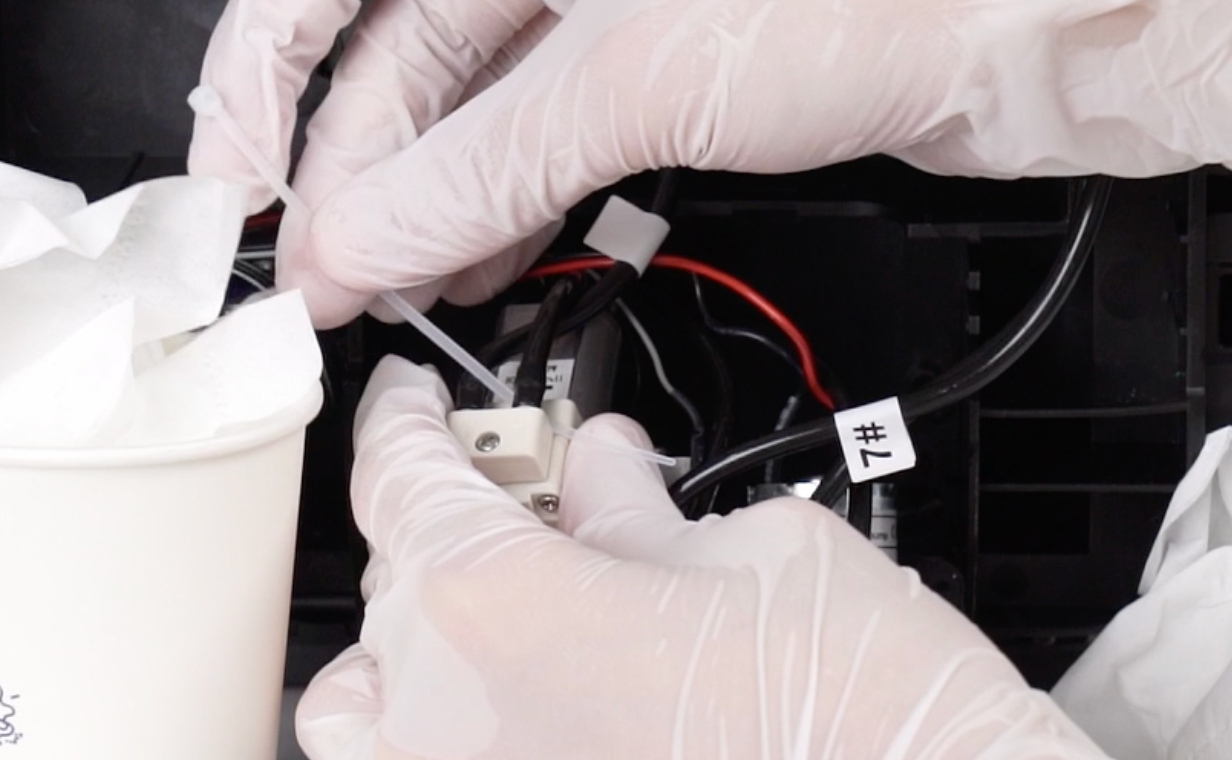
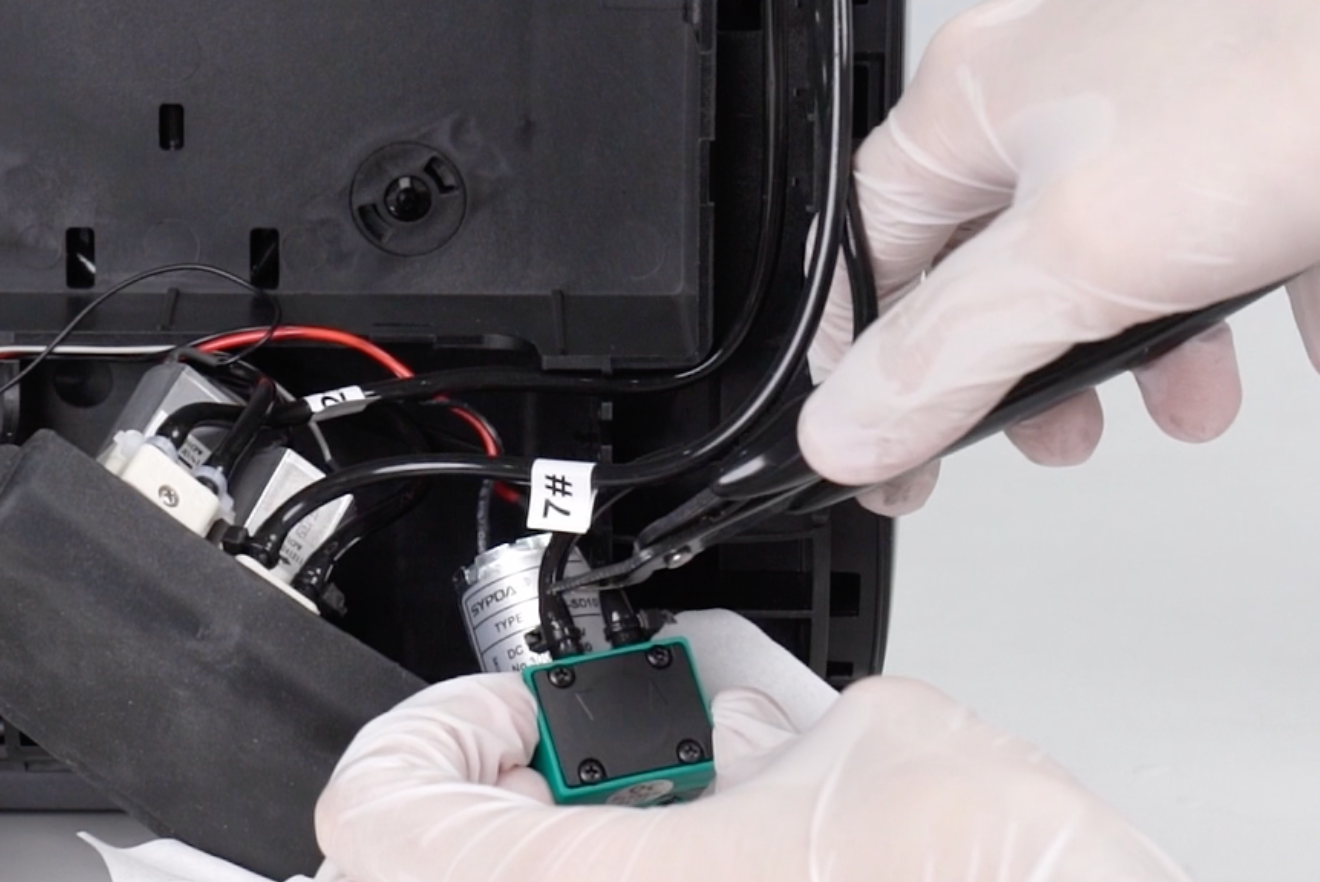
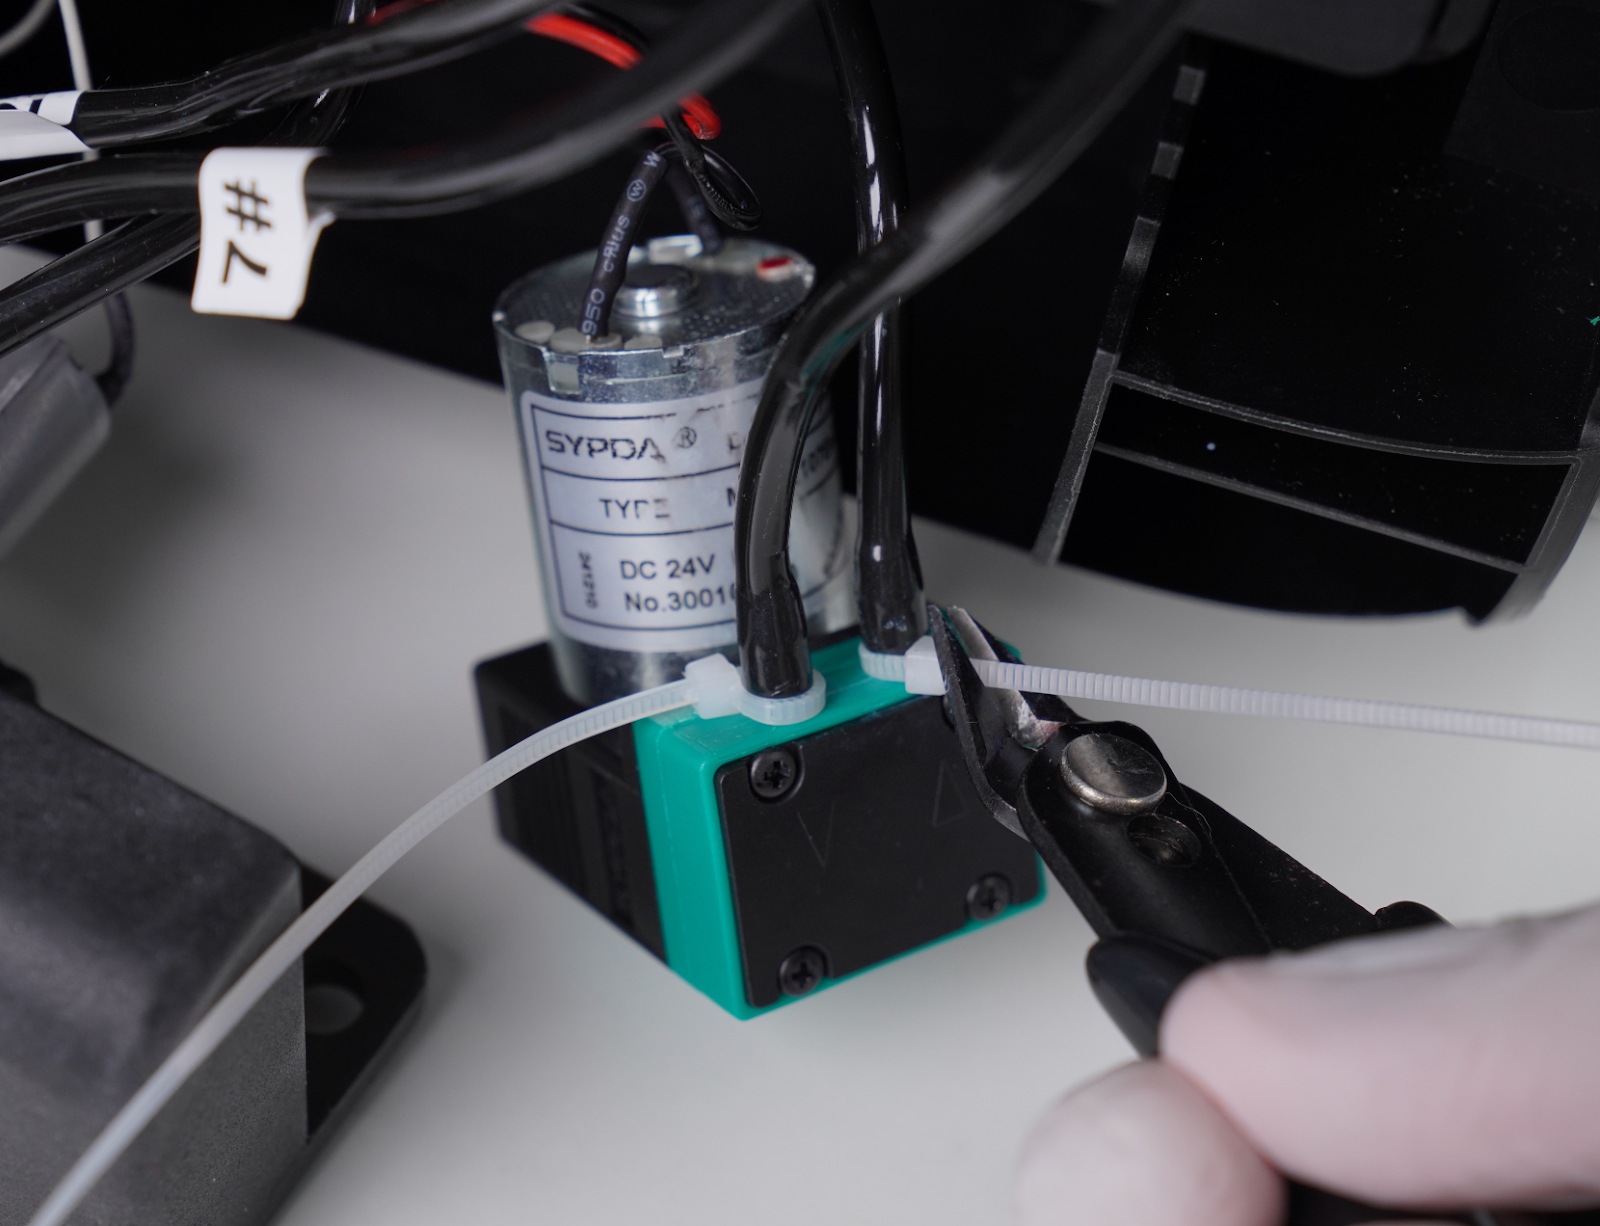
Prepare a paper cup and tissue. Cut and remove the cable tie securing the hose.
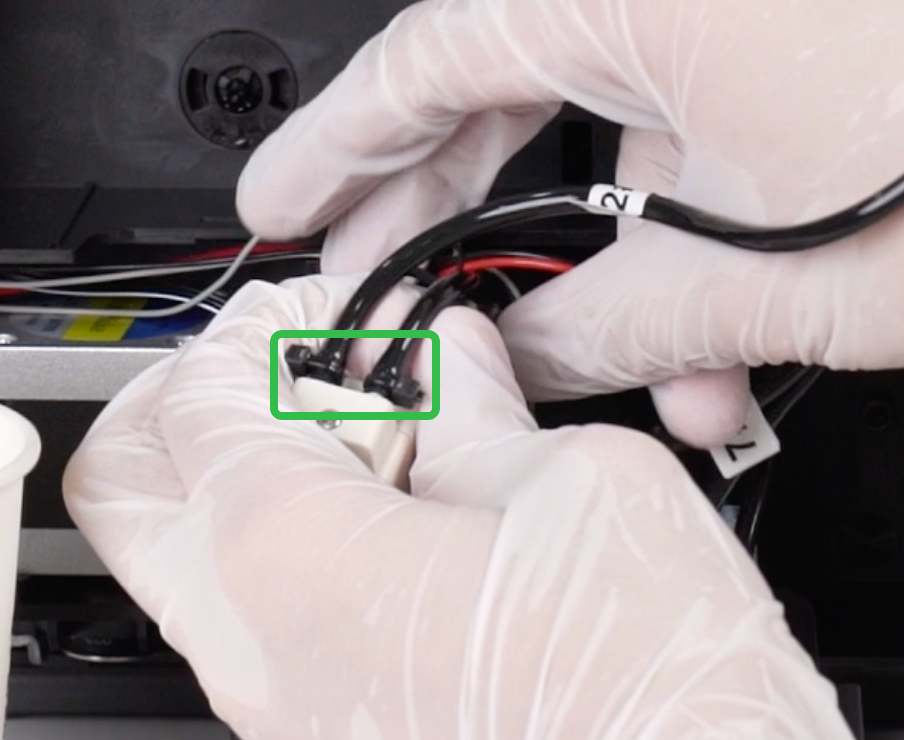
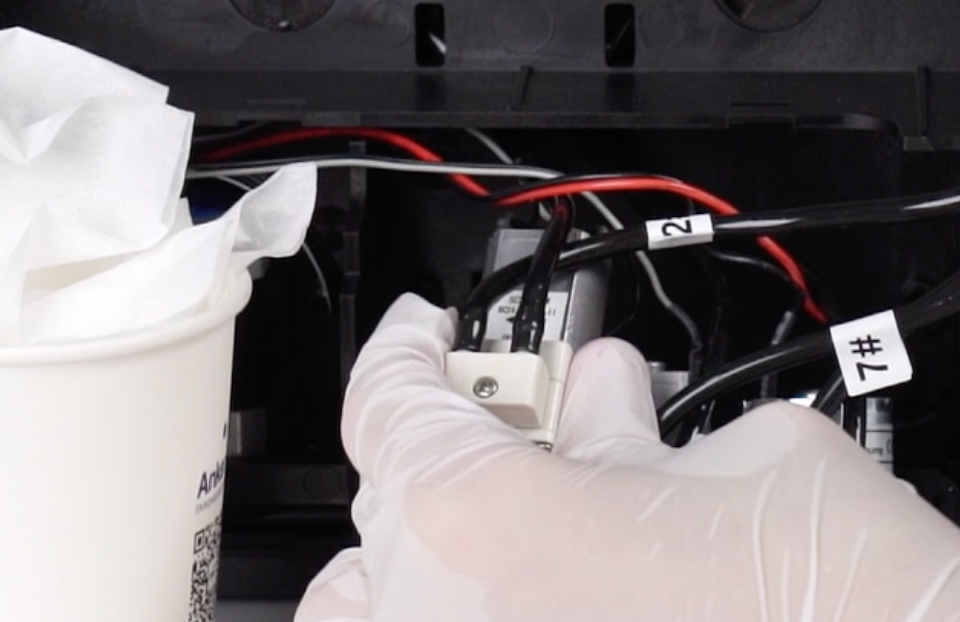
-
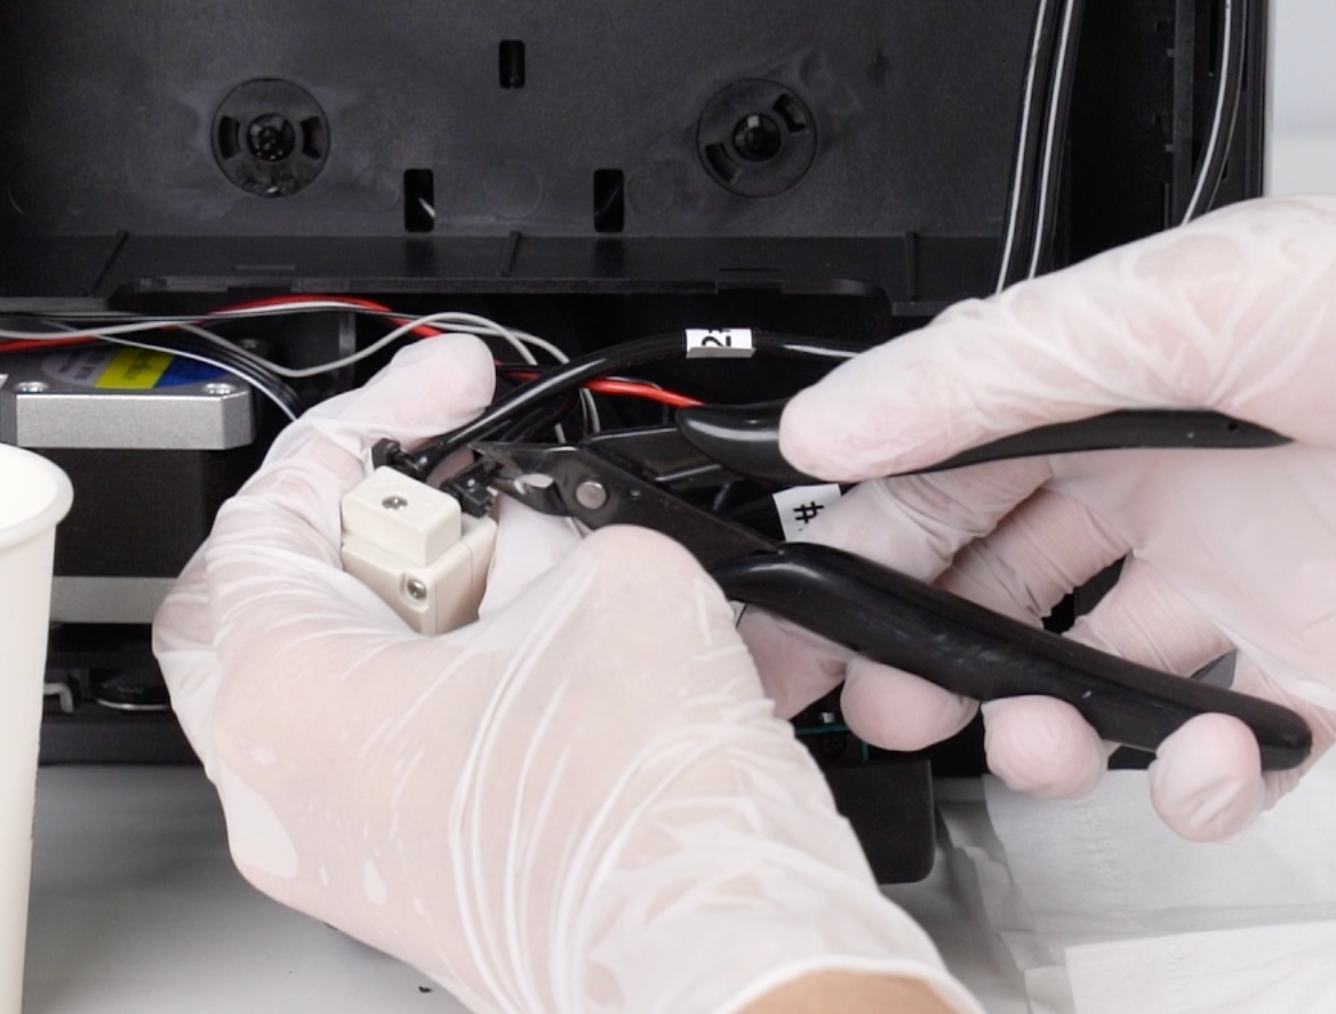
Secure both sides of the hose firmly by hand to prevent waste liquid from splashing when cut.
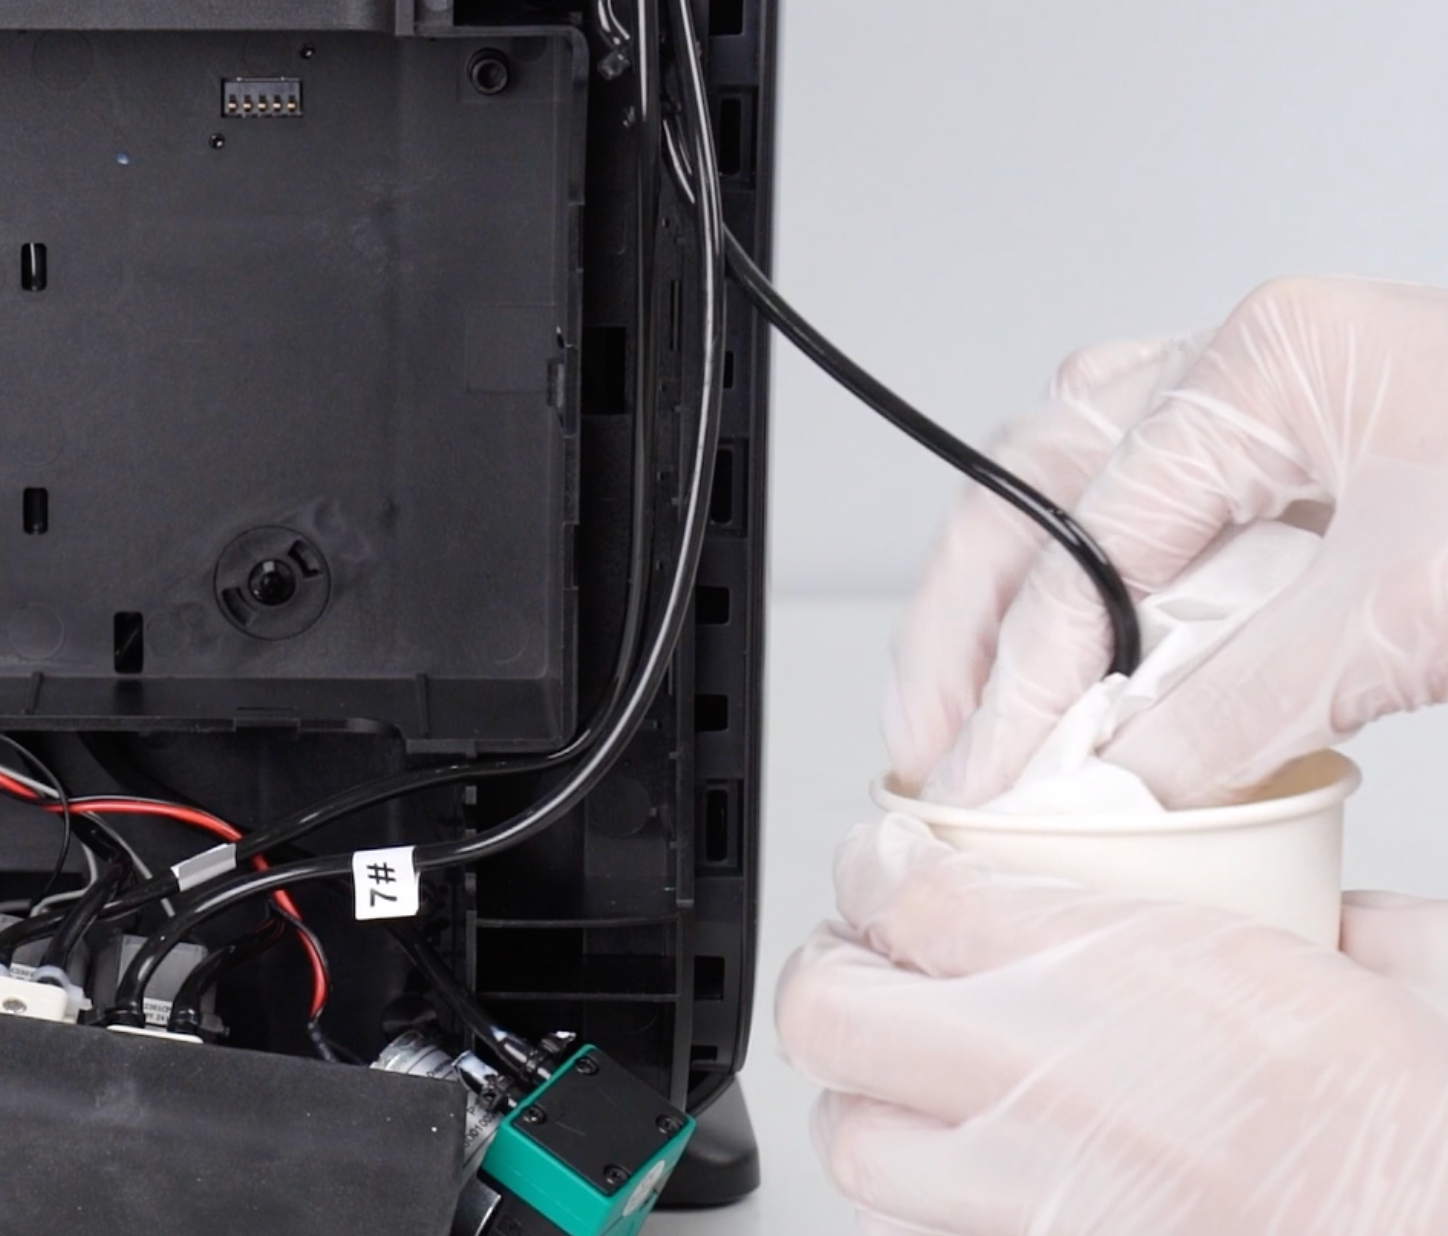
Using side cutters, cut the hose connected to the pump, leaving 15–20 mm of tubing.
Catch any liquid with tissue and place the hose into a waterproof bag or paper cup.
Remove the faulty pump to complete disassembly.
⚠️Waste liquid will flow out when cutting the tube. Use protective measures.
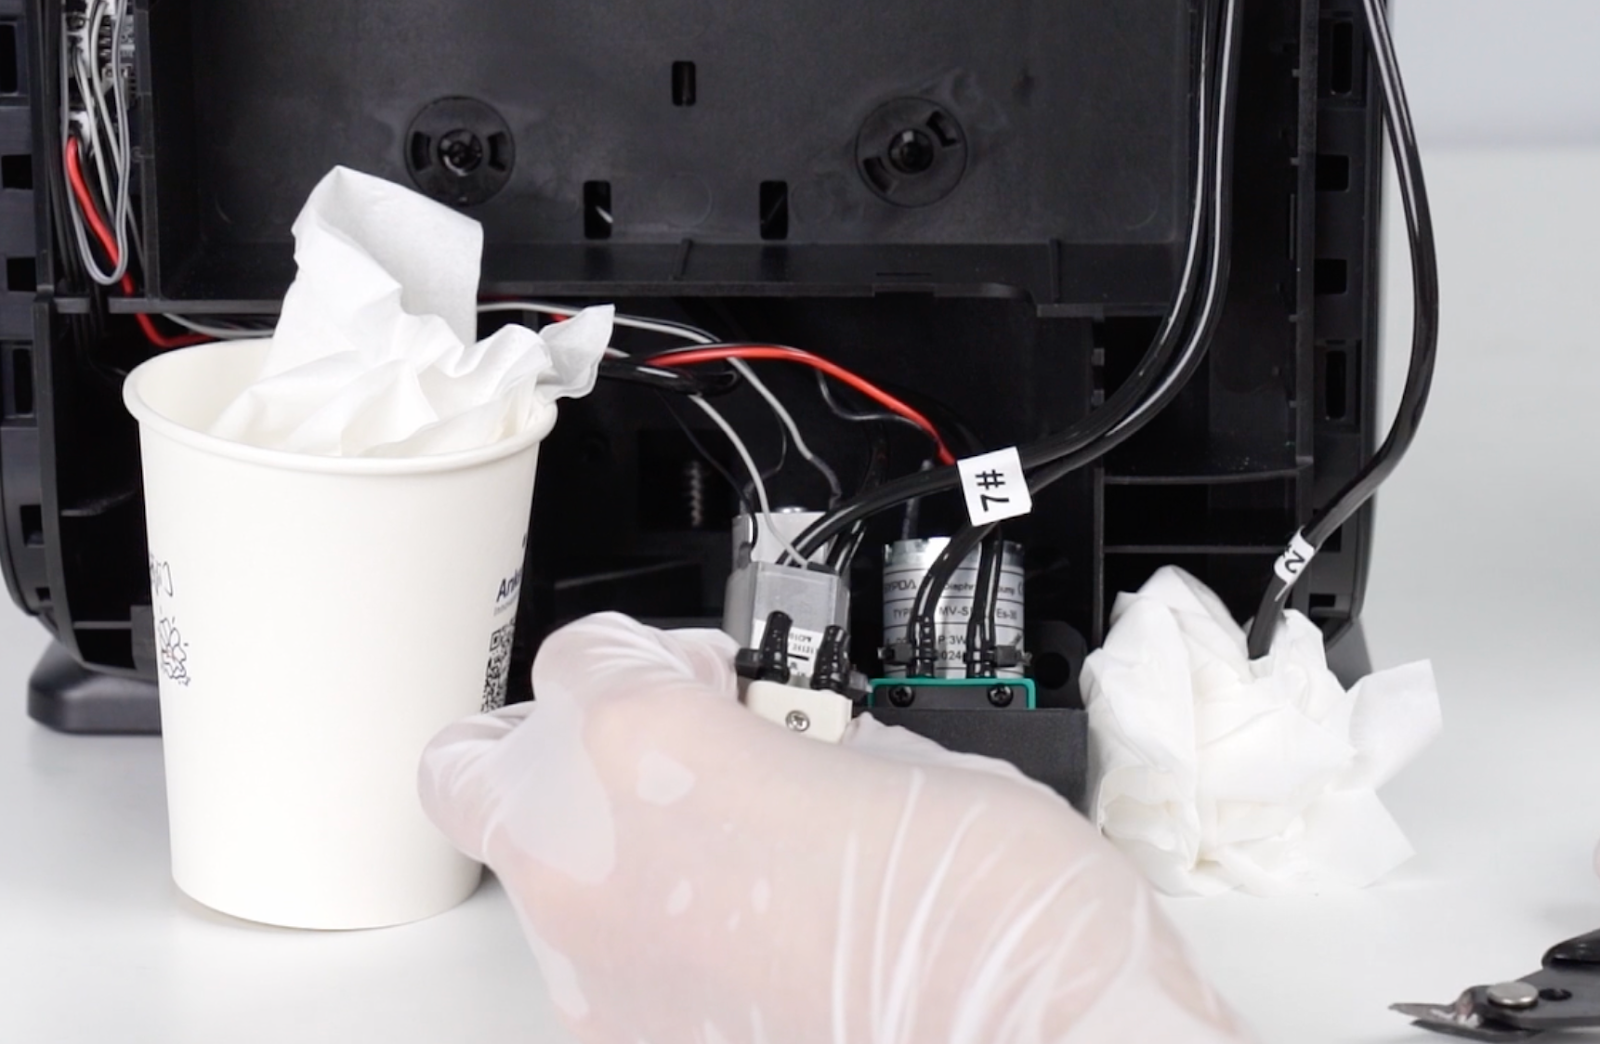
Install the cleaning fluid pump
-
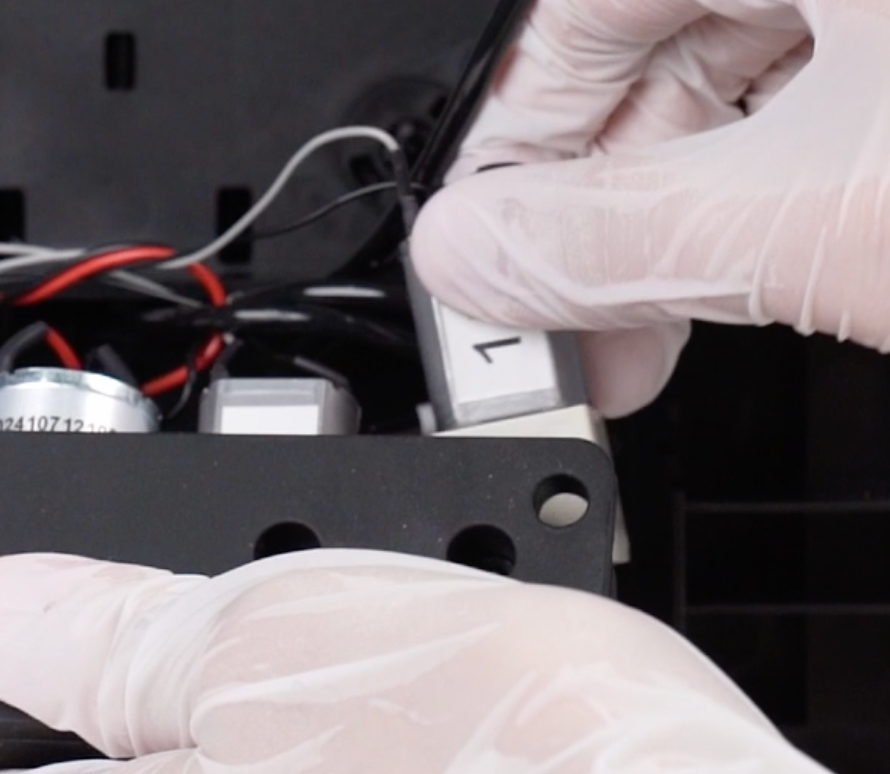
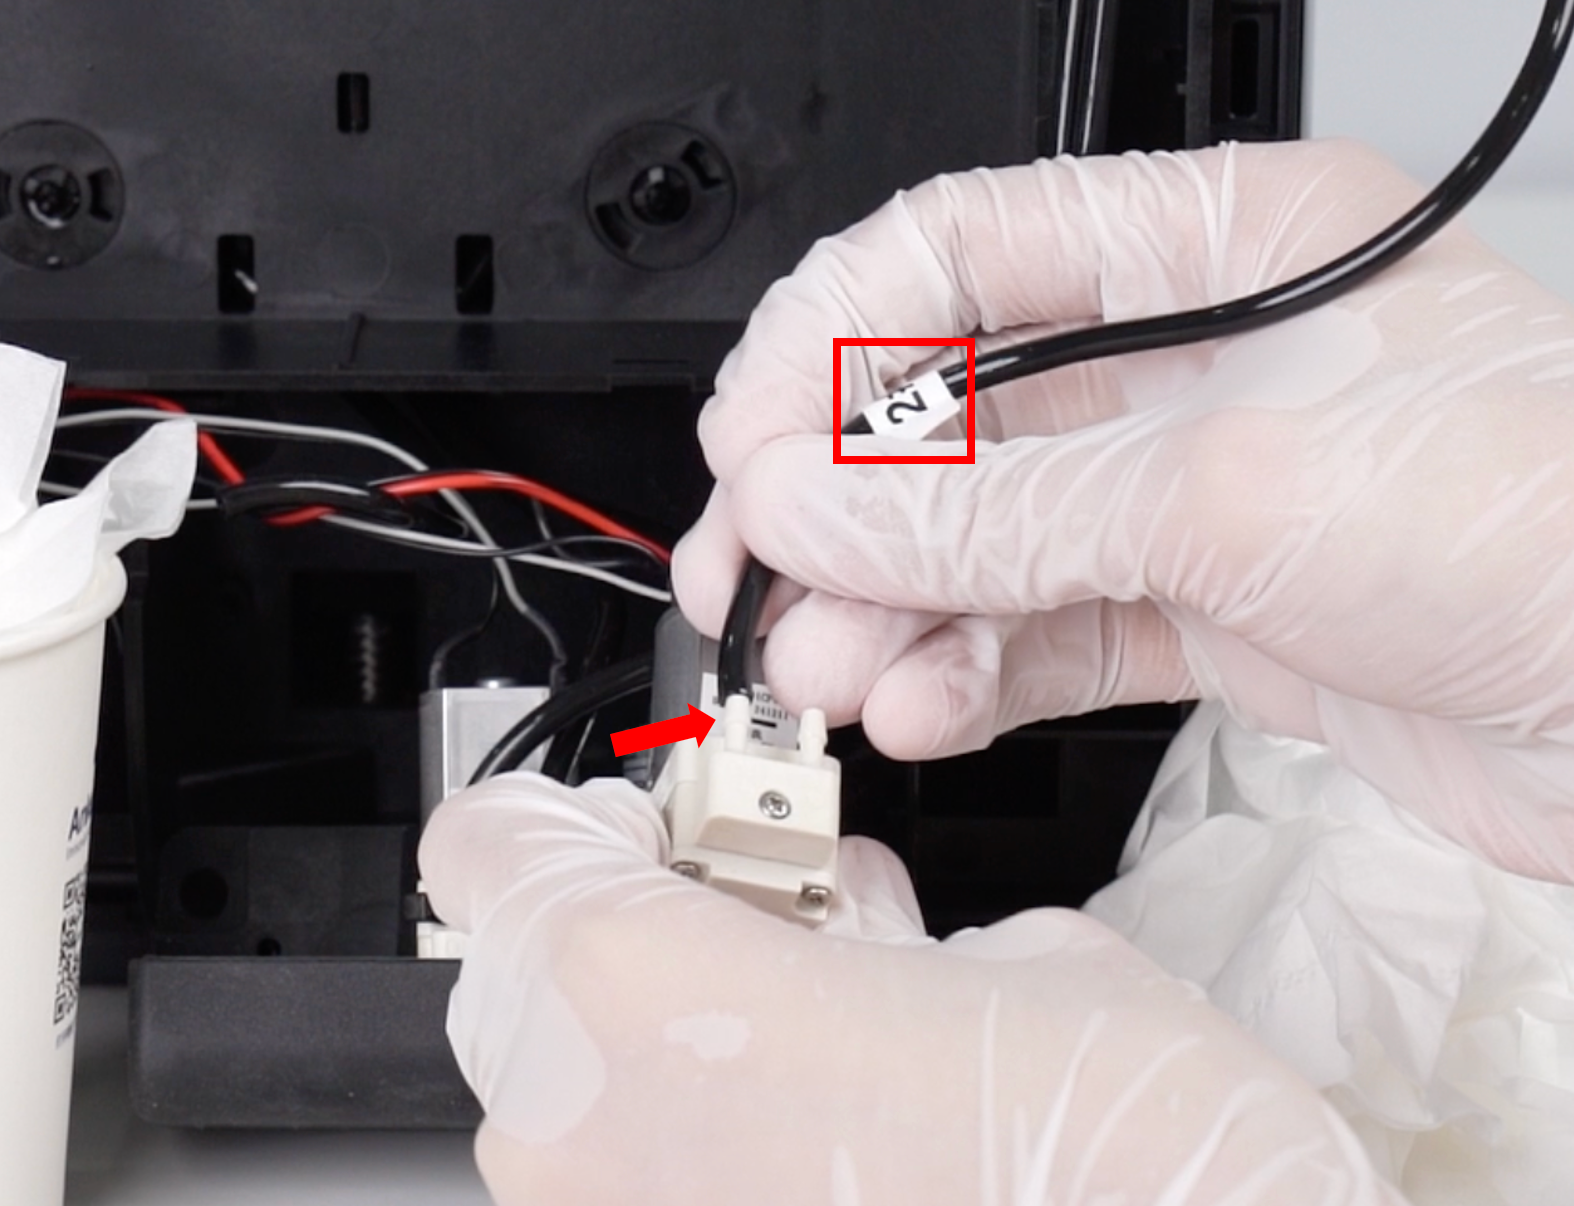
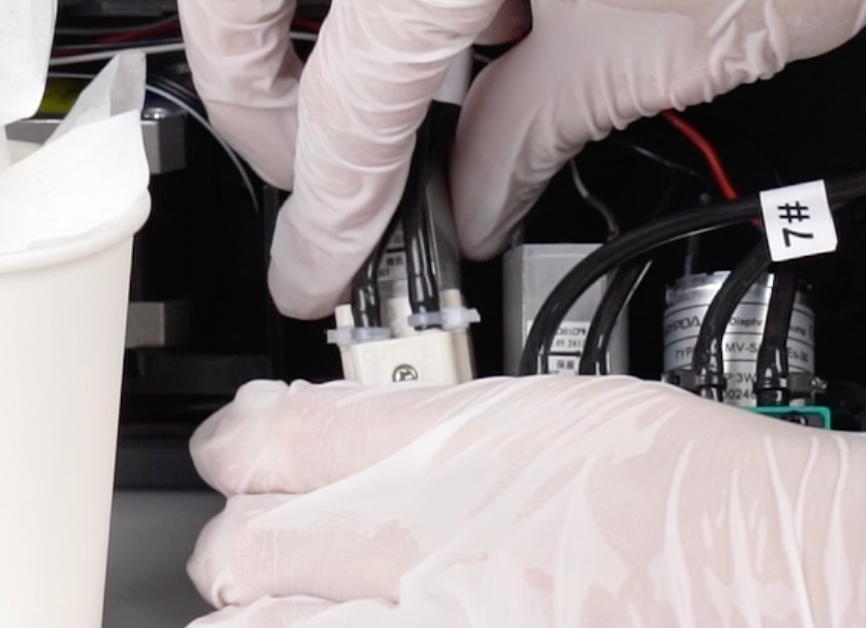
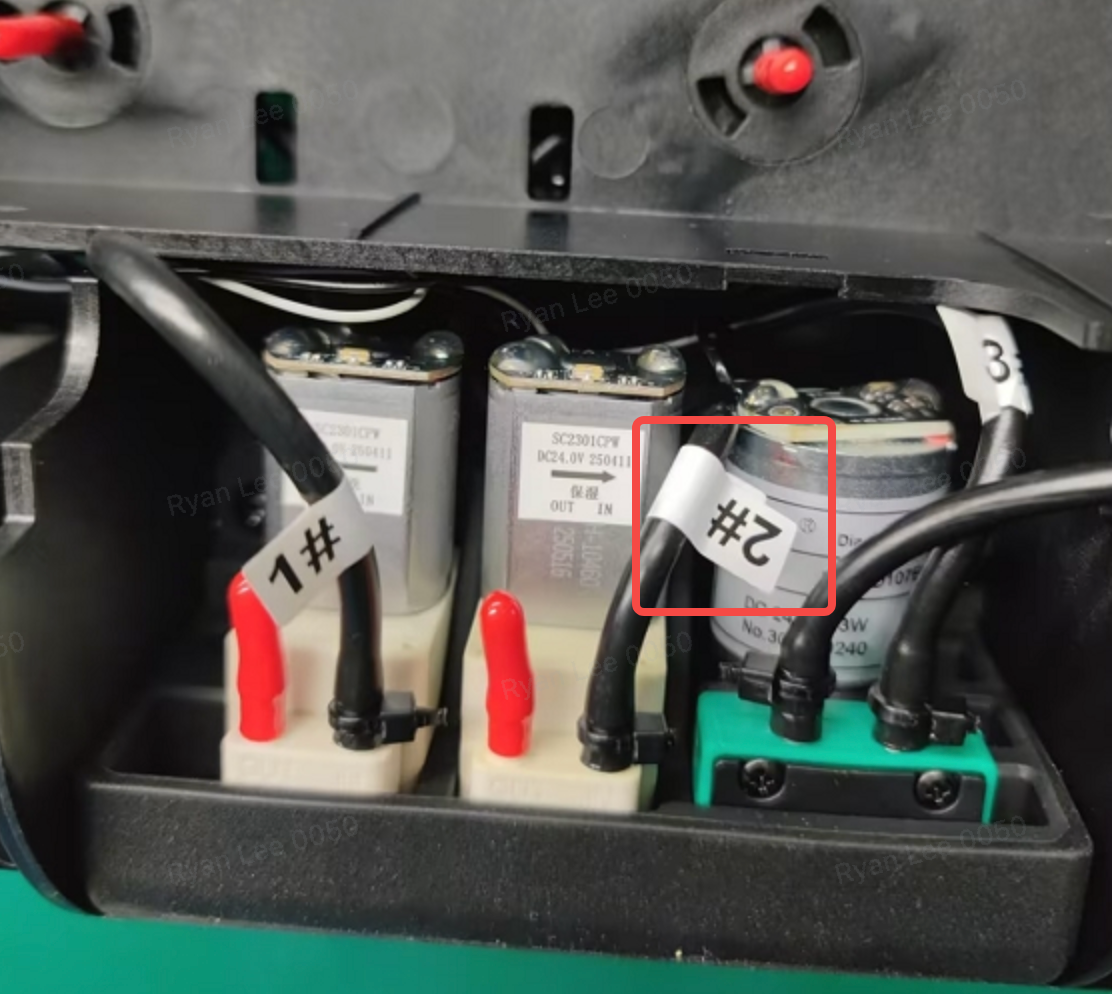
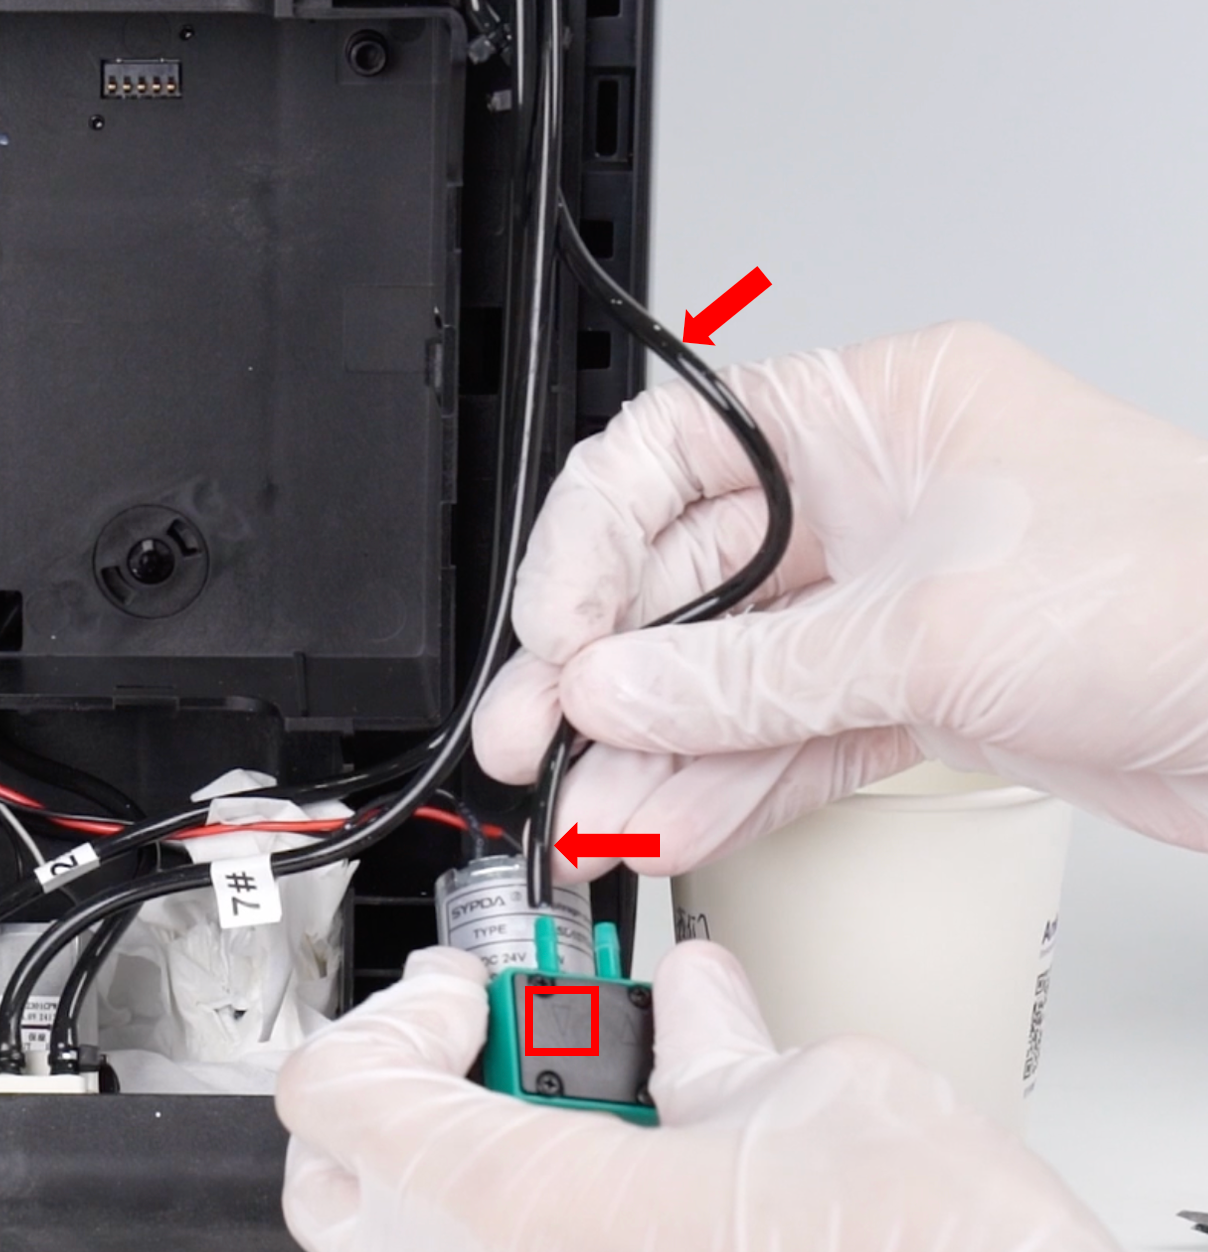
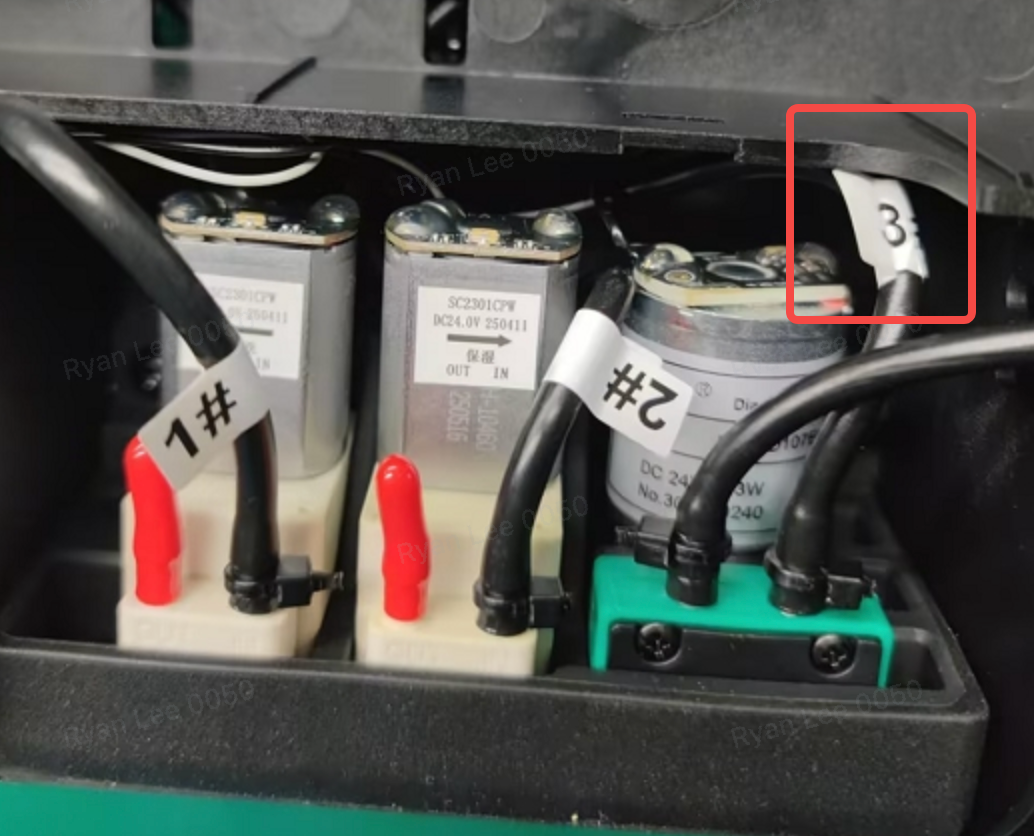
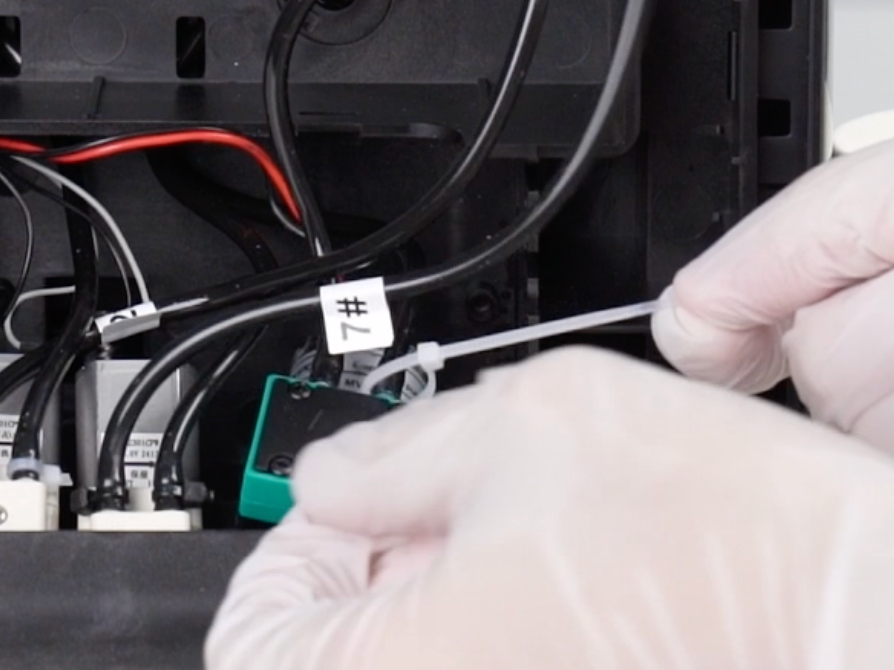
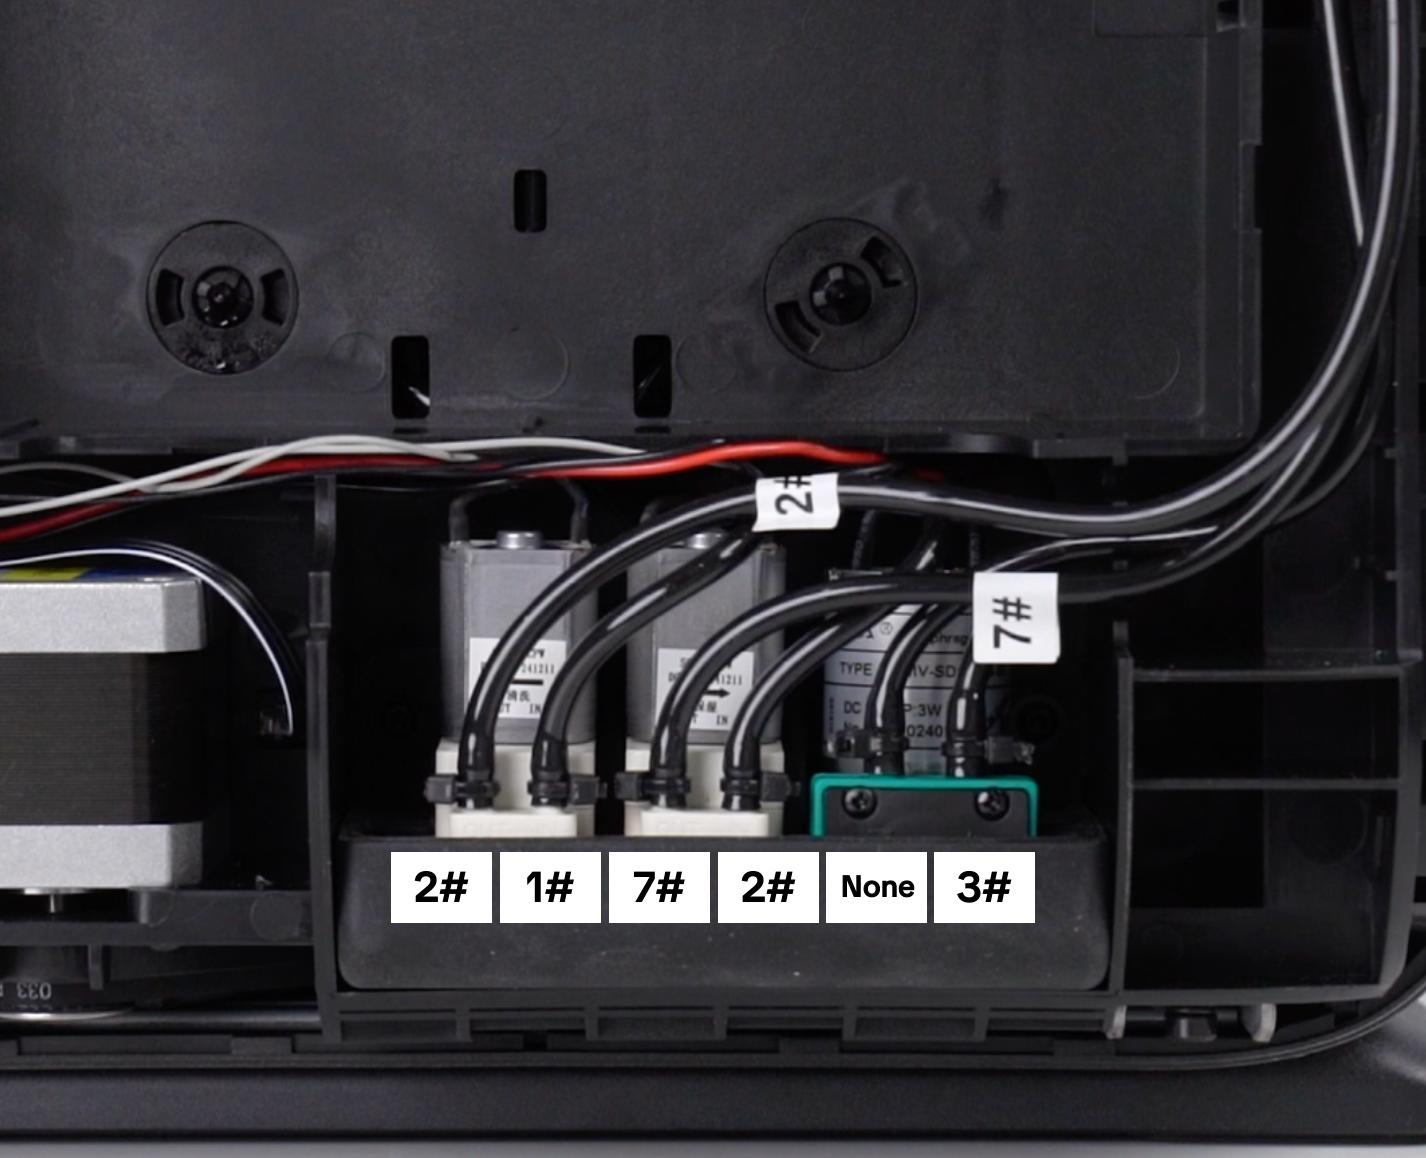
Insert the ink tubes into the new cleaning fluid pump as shown.
⚠️ Tube orientation is critical:
-
Tube #2 → left side of the pump
-
Tube #1 → right side of the pump
-
Securely fasten the two hoses with cable ties
-
Use a 2.0mm hex screwdriver to install the two screws behind the cleaning fluid pump, and reinstall the cleaning fluid pump cable harness

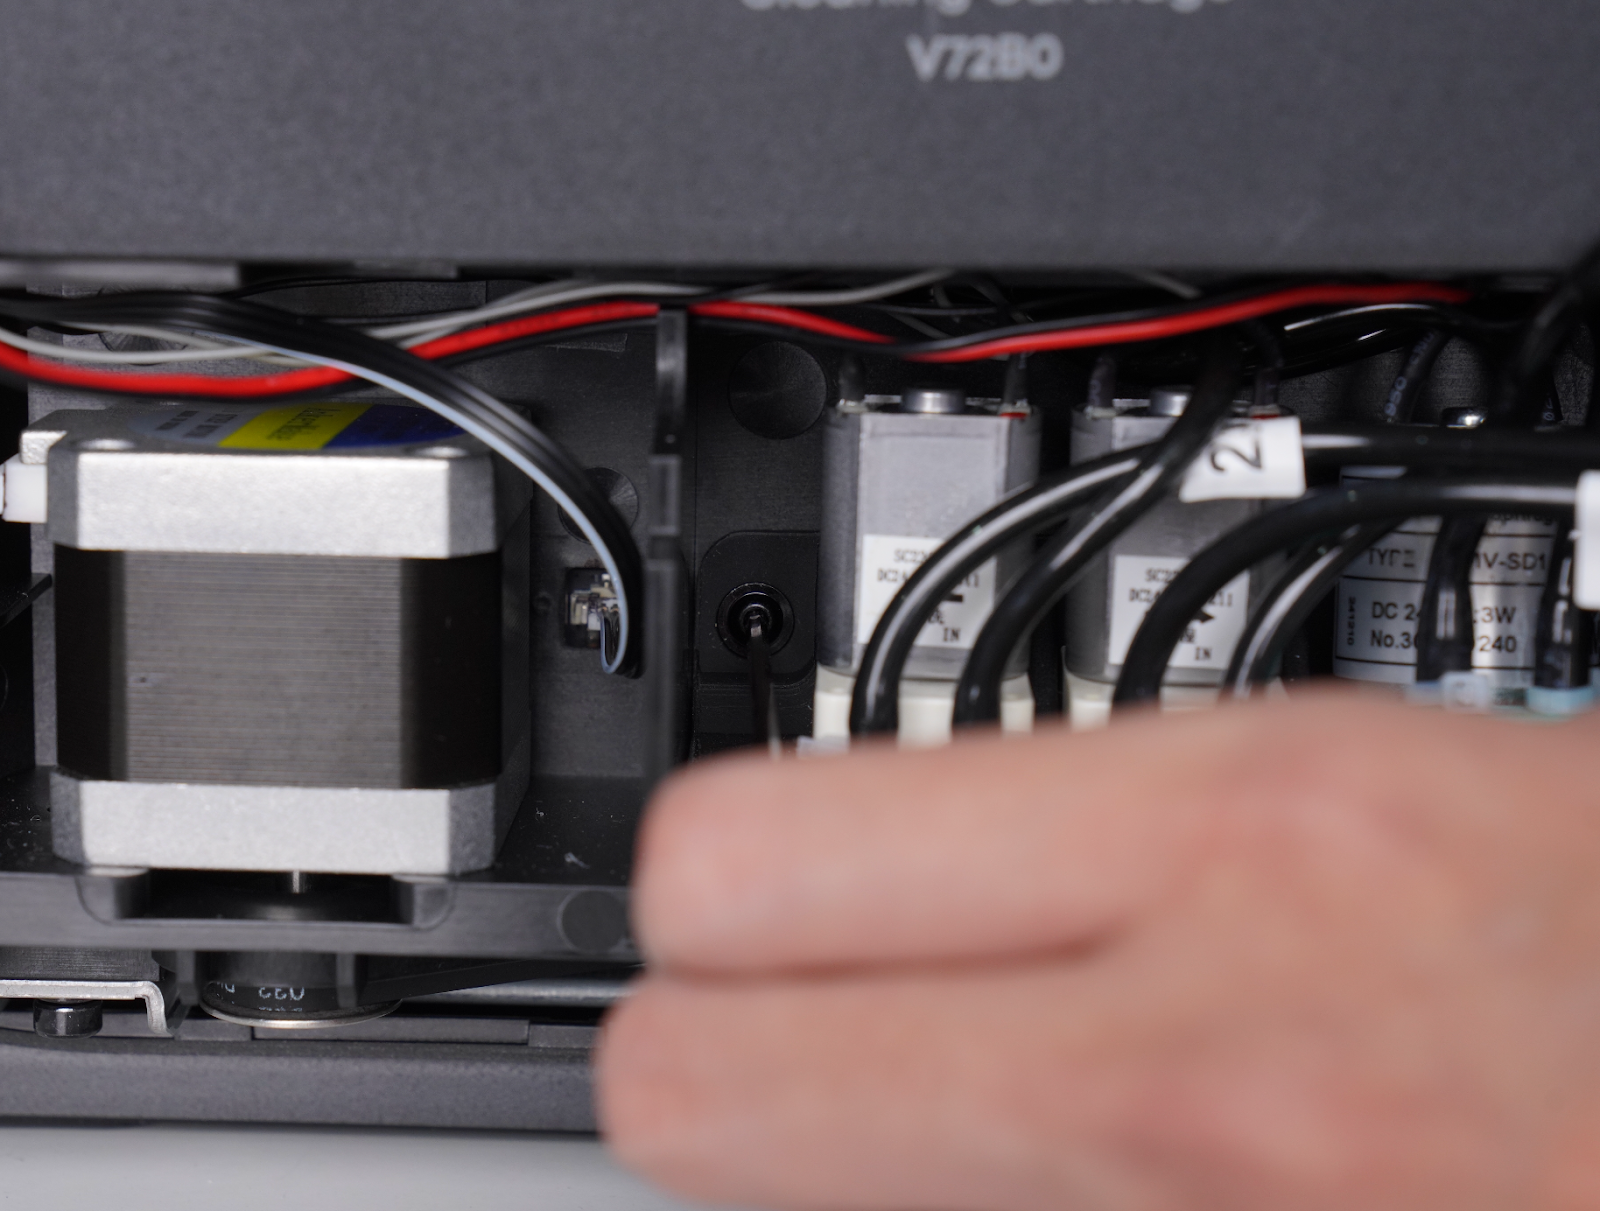
Step 5 - Replace the moisturizer pump
-
Using the same method as above, remove the two screws securing the moisturizing pump and remove it.
-
Disconnect the moisturizing pump cable from the ink stack adapter board and organize the cable.
Cut and transfer the two hoses to the new moisturizing pump following the same process used for the cleaning fluid pump.
-
Reconnect the pump cable.
⚠️ Tube orientation:
-
Tube #7 → left side of the moisturizing pump
-
Tube #2 → right side of the moisturizing pump

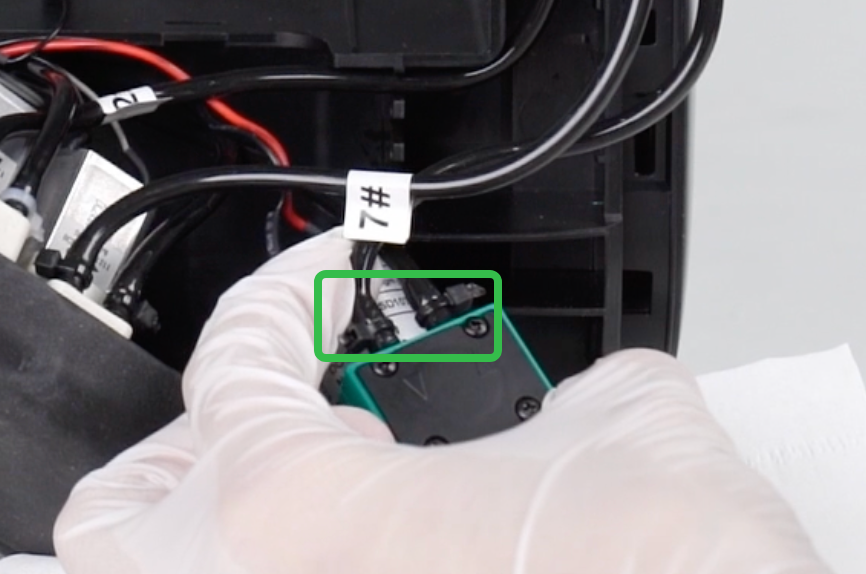
Step 6 - Replace the Waste Ink Pump
Remove the waste ink pump
-
Use a 2.0mm hex screwdriver to remove the two screws behind the waste ink pump, then take out the waste ink pump
-
Disconnect the pump cable from the ink stack adapter board.
-
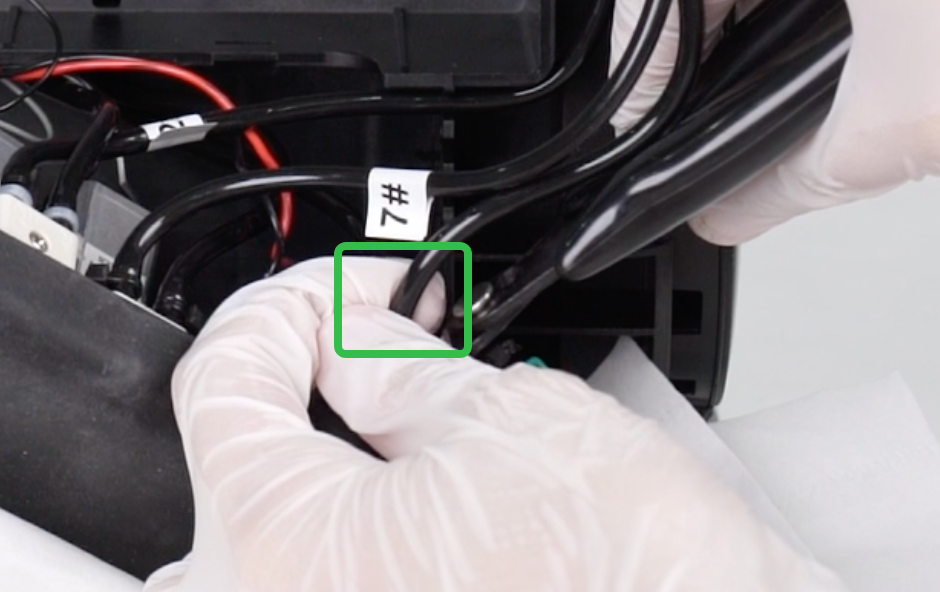
Prepare paper cups and tissue. Remove the cable tie from the hose.
Secure both sides of the hose and cut it, leaving 15–20 mm of tubing.
-
Catch liquid with tissue and place the hose into a waterproof bag or paper cup.
⚠️ Waste ink will flow out during cutting.
-
Removing the faulty pump will complete the disassembly
Install the waste ink pump
-
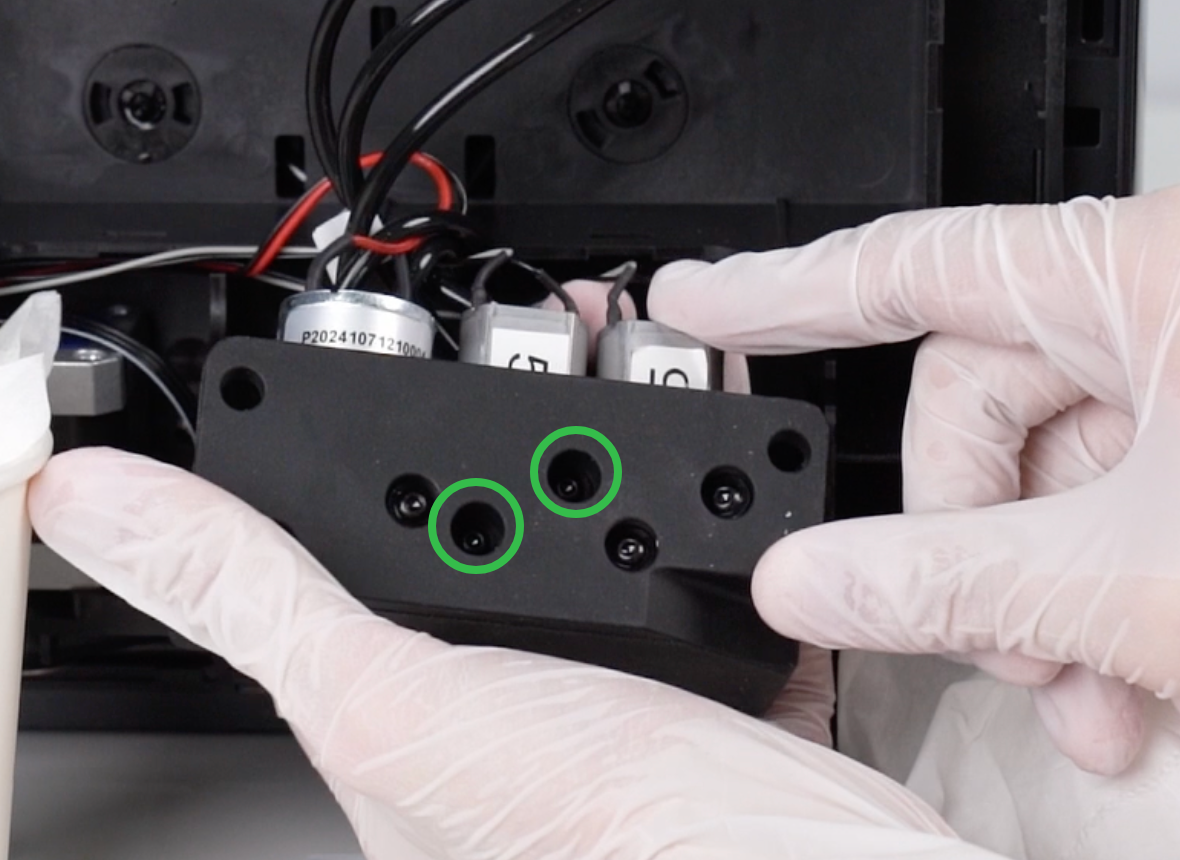
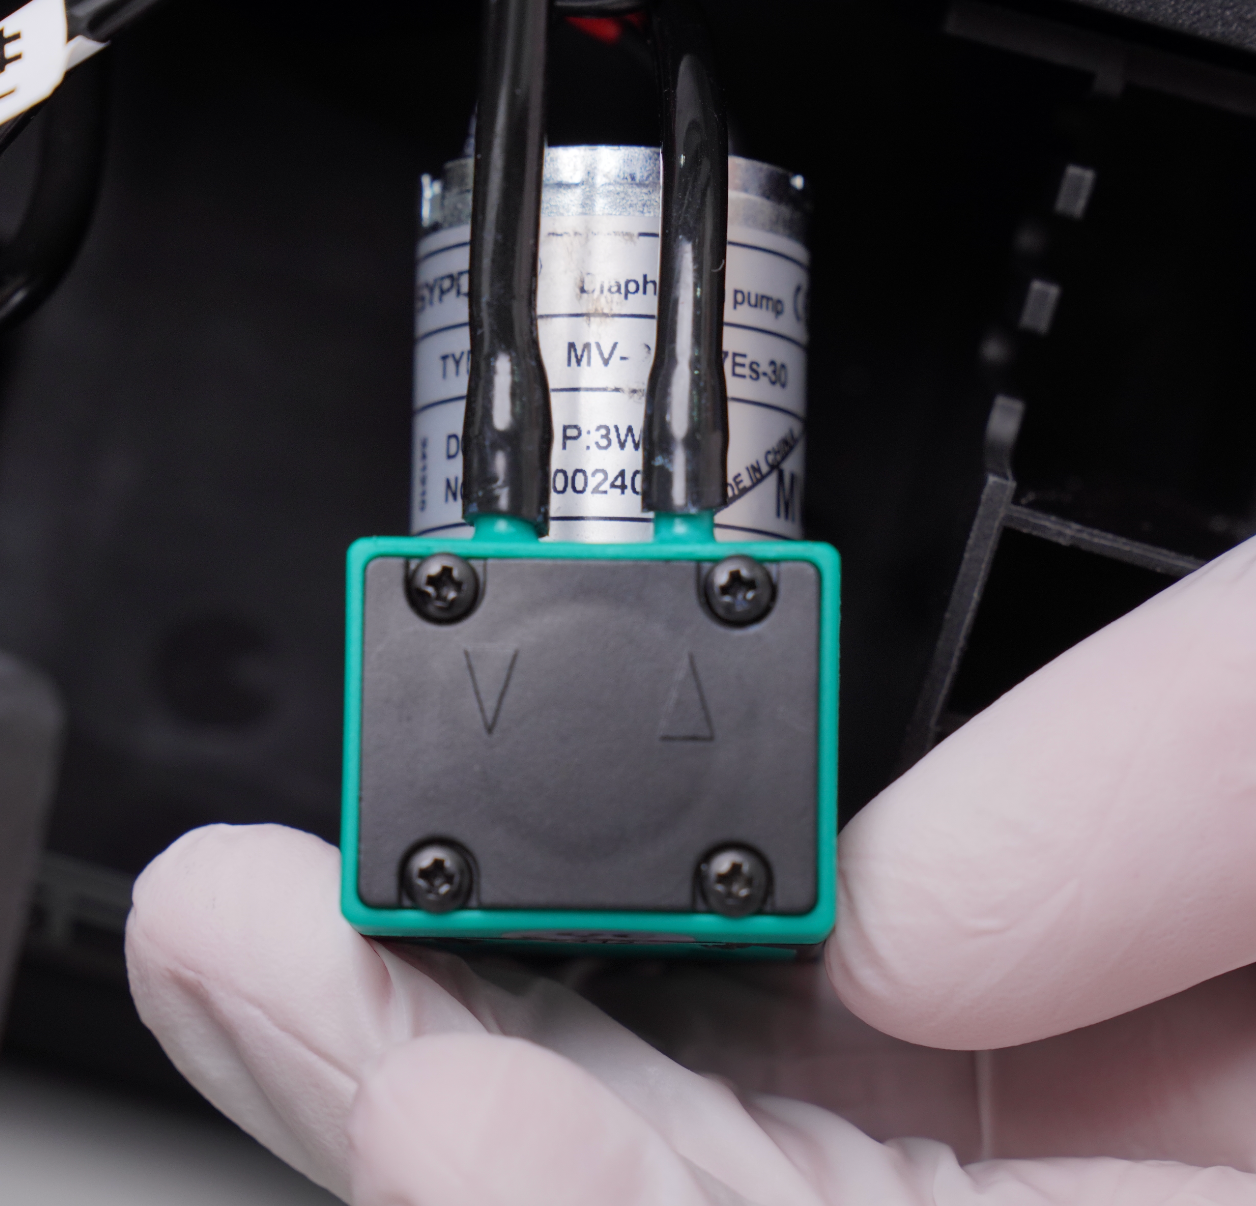
Connect the ink tubes to the new waste ink pump as shown.
⚠️ Tube orientation:
-
Unlabeled tube → left side
-
Tube #3 → right side
-
Securely fasten the two hoses with cable ties
-
Use a 2.0mm hex screwdriver to install the two screws behind the cleaning fluid pump, and reinstall the cleaning fluid pump cable harness

Step 7 - Reinstall the pump mounting base assembly
-
Check the installation sequence numbers of the ink tubes
-
Reinstall the pump module and tighten the two 2.0mm hex screws
-
Organize the cable and ink tube, and press the ink tube back into the groove
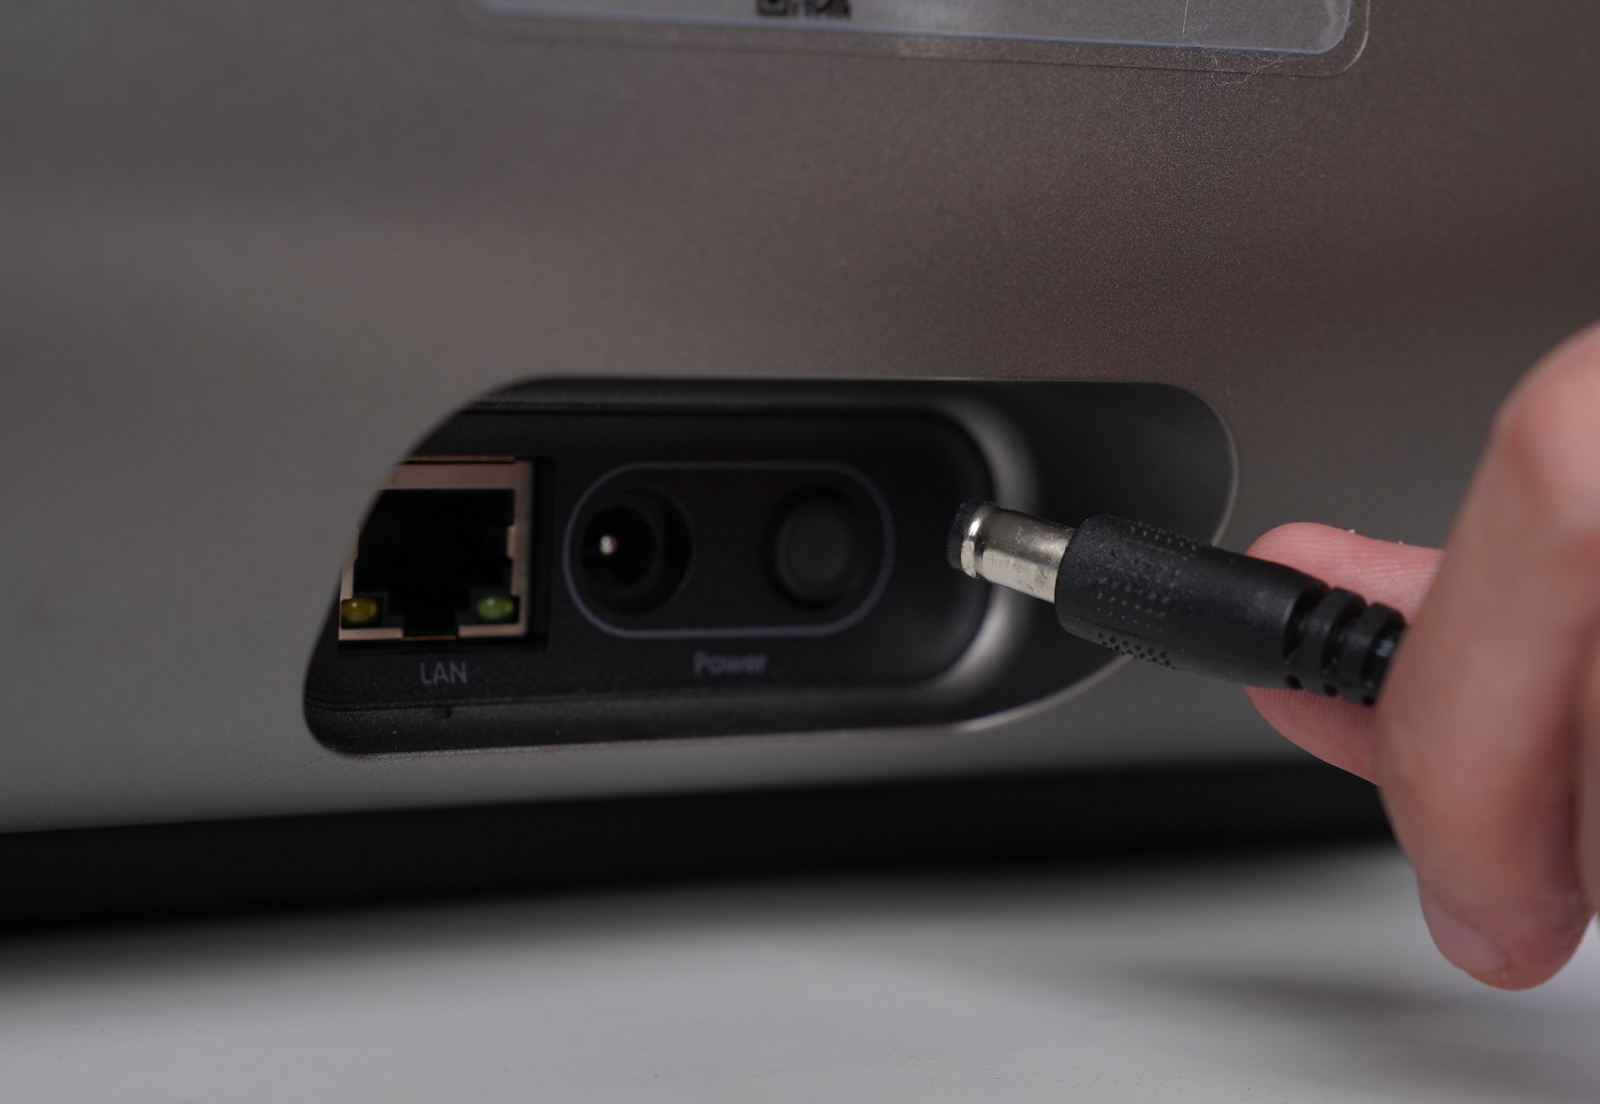
Step 8 - Power on the machine
After confirming that all ink tubes and cable harnesses are correctly installed and not exposed:
-
Reinstall the right-side cover and press around the edges to ensure all clips are secured.
-
Reconnect the power cord and power on the machine.